Month: June 2019

Crypto VPN | 2 Best VPN’s To Use When Sending, Receiving, Or Exchanging Bitcoin

In this article, I am going to share with you why it’s best to use a VPN with all of your bitcoin related dealings with a crypto vpn. I recently had an experience where I was sending and receiving some bitcoin with a friend of mine and I was in a rush and I forgot to enable my VPN to process the transaction.

At first, I didn’t think too much of it, but then I received an email indicating that it detected me sending it from a different IP address. This was a blunt reminder that even when you aren’t conscious of it, all of your dealings on the internet are being watched and recorded by your ISP, and in some cases, even the wallet or exchange you are sending or withdrawing your coins from.

This is why using a VPN is not only important for your everyday internet browsing, but particularly when you are dealing with sending, receiving, or exchanging bitcoin or other cryptocurrencies. Before I get into the meat of the article, I just wanted to remind my readers that I recently wrote an e-book that details the 5 best ways to secure your cryptocurrency. This is an in-depth guide that goes into the best tips and tricks for managing your cryptocurrency and specifically the best practices on how to store and diversify your holdings. Click HERE to check it out, it’s free!

So let’s get right into what a VPN is, and why you need one! Let’s go!

What Is A VPN?


A VPN (or Virtual Private Network) is designed to obfuscate or block your current IP address, which includes your ISP and your current location from being tracked online. Why would I need this? Well, as you probably already know, the internet is an amazing place, but it surely isn’t private. Your ISP is watching your web pages, knows your location, and can even report what you are watching and doing to the authorities, if they so choose.

This is NOT ok, as your privacy is an unalienable right. There is no reason they need to know this information and should not be strong-armed into handing it over to the authorities for any reason. This is where a VPN comes in. VPN’s are not only used for every day internet browsing, but can also used for torrenting, streaming services (like Netflix and Hulu) and also when making any financial transactions, namely crypto transactions.

With a VPN, you can cloak your location, the website’s you access, any downloads or uploads you have engaged in, and much much more. This is ideal if you want privacy for whatever you decide to do online, and the best part is, most VPN providers don’t even log what you do, so if they are contacted by authorities, they can’t even hand over anything anyways.


Why Do I Need A VPN For Bitcoin Transactions?


As mentioned above, without a VPN, all of your interactions or actions you take online are recorded with your ISP and they log all your websites, and what you do on those websites. This means, that if they wanted to, they can see your passwords, watch your private information, and use it against you. This doesn’t mean they will, but take into consideration if they get hacked. There is nothing blocking a nefarious character from taking your personal information and using it against you.

When it comes to bitcoin and crypto transactions, privacy is the MOST important thing. Period.


Do I Need A VPN For Trading On Bitcoin Exchanges?

Yes. Most exchanges (especially U.S. exchanges like Coinbase, and Bittrex) are in bed with the government and the IRS, so they are tracking what you do, where you are, and can provide a lot of identifying information. If you consent to this when using an exchange, that’s on you, however, when you use a VPN, you can take your physical location layer out of the equation. Additionally, you may want to use services like Bitmex for leverage trading or an exchange like Bitfinex that does not allow U.S. IP addresses. This would be a work around for you to gain access to products and services that are not available in your jurisdiction.


Can I Pay For A VPN With Bitcoin Or Other Cryptocurrencies?

Yes. I recommend using either NordVPN or ExpressVPN, as I use both personally. They are not based in the U.S., so they are not subject to any of the regulations or over-reaching by our government, so that is a huge relief and provides peace of mind. You can click the link below to get 75% off Nord VPN and ExpressVPN below, and I believe they offer a free-trial as well and a 30-day money back guarantee!


**CLICK HERE TO BUY NORDVPN AT 75% OFF**


**CLICK HERE TO BUY EXPRESSVPN AT 75% OFF**


Additionally, you can pay in bitcoin or other cryptocurrencies when you sign up for either of these. To me, that’s a HUGE plus because it demonstrates the companies’ values and I always like to support organizations that promote using bitcoin and other crypto in every day commerce. I have a review video I did below that goes over these in a little more detail, but both are top-notch and trusted and used my millions of people for various uses. This is designed for people that value their privacy and anonymity. (Satoshi would be proud!)


Is There A Free VPN?


There is ONE that I have used in the past called Tunnel Bear, but it only allows up to 500MB per month for free. If you exceed that amount (which isn’t a lot), you will be required to upgrade and pay either a monthly or yearly fee. I used this as a starter VPN, and is the best free VPN I’ve personally used. You can use the link below to get signed up for free, and if you decide to upgrade, it will provide you 58% discount on your service.


**CLICK HERE TO DOWNLOAD TUNNELBEAR FOR FREE**


Crypto VPN: Conclusion


Overall, you absolutely need a VPN for all of your crypto-related dealings and the options for NordVPN and ExpressVPN also have free mobile apps, so you can make sure it’s enabled on your phone if you prefer to send/receive on a mobile bitcoin wallet as well, so there is no excuse to not use one.

Trust me when I say, no matter how much of a hurry I am in, I will never forget to enable it again, and it’s just as simple as a click away, so it’s very easy to use. On a side note and on the topic of mobile apps, If you are looking for new an interesting ways to earn free bitcoin (and other cryptocurrencies), you can download the LIFE INFO APP.

This app pays you in bitcoin rewards on purchases you are making anyways, and also gives you an instant discount on everything you buy. There is no reason NOT to do this, as there is no catch, and you save money. If you’re buying these items anyway, you may as well save money and earn bitcoin for free. I will leave an in-depth review of this HERE for you to check it out and will answer more of your questions, but I strongly recommend you check it out.


What do you think? Do you use a VPN for sending and receiving bitcoin? Let me know in the comments below!


Cheers,


The Crypto Renegade


NOTE: This post may contain affiliate links. This adds no cost to you but it helps me focus on giving as much value as possible in every single post by being compensated for recommending products that help people succeed.

Trezor Model T Review – Best Hardware Wallet Yet? (2020)

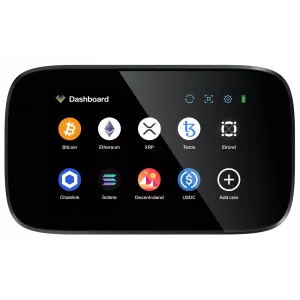
In this article. I am going to provide you with an in-depth Trezor Model T Review! The Trezor Model T Is the second generation device in the Trezor family and it came with a plethora of upgrades and a new capacitive touch screen for authorizing transactions, firmware updates, and entering in your security pin on the device itself versus the one the web application as with the Trezor One.

I also recently wrote an in-depth review of the Trezor One, which you can find HERE if you’re interested and I will be writing a comparison review shortly between both Trezor models.

Additionally, before I jump into the review of the Trezor Model T, I wanted to point out that I just wrote an in-depth guide on the 5 best ways to secure your cryptocurency in the form of a free e-book. It goes over some basic and advanced techniques to make sure that your crypto is the safest it can possibly be and provides you some tips and tricks to ensure your private keys stay protected forever. You can get that free e-book HERE.

Ok, phew, here we go, let’s get to the full review of the Trezor Model T Below! You will also find an attached video of the unboxing at the end. Let’s do this!


Trezor Model T First Impression And Unboxing


So when you first get the box in your hand, you’ll notice that it is substantially different than the Trezor One box. First off, it’s covered in plastic and then is a slide out box that separates into two parts (see video below). When you go to open the box, you’ll notice there are no security seals or holographic tapes on the box to promote anti-tampering and has a window on the box that shows the device in a display window.

It has a magnetic clasp that you can use to open the box where you will find the device sitting on a foam cushion that is surrounding the device and a blank black box with a green sticker right next to it.

Here is the reason why there is no security tape on the box when you first go to open it (unlike the Trezor One). The security tape is on the device itself covering the USB-C port on the bottom of the device and they have decided to bypass the security measures on the box. I understand why they made they choice and wanted to narrow down the security to the device itself from any side-channel attacks or MIM attacks. However, when you peel off the security tape, it purposefully leaves a very sticky residue on the device and it since it’s plastic, it is very difficult to get off without scratching it.

The touch screen is sleek and very bright, which is nice, but it is also very small. Even if you have average sized hands, you may have difficulty with entering in the pin-code and/or additional “25th seed phrase” as a password on the device. More on that later.

This is one of my biggest complaints as the device itself doesn’t look that good when you’re ready to use it and it it has a sticky film when you hold it and un-plug and plug in your device. I will say that this is the worst of your worries as the device is pretty solid and has a lot to offer in terms of security and functionality. The final thing that I noticed this device upon opening it up is it has a very sleek SD card slot that can be used for signing transactions offline and import them.


***CLICK HERE TO BUY TREZOR MODEL T FROM THEIR OFFICIAL SITE***


What Coins Are Supported?


I will leave a link to the official list of what Trezor has listed on their website HERE, but I will point out a few of the coins that this device supports that you don’t really see on other hardware wallets that stands out to me and is what I use on my device as well. The primary coins

NOTE: This device hold over 1,200 coins in total, but the majority of them have 3rd party wallets developed by either the development team for that coin specifically that can be connected, OR major third party wallets that hold hundreds of ERC-20 tokens, such as Mycelium and MyEtherWallet.

Just to name a few coins that are now supported on the beta wallet or (native app wallet) on the web app that is easy to manage and is unique to this hardware wallet is: HoloChain (HOT), Lunyr (LUN), Chainlink (LINK), and Polymath (POLY). They are adding Native support to new coins and tokens all the time, so make sure to keep your eye out for it!


Does this work with any 3rd party wallets?


Yes. Although I personally recommend using the native apps on the web application on the Trezor website. Why? Because it’s easily managed and located in one place. Additionally, because this wallet for managing is web-based you can easily take this wallet and manage your coins on the go without having download multiple wallets and setting it up and import it when you may not have access to the same computer.

This is safe to do because this hardware wallet is completely resistant to malware or any other viruses that may be present on unknown or public computers.

In regards to 3rd party wallets, there are a handful that are known to work and integrate directly with the Trezor Model T (and Trezor One) such as: MyEtherWallet, Mycelium, MyCrypto.com, and the newly announced partnership between Trezor and Exodus!

I will be doing an in-depth review and video on the Trezor user experience with the Exodus desktop wallet very soon! It looks very promising and they have hyped it up as a much better user experience than the standard web-based wallet, so we will see that review in the next week or so.


How Do I Set It Up?


Once you take the device and remove the security tape and unbox your recovery seed cards and the USB cable, you will open an internet browser tab and visit Trezor.io/start. This will take you through the process of downloading the “Trezor Bridge“, which is a small downloadable executable file that is required to use your wallet with the web app. Once you download this, you will follow the prompts on your device to download and install the latest firmware update.

NOTE: As a security measure, Trezor ships the device with no firmware installed to ensure that your device is activated properly when you set it up for the first time and the proper firmware will be activated with Satoshi Labs signed firmware. This ensures that no one can alter or tamper with the firmware of inject any malware in the device after it is shipped before it lands in your hands.

Once this firmware update is done, it will ask you on the web app to create a new wallet (recommended for new users) or import an existing wallet. You would only choose this option if you are trying to restore a previous wallet from on older recovery seed.

If you choose the new wallet option, it will prompt you to write down your recovery seed words on the card provided to you in the box and the words will display in succession on the device and will have you verify them in the correct order before the device is fully activated.

Once this has been created and you have decided if you want a 25th seed word as an extra layer of protection (I STRONGLY recommend that you do), you can now send, receive, and view the available coins in your dashboard!


***CLICK HERE TO BUY TREZOR MODEL T FROM THEIR OFFICIAL SITE***


Does It Support Monero And Ripple?


Yes and No. Let me explain. First, let’s talk about Monero support with the Trezor Model T. Although the firmware is setup to support this coin, there is currently no wallet that has been setup to use with it yet. This is currently in development and you will need to periodically check the Github page setup by Trezor to monitor the status of this, or await the newsletter that Trezor will inevitably send out once this is activated.

NOTE: I recently wrote an article HERE that goes over the 4 best Monero wallets, which includes hardware wallet support with the Ledger Nano S, albelt with the integration of a 3rd party wallet.

What about Support for Ripple (XRP)? Yes. Ripple has an easy to use native application that has recently been added to the web app for Trezor Model T. I have personally used and tested this and I am pleasantly surprised on how easy it was to manage. In fact, it was an even better experience than I’ve used with Ledger in regards to XRP.


How Does Trezor Model T Compare To Ledger And KeepKey?


Overall, this is a higher end wallet that supports many more coins than either Ledger or KeepKey. Additionally, it offers a touch screen for ease of use and independent security that is managed on the device itself. This includes being able to type in a custom password of “25th seed word” to access the device whenever it is connected or having a wallet being restored, in addition to the standard security PIN code.

This also means that it is more expensive. The current price of the Trezor Model T is 149 Euros or approximately $169 USD at the time of this writing. Ultimately, it depends on how many coins and WHICH coins you are specifically looking to hold on your hardware wallet.

If you are a beginner and you only want to hold the main higher market cap coins, like Bitcoin, Ethereum and Litecoin, then you really just need an entry level device, like the Ledger Nano S or The Trezor One. keepkey wallet

However, If you want to be able to trade and swap coins directly on your hardware wallet without exposing your private keys, I would recommend going with KeepKey. They have a new platform (currently in beta, check out my in-depth review HERE) that allows you to trade on the ShapeShift platform while having your device connected and you never have to give up your private keys. This will be key if you are trying to be primarily trade, instead of just sit and hold.


***CLICK HERE TO BUY TREZOR MODEL T FROM THEIR OFFICIAL SITE***


Conclusion


So what’s the bottomline? I would recommend the Trezor Model T to anyone that is trying to expand their coin selection and are smart enough to know they need to keep their coins on a hardware wallet at ALL times. This wallet will continue to expand it’s coin support and they have already grown this support dramatically over the last 12 months. If there is a coin in particular that it currently doesn’t support on it’s web app, there is a STRONG chance that it is either supported with a 3rd party wallet you can integrate this with, or it will be natively supported very soon.

If you are just looking to buy and hold Bitcoin and Ethereum (or even Litecoin), you really don’t need a device as nice as this. At least not yet. As you understanding of this technology and your taste for new altcoins grows, you will probably want to expand into a new wallet, and in fact, it’s quite normal for people to have more than one active hardware wallet at once to diversify and protect themselves as well.

Additionally, you may want to consider using a device like CryptoTAG, as a metal backup to your recovery seed card, if you are holding enough funds that you want to have a backup of your backup. This makes sense for anyone that is holding more funds on their hardware wallet, than they actually paid for the wallet. This is actually not that much, so make sure you download the free e-book I mentioned above, so you can get the free tips above.


What do you think? Is the Trezor Model T the best hardware wallet out there today? Let me know in the comments below!


Cheers,


The Crypto Renegade


NOTE: This post may contain affiliate links. This adds no cost to you but it helps me focus on giving as much value as possible in every single post by being compensated for recommending products that help people succeed.

Bitpay Card Review: My Experience Living Off The Debit Card (2020)

In this review, I am going to cover my experience living off of the Bitpay Card. In 2017, I was hired to build a cryptococurrency hardware wallet for a prominent crypto company and I was paid directly in bitcoin and bitcoin cash. I needed to find a way to pay my bills with crypto in this legacy financial system that would not allow me to pay directly for my rent, groceries, gasoline, etc… This is when I did thorough research and discovered there were several crypto debit cards that existed.

bitpay card

Which one should I use? Which one works best and has the lowest fees? How much does it cost to get one? How easy is it to use? These were all questions I had when I first started researching these options and after doing a few weeks of research, it was clear that the best solution was to use the BitPay card.

I was already using BitPay to accept payment through this website when it was used for ecommerce, but I was unaware at the time that they had a crypto to Visa cash option that works for personal use. I was already happy with the experience I had using them as a payment processor, so I figured I would try their debit card for every day use. My experience and FAQ’s are detailed below!


HOW DOES THE BITPAY CARD WORK?


So here are the basic process of using the card from start to finish:

  1. Go to Bitpay.com/card and request a card. It will cost $9.95 as a one-time fee after you’ve filled out the application, which requires your personal details to send the card to.
  2. Wait 5-7 business days for the card to arrive (if you’re in the U.S.) It can take up to 21 business days for other countries.
  3. Once the card is received, call the 1-800 number on the front sticker to activate and set a PIN. Then go to your account to enter in the secret code sent in the letter to activate.
  4. Once activated, you are able to see your card available for crypto loads from the Bitpay mobile app and start using.
  5. Choose the wallet (either bitcoin or bitcoin cash) that you want to load onto the card, the choose the USD amount you want to add, then authenticate with your password and Face ID (if one is setup for extra security on the Bitpay wallet app)
  6. You’re done, money is loaded instantly and you will receive a confirmation email once you have completed the “Slide to Pay” function on the final screen.
  7. You are free to use this Bitpay card online, in person at any merchant that accepts Visa, or at the ATM.

My experience has been one that has shown this to be not only a very simple process, but also one that you can load money on in a pinch if you need to top off or load up your card because you don’t have enough funds. I have also experienced an issue where the card was declined once, but it was the merchant who I was using who said his bank was declining it. Once I called Bitpay’s card services, I was able to have them unblock it on their end and it went through perfectly.


WHAT CRYPTOCURRENCIES CAN I USE WITH THIS BITPAY DEBIT CARD?

Currently, the only two cryptocurrencies that can be used to load up the card on the prepaid Visa is Bitcoin (BTC) and Bitcoin Cash (BCH). There have been plans to add more in the future, but for the time being, these are the only coins that are supported on Bitpay’s platform for debit card usage. There have been rumors that Ethereum (ETH) may be the next coin added for further altcoin support, but that has not been confirmed by the company.


HOW DO I PUT MONEY ON MY BITPAY CARD?


Once you have the card activated and you have linked your card account online, you will see the card option to “Add Funds” on the Bitpay Wallet App. Once you click on this, you can select the USD amount or toggle to the BTC or BCH side to calculate the exact amount you want to load. This will have you select the wallet you want to fund with in the drop down menu. Once you select the wallet, you will confirm the total and continue with “Slide To Pay” at the bottom, and will load instantly!


(PRO-TIP: If you are concerned about price fluctuation, you can keep your funds on your wallets and only top off the card at the exact moment before you purchase. This gives you flexibility in trying to monitor and maximize the price volatility in your favor!)


CAN I USE THE BITPAY CARD TO WITHDRAW CASH FROM AN ATM?


Yes. I have used this in a pinch where a card is not accepted when I went to a concert venue, however, keep in mind you will incur a $5 fee for ATM withdrawals and that does not include any ATM fee’s the machine you are using will incur. In some cases, it is not worth it to use this feature, but it is nice to know you have the option if it’s required.

It is also nice to know that when using a debit option at a merchant, you can easily choose the “cash back” option as a free way to get cash back, but that is usually limited to $100 dollars. This is a work around I would frequently use if I knew I needed to have some cash on hand for certain occasions and is nice to avoid those fees.


CONCLUSION


I was able to successfully use this to make most purchases I needed to make for the past 2 years. There are some bills that people pay that required ACH and will not take a debit or credit card. IN these instances, I was able to use Coinbase to as a crypto to fiat off-ramp, but I avoided using this as much as possible as the fees were not helpful, and I liked the idea that I could use crypto top make payments in the real world, without a hitch.

I also negotiated a way to start paying rent and other bills via Venmo, which was a nice workaround top using ACH. I was so hell-bent on using crypto as a viable payment source to pay my living expenses, that I went out of my way to make this happen. Any funds that I did not load onto my card, I only kept a little of it on the Bitpay wallet app and then kept the savings (as everyone should) onto my KeepKey hardware wallet.

If you are unfamiliar of the best practices for securing your cryptocurrency the right way, I will leave my link here for my FREE E-BOOK that details the top 5 ways to secure your cryptocurrency, and I recommend giving it a look, as it’s free.

All in all, this was a viable solution to live on, but I understand that some people are unable to use this in their particular country or their particular circumstance. If you live in any European or Asian countries and would like the option to use a crypto debit card, you can also try Wirex.

The Bitpay card is an option that does have a monthly fee, but it primarily used on that side of the world and has a similar user experience. I would recommend using this card for ANYONE that wants an option to “cash out their crypto” in a moments notice that would prefer not paying any exchange fees and needs it to happen within seconds.


What do you think? Are there any better crypto debit card options that you have used? If so, let me know in the comments below!


Cheers,


The Crypto Renegade


NOTE: This post may contain affiliate links. This adds no cost to you but it helps me focus on giving as much value as possible in every single post by being compensated for recommending products that help people succeed.

Ledger Wallet Ripple: How To Store Ripple (XRP) On The Ledger Nano S (2020)

In this article, I am going to explain how to store Ripple (XRP) on the Ledger Nano S in the Ledger Wallet Ripple. Most people I speak with talk about whether or not XRP is safe to leave on exchanges for storage. The simple answer is no. Under no circumstances is it safe or even a slightly good idea to leave ANY coins your have on an exchange. “Not your keys, not your crypto” is a statement you’ll hear repeated throughout the crypto ecosystem. If you are unsure about the safest ways to store and secure your cryptocurrency private keys, then grab my free e-book that gives you some in depth resources on how to manage your crypto safely. I also wrote a comparison review of the major differences of hot vs cold wallets, in case you are unsure. ledger wallet ripple

Now, as Ripple is a top 3 market cap coin, it is imperative to know how to properly store it on a hardware wallet, and the one wallet that can easily store this right now is the Ledger Nano S. You can also store it on the newly released successor to this wallet known as the Ledger Nano X, if you want a larger storage capacity and a wallet that is wirelessly capable. Let’s get to it below!


WHAT IS RIPPLE (XRP)?


Ripple is both a platform and a currency. Let me explain. Ripple itself is platform and open source protocol which is designed for quick and cheap transactions. This was “invested” as a resource for efficient, cross-border payments that is intended to be used by big banks. The Ripple platform is very very cheap and efficient and unlike bitcoin, it is designed as a payment machine and nothing more.

XRP (the token that is represented on the ripple platform) is designed to transfer value across the Ripple platform. The intention behind this is to be able to transfer value from either cryptocurrency or fiat from peer to peer in the fastest way possible. That is it’s only function.

The other noteworthy aspect of this is, there is a predetermined amount and it is not mined or staked, like it is on POW and POS networks. In fact, there is no blockchain for this token at all. This has been the source of a lot of criticism in the ecosystem that this is not really a “crypto” currency, but rather, just a digital version of fiat.


HOW DO I BUY RIPPLE (XRP)?

You can buy ripple directly at many OTC exchanges, or other trading exchanges like Coinbase or Binance. When using Coinbase, you can link up your bank account and/or major debit card to process the transaction and if you’re not verified, it can take up to 7-10 business days to process.

If you plan on buying XRP with a credit card directly, you can use either Paxful or Changelly and use this as an OTC exchange to buy it directly (although paying with credit card will incur some extra fees). You can also go through a 2-step process and buy bitcoin with a credit card on Coinmama, and then use one of the above exchanges to swap it.


LEDGER WALLET RIPPLE: HOW DO I MOVE RIPPLE TO THE LEDGER NANO S?


  1. Open up Ledger Live, and make sure it’s software version is up to date.
  2. Head over to the Manager section on the left side bar, and search on “XRP”, then click on Install.To create an XRP wallet on your Ledger device, we first need to create an “account” for you to be able to have access to your wallet’s XRP address.
    1. Click on the rounded + symbol on the left portion of the Ledger Live app to add an account.
    2. Type in “xrp” on the search bar to easily find XRP on the list, then click on “Continue“.
    3. Open the XRP app on your Ledger device, then click on “Continue“.
    4. Wait for Ledger Live to synchronize.
    5. Choose a name for your wallet. For this example, we’re just going to name our wallet “My XRP Wallet“.
    6. Tick the blue checkbox , then click on “Add account“.
    7. Account successfully added!Click on “Add more” if you want to create more XRP wallets, or if you want to head over to moving your funds to your XRP wallet, just click on the small x on the top right corner of this popup.
    8. Your XRP wallet is now ready. Simply click on the XRP wallet you made on the “Accounts” section on the left, then click on the blue “Receive” button.
    9. Click on “Continue“.
    10. Click on “Verify“.
    11. For security purposes, check if the same wallet address is being shown on the Ledger Live app, and the address shown on your physical Ledger device.If everything’s fine, you can now copy the wallet address shown on Ledger Live, and you can now use that address to move your funds from other XRP wallets, or from the exchange you’re using.


WHAT ABOUT THE NEW LEDGER NANO X?

The Ledger Nano X has the same process as above for adding it to your hardware wallet using Ledger Live, the only difference is it is primarily done via the mobile app. You can still plug this device in and manage this the same way as the Ledger Nano S, however, it is able to connect to the app and manage this wirelessly, which is the major advantage.


CONCLUSION


Bottom line, if you’re in the market to acquire this coin, you will absolutely need to store it on a Ledger device. Keeping all your private keys (of any coin) on a trusted hardware wallet is imperative. Period. I will say that with the Ledger Nano S specifically, is the cheapest and is the best entry level hardware wallet if you want to store ripple at only $59. The one caveat is that you can only store 3 or 4 different coins on the app at once, that’s it. If you plan to grow your portfolio, you may want to spring for the extra money and go for the Ledger Nano X, which can hold up to 100 coins or “apps” at once. I will leave the full review of the Ledger Nano S here.


What do you think? Is there a better offline wallet to store your XRP? Let me know in the comments below!


Cheers,


The Crypto Renegade


NOTE: This post may contain affiliate links. This adds no cost to you but it helps me focus on giving as much value as possible in every single post by being compensated for recommending products that help people succeed.

Bitcoin Fees: How To Check When You’re Sending A Transaction (2020)

In this article, I’m going to address how to check what the bitcoin fees are for bitcoin and other cryptocurrencies. Not many people think about the “fees” when sending their first bitcoin transaction, as it’s just so exhilarating that you can transact value without permission from a bank or other institution. 

This is really a minute detail, however the fees for sending a bitcoin transaction back in 2017 was upwards of 75$ when it was at it’s peak. This means you need to be able to determine if the fees are a “fair” price at a moments notice and if it will significantly cost you to move your bitcoin.

Luckily, there are a few different resources you can use to check not only what the current bitcoin fees are, but also check out the fees for other cryptocurrencies and Ethereum as well. Additionally, you need to be able to determine what the cost structure is and if you can pay more for a priority transaction. Well, I’m here to break it all down for you. Let’s get started with the #1 resource I use on a regular basis to check the current fees for sending bitcoin in a transaction!

Before I jump down there, I wanted to provide you with a free resource for protecting your cryptocurrency and it’s a free e-book I recently wrote and you can obtain it for free on my website here at the top right corner in an orange button. “5 Best Ways To Secure Your Cryptocurrency” is available to download now! Go grab it!


HOW TO CHECK BITCOIN FEES ON BITCOINFEES.INFO


Bitcoinfees.info is one of the best resources to check real-time bitcoin fees and what amount of time you would need to wait for your transaction to be confirmed for that fee. For example, it will let you know what the estimated fee is if you want it confirmed in the next block (10 mins), within the next 3 blocks (30 mins), or next 6 blocks (60 mins).

As you wait longer the fees will go down, but not drastically. To provide a frame of reference, the current fees at the time of this writing is $2.17 USD fee for having my transaction in the next block and $0.78 cents in the next 6 blocks.

This varies and fluctuates and is determined by the demand in volume and what specific mining pools are charging and maintaining a competitive marketplace. Why are there fees if they receive a block reward already? Well, to put it frankly, because they can.

Bitcoin miners are the groups of people that use their hash power to ensure the transaction is not only confirmed, but that it’s also safe and secure. It is a necessary component for the network and ecosystem to flourish and maintain economic incentive.

This site also shows your daily, monthly, and yearly averages in the form of charts and graphs to show you how this progresses overtime. They also consider that the average bitcoin transaction is 250 satoshis per byte large for measuring these averages. This also includes the basis of the 1 MB blocks that the current block size represents and would not relate to the fees for the lightning network.


HOW TO CHECK BITCOIN FEES ON COINBASE

The fees charged by Coinbase are pretty low. But they can add up, especially if you use the service often. You will see the buying and selling fees we described above.

There may also be fixed and variable fees depending on the amount of the transaction. And when your purchases are smaller, there is a flat fee charged.


Here are the flat fees for the smaller transactions:

  • If you are buying or selling in the amount of $10.99 or less, the fee is $0.99
  • If you are buying or selling between $11 and 26.49, the fee is $1.49
  • If you are buying or selling from $26.50 to $51.99, the fee is $1.99
  • If you are buying or selling from $52 to $78.05, the fee is $2.99


This is a fairly low and tiered system, but as you can see, this fee is for Coinbase and does not include any miner fees or network fees. So please keep in mind that that you will need to add the two totals together in order to find out what you will actually be paying.


HOW TO CHECK ETHEREUM FEES

For ETH, I typically go to ETH Gas Station for this information as it’s the most real-time and accurate in my experience. When sending Ether in a transaction, it uses a component of fees known as “Gas”. What is gas? It’s essentially a fraction of Ethereum that is required to pay for the transaction and is typically much cheaper than bitcoin transaction fees. This also applies to ERC-20 tokens and security tokens as well as they are built on top of the Ethereum network.

This has several other tools to estimate transactions for a specific block and also if you want it applied to s specific smart contract on the network. It includes anything else you may need to know including what mining pools are currently verifying on the network, what the estimated wait time is to have your transaction included in a specific block, and also how full or empty these blocks are.

All in all, this is the only resource I need when trying to estimate how much I will be paying in fees and the only other resource I might use is the specific block explorer I would use in order to verify the status of my transaction. For those of you who do not know what a block explorer is, it is basically a way for you to check the status of your transaction and how many confirmations it’s received before it’s delivered to the recipient.

CONCLUSION


Overall, these are the most common resources you will use to check the transaction fees for bitcoin and Ethereum as these are the largest networks by volume and therefore, the most likely to be used when sending crypto. You can also check each individual blockchain if you want to determine what the fees are for, say “Monero” for example.

In the event I want to know what the estimated fees for that example would be to attempt a transaction when sending from my hot wallet, or I would simply use google and include the “coins name + transaction fees” to get the most accurate result. These examples hopefully clarify some of the questions that surround how much you will pay in fees at an given time on these popular coins and networks. Until next time…


What are your favorite resources to check crypto transaction fees? Sound off in the comments below!


Cheers,


The Crypto Renegade


NOTE: This post may contain affiliate links. This adds no cost to you but it helps me focus on giving as much value as possible in every single post by being compensated for recommending products that help people succeed.

KeepKey Review: Is It Better Than Ledger? (2020)

In this article, I will give you a deep dive into the KeepKey wallet and provide you a review of my personal experience thus far with a keepkey review. I started using KeepKey about 3 years ago and boy has it come a long way. At first it was the simple bitcoin wallet that only supported about 6 coins, and was the easiest wallet to use at the time (including Trezor and Ledger). It’s selling edge was the physical wallet itself which is a nicer aluminum finish and clean and upscale look and significantly differed from the flimsy plastic Trezor and Ledger presented you out of the box. keepkey review

As a result, it was priced as such, and many people would not pay more for a device that only supported 6 coins. In 2018, it started adding 3rd party wallet support, like MyEtherWallet and MyCrypto.com and ERC-20 tokens. In this review, I will go over what has changed since then and ultimately if this wallet is the best choice for you or not.

I also recommend you download my free e-book that I just wrote that gives you some expert tips on how to secure your cryptocurrency and ensure you are protected for the next bull run. You can click the link above to gain access now, and it will only help you on this crypto journey. Addtionally, I recently wrote a detailed review on the new ShapeShift platform, that will have elements of it woven into this review as they both utilize the KeepKey wallet to operate. Let’s get started!


CLICK HERE TO BUY KEEPKEY FROM SHAPESHIFT’S OFFICIAL SITE DIRECTLY


KEEPKEY REVIEW: WHAT COMES IN THE KEEPKEY BOX?

First off, they have a really solid presentation. The box is a quality box and is sealed by an anti-tamper sticker to indicate if the box has attempted misuse or access to it. Secondly, it comes with the following items in the rectangular apple-esque box:


-Nylon Woven USB to Micro USB cable

-2 Recovery Seed Cards

KeepKey Hardware

-Getting Started Guide


The device itself is rectangular and only has one singular button on the top right used for signing and authorizing transactions. This is why it can be defined as the simple bitcoin wallet and is mechanical in design. Overall, this is a non-nonsense wallet that is made up of solid, sturdy construction and is physically larger than the Ledger and Trezor wallets.


CLICK HERE TO BUY KEEPKEY FROM SHAPESHIFT’S OFFICIAL SITE DIRECTLY


KEEPKEY REVIEW: WHAT COINS ARE SUPPORTED?


Natively, this wallet in the current beta form supports over 40 assets with more on the way! Here is a current list of assets that are supported right now.  Now let’s get into the nitty-gritty. For years, KeepKey only supported: Bitcoin, Litecoin, Ethereum, Namecoin, Dogecoin, and Dash. For a hardware wallet that needs to compete in this market place, that needed a serious upgrade.

Luckily, they have been making some AMAZING changes and not only added a ton of ERC-20 Support, but more importantly, they are revamping their entire platform to have one fluid, seamless application that integrates all of their core services (See my previous post for details on this). This is extremely powerful, and a decision that I believe will catapult them ahead of the competition. They are currently in a closed beta, and it is expected that they will be releasing this later in 2019. Stay tuned for news on this.

Some of the notable coins that have been added are:

-DigixDAO (DGD)

-Binance Coin (BNB)

-Dai (DAI)

-Maker (MKR)

-TrueUSD (TUSD)


CLICK HERE TO BUY KEEPKEY FROM SHAPESHIFT’S OFFICIAL SITE DIRECTLY


KEEPKEY REVIEW: HOW TO SETUP THE DEVICE

This information will be outdated soon, but I will leave a link to the current setup and initialization of the device as of June 2019 for most people here. I am more interested in talking about my experience with their new unified platform that will be released to the public shortly. Essentially, once you take the KeepKey out of the box and plug in the USB, it will prompt you to download the firmware updater and initialization steps once you login to your account. Currently, this is done on beta.shapeshift.com.

Once you have updated the firmware by plugging it in and holding down the single mechanical button as you disconnect and re-connect, it will process the update for you very quickly, usually within about 30 seconds. From here it will connect your KeepKey and there will be an animation in the top right of the dashboard letting you know it’s current status and then prompt you for the pin that is randomized every time it’s plugged in to ensure you have proper access to the device.

Once you’re validated, you can trade, view your accounts, and send/receive from your existing accounts and it’s a seamless process that will prompt for your PIN again to make any changes. I will leave a photo below for you to see the dashboard layout and it is very clean.

CLICK HERE TO BUY KEEPKEY FROM SHAPESHIFT’S OFFICIAL SITE DIRECTLY


KEEPKEY REVIEW: SECURITY


KeepKey has a true random number generator (TRNG) for it’s PIN interface for extra physical security. In addition to offline storage, KeepKey’s PIN code and number randomization makes sure that

1) Your wallet is secure from physical theft.

2) That a hacker couldn’t steal bitcoins from your wallet with malware.


KeepKey is an HD wallet, meaning your entire wallet can be backed up with the 12 words generated on setup. 12 words is the default setting, although KeepKey supports seed lengths of 18 and 24.

The seed is generated using entropy from both the device itself and the computer used for setup. The seed is generated offline on the KeepKey and displayed on the device’s screen. The device’s offline screen makes sure the seed is never displayed on an internet-connected device.

You can recover your wallet using the backup seed if your device is lost, stolen, or damaged. Recovery can be done in this new beta platform, but it has yet to be released on the current version. Make sure to keep multiple backups of your seed and use a metal recovery seed backup for extra protection.

The wallet’s screen allows you to sign and confirm the transaction on the device itself, so you can verify the address matches when sending on the web app and the device to prevent unauthorized bait and switches, but does not prevent phishing attacks.


CLICK HERE TO BUY KEEPKEY FROM SHAPESHIFT’S OFFICIAL SITE DIRECTLY


KEEPKEY AND SHAPESHIFT: USER EXPERIENCE (UX)


As you can see in the interface, besides the assets list on the left, most people like to trade within the app. All this is done within the app, so your private keys are never exposed online or to a 3rd party, which again, makes this new platform EXTREMELY compelling.

Additionally, unlike most exchanges you do not need pre-designated trading pairs that are usually defaulted to BTC. This means you can trade from altcoin to altcoin without having to trade back into BTC first, which will save you a ton on trading fees.

You can also buy crypto directly in the app via Wyre and can do a bank transfer that takes only 1-3 days and with only minimal fees. This is a huge advantage over Binance or other exchanges that charge exorbitant fees to have it done via a credit card and pay a lot more for that instant gratification. Again, when you do this, the private keys will go directly on your KeepKey so they are never exposed to the internet , even for a second.

Finally, here is a glimpse of the assets list. At the time of this screenshot, I only had 2 assets for testing and I haven’t tested this with bitcoin directly and dealt with DOGE and SNT at the time. I have since distributed that between about 9 different assets and have had a good experience with seamless trades that all end up on my hardware wallet, instantly after signing and authorizing a trade.


CLICK HERE TO BUY KEEPKEY FROM SHAPESHIFT’S OFFICIAL SITE DIRECTLY


KEEPKEY REVIEW – CONCLUSION


In the end, I still would take the KeepKey over the Ledger if I had to choose. The Ledger Nano S only holds 3 or 4 apps at the same time, and if you plan to expand or add more, you will have to remove and uninstall what you have to make room. KeepKey does not have this storage issue.

As mentioned above, with KeepKey will not give you this issue and you can trade assets very seamlessly and without the need to give up your private keys over top an exchange. This is a HUGE advantage and not one that any other hardware wallet can compete with. Having a non-custodial wallet is key and having one that is designed to never expose the private keys is even better.

keepkey

The UX has been greatly improved and you can actually initiate a trade, sign the transaction on the device, and then unplug and off you go. You do not need to wait for the trade to take place, which is super convenient. Right now it costs $79 and is only 20 bucks more than the Ledger. It feels like it should be worth twice that since the quality you get is superior. Honestly, if you asked me which wallet should I choose a year ago, and is KeepKey is better than Ledger?

I would’ve said “No”. But, this new user interface and overall experience managing your assets all in one place and one screen, and not needing to install and uninstall several applications is unbeatable. Using their beta and testing their new platform has been a great experience and one that I would recommend to my closest friends and family at this point. Even if you are brand new and don’t have much experience. KeepKey is the best choice for a hardware wallet right now in 2019.


CLICK HERE TO BUY KEEPKEY FROM SHAPESHIFT’S OFFICIAL SITE DIRECTLY


***Leave a comment below and I will message you a coupon for 50% off for a limited time only!***


What do you think? Which hardware wallet is your favorite and why? Sound off in the comments below!


Cheers,


The Crypto Renegade


NOTE: This post may contain affiliate links. This adds no cost to you but it helps me focus on giving as much value as possible in every single post by being compensated for recommending products that help people succeed.

How To Buy Gift Cards With Bitcoin (2020)

In this review, I will be going over the 3 best ways on how to buy gift cards with bitcoin in 2019. There are 3 trusted sites (and one app) that are used to buy gift cards very easily and it happens almost instantly. You can choose whether or not to email you the redemption code for the gift cards digitally via email, or you can choose to have them shipped as a physical card to your friends or family if you are going to use it as a gift.

It all is very easy, and more importantly, it proves that there is real world utility for bitcoin (in case you didn’t know that already). Let’s get right to the best ways to go about this below!

Before I get to these 3 options, I will recommend you first check out the LIFE INFO APP. This does the reverse and allows you to earn free bitcoin AND save money on thousands of merchants, just like the resources below. I HIGHLY recommend using this free app, because it’s a great way to start accumulating bitcoin for free while saving money on purchasing items you are already buying anyway. I will leave a link to the review that explains this free app HERE.


DOWNLOAD THE LIFE INFO APP TO START EARNING BITCOIN


How To Buy Gift Cards With Bitcoin


#1 GYFT.COM

how to buy gift cards with bitcoin

This website offers a fully functioning website and a full service mobile app as well, but you can get pretty much any type of gift card you can think of. It’s essentially the Amazon of of buying gift cards and the selection is huge. It covers anything from pizza gift cards to department stores, like Macy’s to Best Buy to Cruises and Airlines.

This really is one of the largest sites that allows you to buy gift cards and isn’t fully dedicated to bitcoin. (we’ll get to that option below). You can actually buy these gift cards with any payment method, but bitcoin is an advertised method for doing so. I have used it once on this site and it’s fairly straight forward with scanning the QR code with my phone and authorizing with my BitPay wallet.

This probably has the largest selection of gift cards, but one thing I wish they did was incentivize the use of bitcoin by offering a discount for purchasing these gift cards, but for them it just appears to be another payment method.

If you want to save money and get discounted gift cards with bitcoin or bitcoin cash, I would recommend trying out Purse.io, which is Amazon built on top of a new platform that specifically deals in bitcoin payment. You can check out my review and recap in this article I wrote HERE.


#2 BITREFILL.COM


This is a site that I love using because it was built specifically to help propel bitcoin being used in commerce specifically. Not only that, you can buy gift cards with Bitcoin, but you can also use several other altcoins as well. You can also top up gift cards on your phone in any denomination you need and it offers over 750 different gift cards, so it has a VERY large selection, just like above.

You can also use Lightning Payments for ordering bitcoin as well. This is a new development, but one that is very welcome. I just downloaded my first wallet for the lightning network and it was really fun to see it in action! Granted, I haven’t tested it out on a purchase here, yet.

However, I plan to do that very soon on my next gift card purchase. I always try to support businesses that support bitcoin payments, but especially ones that were built on the promise of bitcoin being a peer-to-peer electronic cash system that was developed by the elusive Satoshi Nakamoto.

Overall, this is probably my favorite place to buy gift cards when I pay with bitcoin or any other altcoin, because of it’s dedication to this cause. I also had a smooth experience and had the physical cards shipped to me within 3 days and arrived on time and as described.

The one thing that also makes this different, is you can pay your phone bill and cable bill with bitcoin. How? Well, you can purchase a specific gift cards amount, say $94.36 if that’s your phone bill amount, and use that to pay your monthly Verizon, T-Mobile, AT&T, or Sprint Bill. Pretty neat.

Also, you can do this with your cable bill if you use Cox or Xfinity if you’re in the U.S. The same thing applies where you can purchase a gift card for an exact amount and use it when you go online to pay your bill. Pretty cool if you ask me!


#3 BITPAY WALLET APP

This is my number one go to mobile wallet because of it’s utility. I also have a visa card that I can load up my bitcoin on directly, so it’s all managed and very easy to use in the app. But, it also offers integrations with Coinbase and you can buy gift cards directly from your wallet there.

The only downside is, it supports only Bitcoin (BTC) and Bitcoin Cash (BCH). If you are using any other cryptocurrencies with your day to day spending, then I would go with something else, but I use this one every single day, because the user experience is top notch.

In terms of gift cards, here is an article the wrote when it was rolled out last December HERE. Ultimately, it doesn’t quite have the features or selection that the other two offer, but when you use this mobile wallet for the debit visa card and for other everyday spending, it makes it easier to manage it all in one place..

It covers some larger name retailers like: Uber, Delta Airlines, Hotels.com and Amazon. There are other options, and they are adding more all the time, so keep an eye on that. Overall, I personally use this option the most as I mentioned above I have a lot of services integrated with this wallet and I’ve never had a bad experience.


CONCLUSION


These are the easiest steps on how to buy gift cards with bitcoin! Overall, I have a clear favorite in the list above in terms of specifically buying gift cards and that is Bitrefill.com, but that does not mean the other options are bad. I have personally used all 3 of these and they all have a good user experience.

The difference lies in their business models and the personal branding and position in the marketplace. They are all reputable and I can recommend all of them, but I still have a soft spot for “Bitcoin Companies” in general, and that’s just an emotional leaning on my part.

If you ever need to see some previews of get some other commentary, watch the video I did above that goes over this and shows you how to go about this process. Give these a try when you have a holiday, birthday, or any other type of event when a gift card would be appropriate. you won’t regret it.


What do you think? Are there better ways to buy gift cards online? Let me know below in the comments!


Cheers,


The Crypto Renegade


NOTE: This post may contain affiliate links. This adds no cost to you but it helps me focus on giving as much value as possible in every single post by being compensated for recommending products that help people succeed.

Scroll to top