Review

Ellipal Titan – Crypto Hardware Wallet (2020 Updated) – FIRST LOOK!

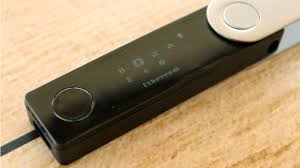
Is the new Ellipal Titan crypto hardware wallet all hype? Or is it the real deal? In this article we are going to take a FIRST LOOK at the mobile hardware wallet. So, the Ellipal Titan appears to be a very unique and interesting cold storage hardware wallet and is the second generation wallet after the Ellipal 2.0 wallet and is unlike any other hardware wallet on the market.

This device is currently available for pre-order and should start shipping it’s first units by mid-August of this year, so make sure to check out the bonuses for pre-ordering with the special referral links I will have below. This is known as the only “True” offline hardware wallet.
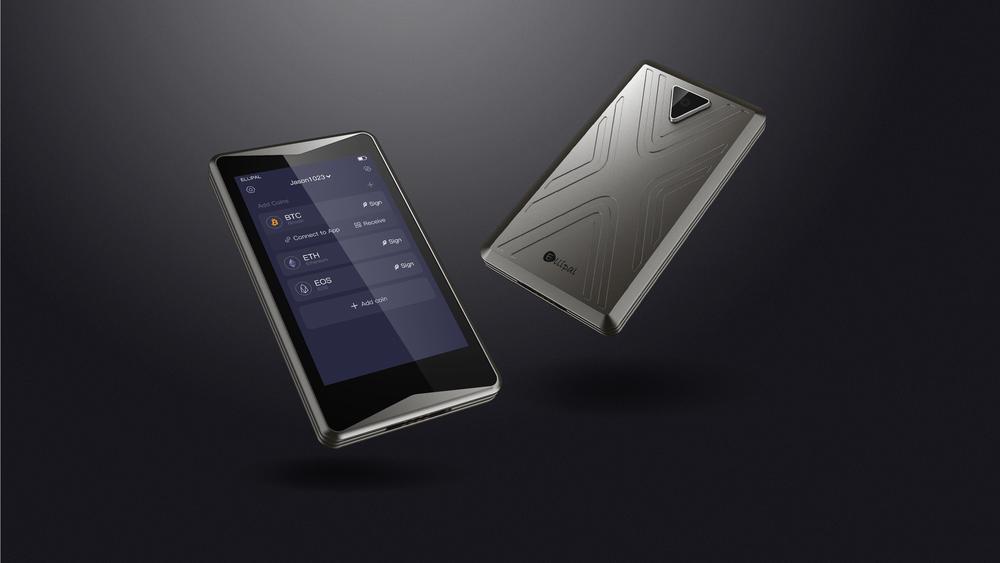
Ellipal Titan

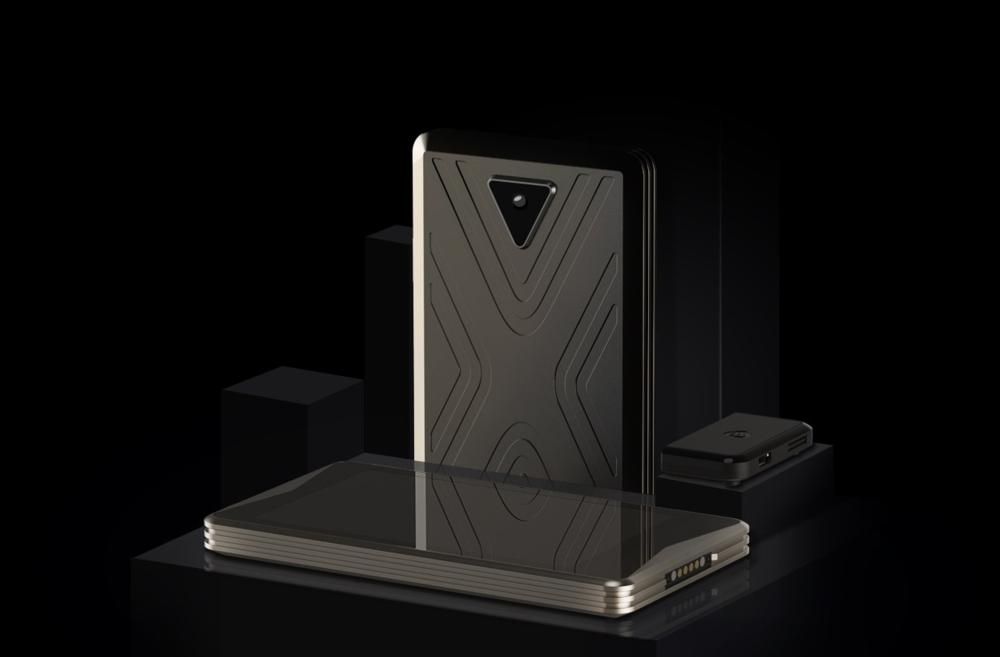
It has zero ports, USB connections, Wifi connections, Bluetooth connections,  Cellular connections and NFC connections. This thing is built like fort knox! It has a form factor similar to that of Cobo Vault, but I will have a written review for that device HERE.

So how do you use it if you can’t connect it? QR codes. The device has a camera and a 4-inch full touchscreen and resembles a small android smartphone. It connects with a smartphone app where you can transfer funds between the hot wallet to the air-gapped device almost instantly through scanning the QR code. Very cool.

Before we dive deeper into the details of this device and how it differs from other crypto hardware wallets out there, I want to make sure you get the free download of my e-book “5 Best Ways To Secure Your Cryptocurrency“. This a comprehensive guide to how to best manage and secure any cryptocurrency you currently have, whether you are a beginner or a crypto veteran! Let’s get right down to the Ellipal Titan!

Ellipal Titan: Whats In The Box?


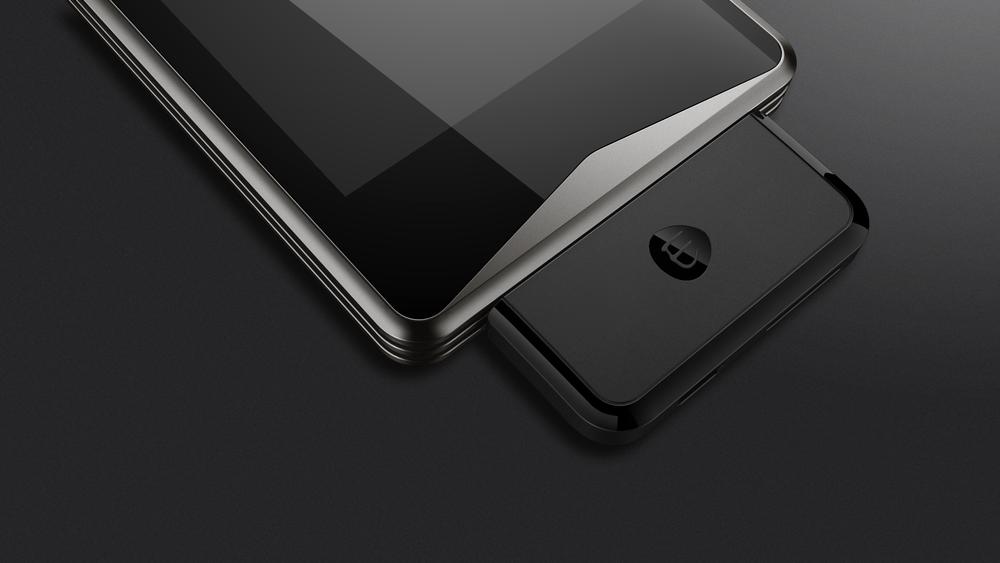
The Ellipal Titan device comes with the same items in the box as the Ellipal 2.0, with the only difference being that there is a magnetic adapter that connects to the bottom of the device. This adapter includes the charging port and SD card slot port for updating firmware and signing offline transactions. The Ellipal 2.0 device has these on the device itself, whereas the titan has no ports or openings on it whatsoever, making it stronger and more secure.

Box includes:

  • ELLIPAL Titan Cold Wallet
  • Rechargeable battery
  • Charging cable
  • Mnemonics card
  • Warranty card
  • User manual


Ellipal 2.0 Vs. Ellipal Titan
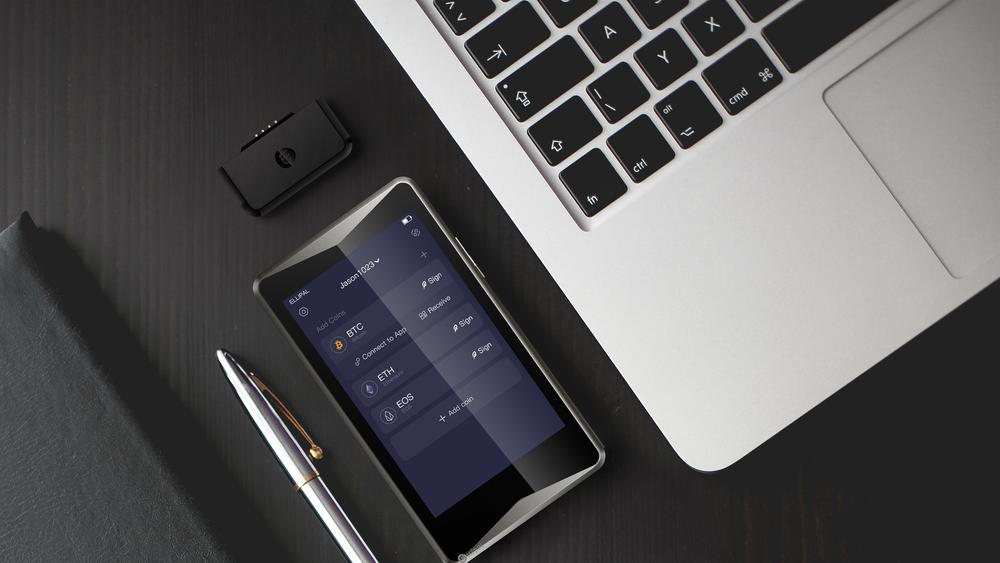
 

So this device is similar in it’s form factor to the Ellipal 2.0 device, with some key differences. Firstly, this device built for Anti-Tampering, Anti-Disassembly, and Anti-Theft protection. What does that all mean? Well, to put it simply, this thing is cannot be pried open with any tools like a screwdriver, hammer, etc…

Ellipal Titan has a self destruct mechanism in place, so that if the screen is tampered with or crushed or broken in an attempt to gain access to it’s internals, it will break a special circuit board that holds all your private keys. This is powerful. Additionally, it’s very sturdy, so not only is it IP65 rated for dust and water resistance, but its made out of a very strong single piece of metal that houses and encompasses the entire device.

The Ellipal Titan is specifically designed against evil maid of supply chain attacks so nothing can be imported or inserted as there are no open access ports on the device.

The Ellipal 2.0 is still a very strong and secure device, but it does have a durable exterior that is built for abuse, and it also has an SD card slot for updating it’s firmware on the device and also has a charging cable port, so there are 2 entry points. Again, still very secure, but the Ellipal Titan is really a massive upgrade.


How Do You Set Up An Air-Gapped Device?
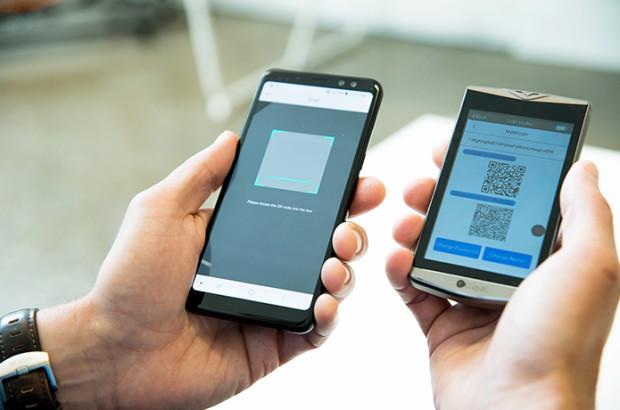
 

This is very simple. It pairs with a mobile app that is available for iOS and Android. This helps you initialize and setup the device and generate all QR codes needed to transfer your funds from the hot wallet app, onto the cold storage device. This process is identical to the Ellipal 2.0 process, however, you now have access to longer PIN’s and extra security features.

There is a full step-by-step setup guide for both Ellipal devices HERE

What Coins Are Supported?


This is always the section I check the most when reviewing hardware wallets, because although functionality and security are important, none of that matters unless it supports the coins you want to store offline. So here is the current list of supported coins and the one that are currently in development.
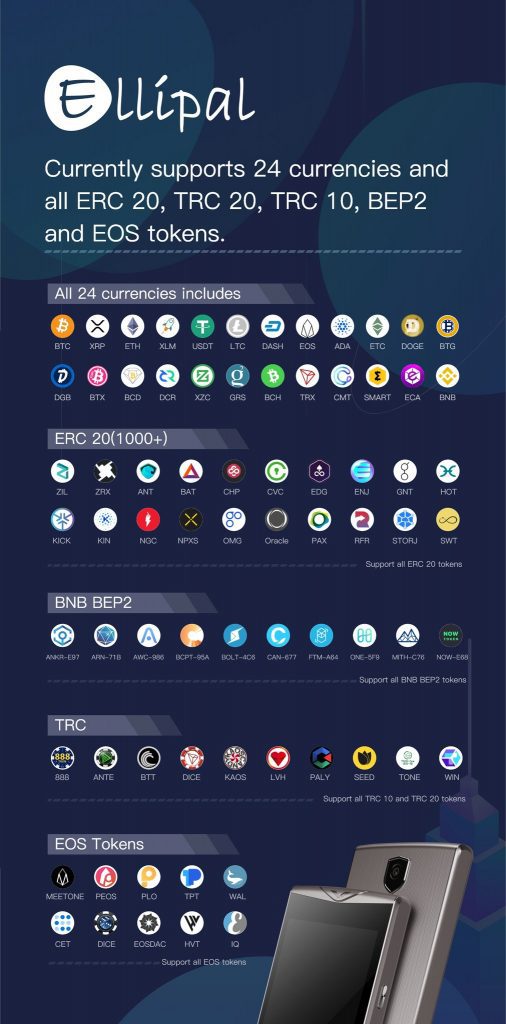
Currently, all coins will be supported fully by both devices. They are also developing new coin support as well with frequent firmware updates. This includes: Tezos (XTZ), Zcash (ZEC), NANO (NANO), STEEM( STEEM), and NEO (NEO) just to name a few.


Decentralized Exchange Support


I will briefly touch on this as it’s definitely worth mentioning. This feature allows you  to not only have direct coin to coin conversion, but it also allows for staking, for instance on the upcoming Tezos support and other POS coins.

It connects to Binance DEX, which is a decentralized exchange and looks very promising. Additionally, you will be able to earn interest and manage your staking rewards offline in future firmware upgrades, which is a HUGE selling point for me.


Conclusion


Overall, I’m very excited to get this device in my hands and write an in depth review on it. I already pre-ordered the device for $149 and I expect to receive it 3-5 weeks when it’s released. This appears to be a truly unique and air-gapped hardware wallet experience and security is really what it comes down to.

Don’t get my wrong, convenience is also important, but Ellipal really brought a unique form of security to the table here by having a very rugged and durable device that has ZERO online connections. You can transfer your crypto funds between its companion hot wallet and vice versa anytime, but the cold wallet never goes online, which is really cool.
For a limited time, you can also get a FREE mnemonic metal recovery seed (a $49 value) when you pre-order the device. This is a STEAL, as this is something I practice myself and believe it is absolutely NECESSARY for any person who takes their crypto seriously.

I also wrote a review recently on a few metal recovery seed wallets and my favorite one HERE, if you want to educate yourself on why they are so important. I will leave the special referral link below to get this device, and I for one am VERY excited to use it and see how “durable” it really is.


What do you guys think? Have you ever used a device more secure than this for your crypto? Let me know below!


Cheers,


The Crypto Renegade


NOTE: This post may contain affiliate links. This adds no cost to you but it helps me focus on giving as much value as possible in every single post by being compensated for recommending products that help people succeed.



Shapeshift And Trezor: Multiple Hardware Wallets Now Supported (2020)

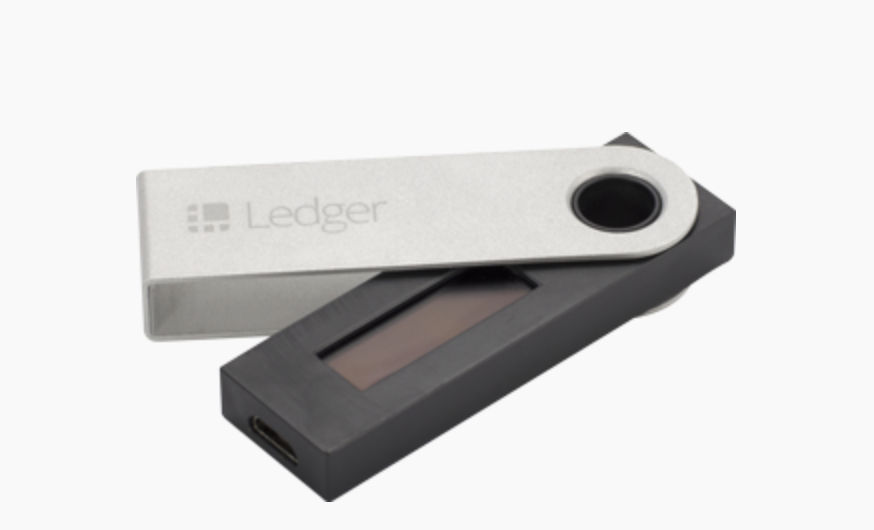
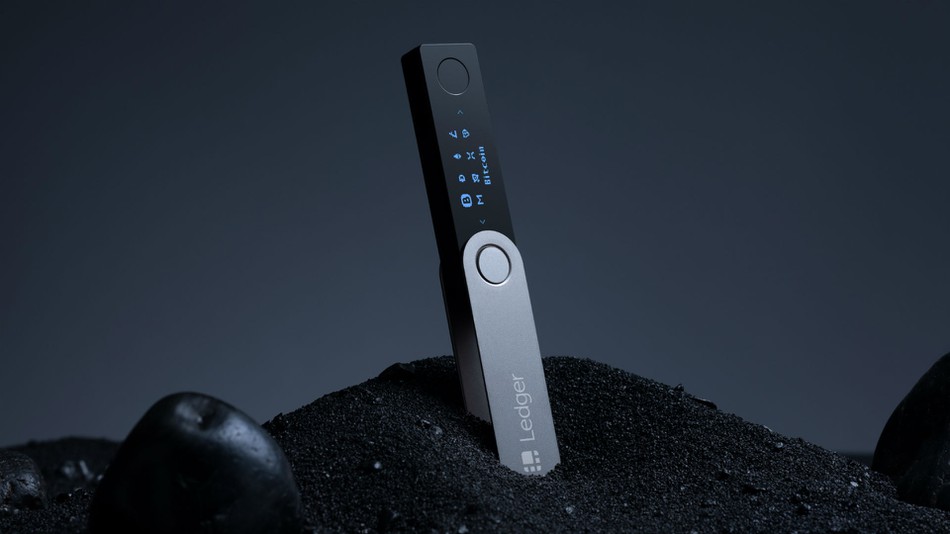
In this article, I am proud to announce that there is a new non-official partnership between Shapeshift And Trezor. Let me elaborate. The newly launched platform of Shapeshift’s all-in-one trading platform not only supports the KeepKey, which is now owned by Shapeshift, but it also integrates with Trezor One and Trezor Model T to manage and trade your assets through cold storage. They also have announced plans to support the Ledger Nano S and not too far after that, the newly released Ledger Nano X device.

This is a huge step forward for non-custodial trading with an emphasis on keeping your private keys in your possession the entire time. This is unlike many popular exchanges, like Binance, Kucoin, or even Coinbase. Maintaining financial sovereignty is a cornerstone of what Shapeshift is trying to achieve with the release of this new platform. I personally tested this platform while it was just in the beta stage and I have been raving about it ever since. I wrote an in-depth review of this platform and it’s features which you can read HERE.

Do I Need An Invite To Try It Out?


Shapeshift And Trezor

When the beta was released it was invite only, but this platform is now live and accessible for Shapeshift account members for free. I will link the announcement of their release that I wrote HERE, and you can now signup for a free account HERE.

(NOTE: You will need a compatible hardware wallet in order to use the platform to perform any trades. This is for your security in mind and makes for a seamless experience. If you do not have KeepKey or Trezor, you can get them by clicking the links below to obtain them directly from the manufacturer.


Can I Use My Trezor Model One AND Trezor Model T?


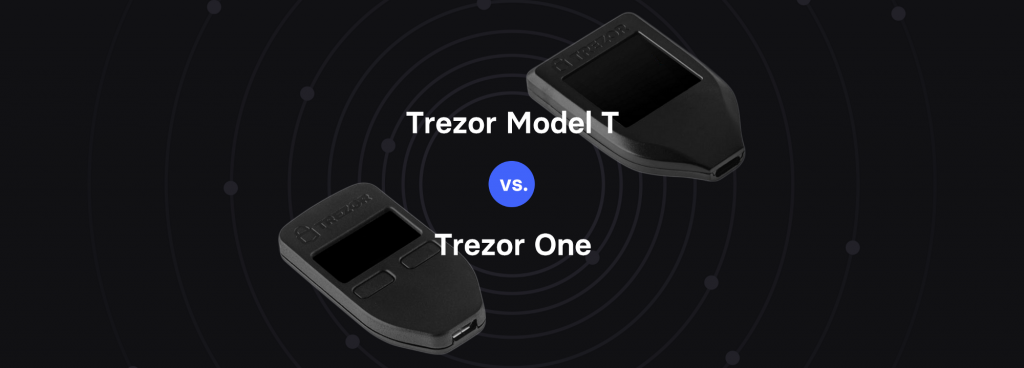
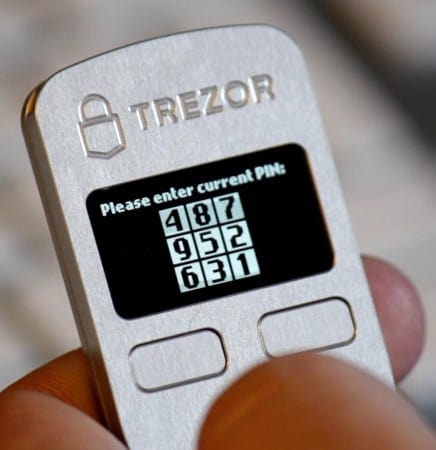
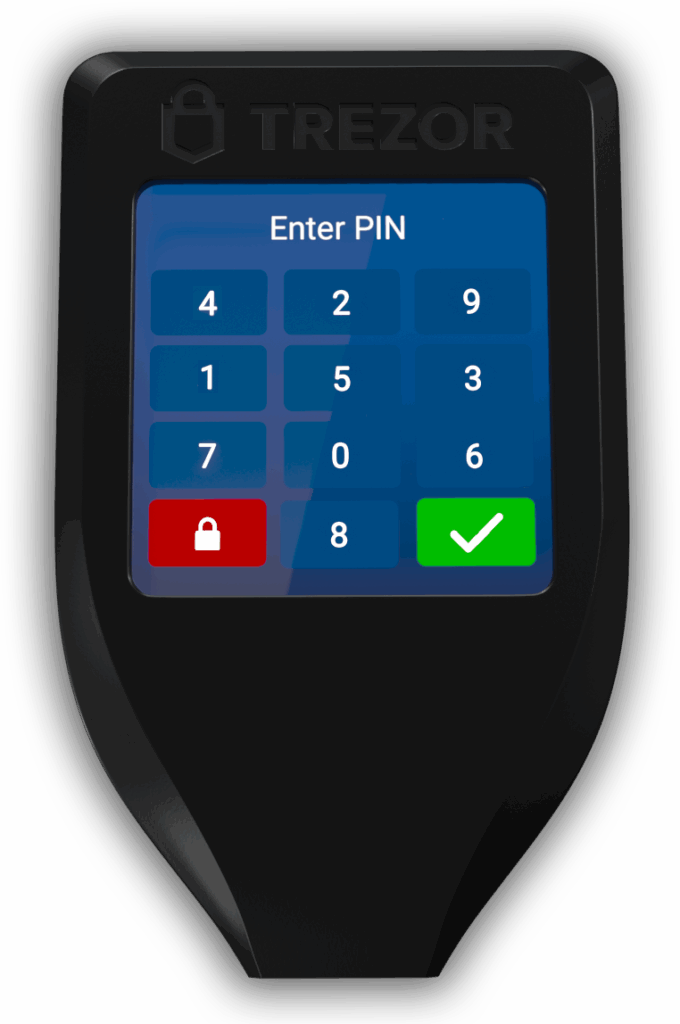
trezor one vs trezor model t

Yes. Both devices are compatible with the platform, and I recommend you initialize and setup the devices through Trezor.io first, before you connect to this platform. This will ensure that your security PIN and recovery seed phrases are properly in place before you connect it to this new platform. In my personal experience in testing, managing your trades, balances, and portfolio from the Shapeshift platform has been easier to use than on Trezor’s own web application.

Below is a video tutorial of how to setup your Trezor and connect it to the platform seamlessly. Please comment down below if you have any questions or concerns on this process. You WILL need to ensure you have the Trezor bridge installed on your machine in order to use this platform.


Shapeshift And Trezor: Are There Any Other Hardware Wallets Supported?


As mentioned above, there are plans to add support for the Ledger Nano S, very shortly. Unfortunately, there is no official ETA, but some non-official sources have told me that the wait will not be long. After this has been tested and verified, support for the Ledger Nano X will be tested and approved as well. There has been no word on whether or not the discontinued Ledger Blue device will be supported or not.

Again, I recommend that if you have a brand new device that you set it up and initialize the device and ensure it’s on the latest firmware version before connecting it to the platform. This article will be updated when they officially announce the Ledger support for the platform and I’m sure there will be an official press release from Shapeshift.


Conclusion


Overall, I can’t say enough good things about this new platform and my primary source for managing my own portfolio on my KeepKey and Both Trezor devices. It really makes managing and trading assets extremely easy and intuitive. If you don’t already have a hardware wallet, I will leave a link below for the KeepKey (My favorite hardware wallet currently), and in conjunction with the new release, I will leave you a 50% off discount code to pick it up for under $40.

That is a STEAL, and will make it the cheapest hardware wallet you can get at the moment. This is a limited time offer, so make sure to act fast! If you are unfamiliar with the basics of how to keep your cryptocurrency safe, you can download my free in-depth e-book on the subject HERE.


Use coupon code “GENESISFOX” at checkout get the discount by clicking the above link.


What do you think? Are you going to try the new shapeshift trading and management platform? If not, what other platforms do you prefer? Let me know down below!


Cheers,


The Crypto Renegade


NOTE: This post may contain affiliate links. This adds no cost to you but it helps me focus on giving as much value as possible in every single post by being compensated for recommending products that help people succeed.
CRYPTOTAG Review (2020) | Best Indestructible Recovery Seed Backup?

In this review, I am going to go over the titanium recovery seed backup called CRYPTOTAG. This device is very unique to say the least. There are other comparable products currently on the market, but this one is different. I will tell a brief story I may have gone over in other reviews, but it’s extremely relevant as to why these indestructible devices were created. A few years back, one of my friends was fortunate enough to have a hardware wallet that was holding private keys to a hefty sum.

When it came time for him to move, he was looking for his recovery seed phrase and had asked his girlfriend where she may have put it, and incidentally, it was put in a bag with some toiletries and was in a small plastic bag that was partly open. This was in a larger bag where a shampoo bottle had spilled and leaked all over the large bag and smothered his recovery seed card with his 24 word phrase. Needless to say, the oils of the shampoo had removed the ink and his paper recovery seed phrase was destroyed and indiscernible.

To make matters worse, he eventually forgot his pin on his Trezor wallet and was completely out of luck. I tell this cautionary tale as a way of reinforcing that this device has a serious need and is a small price to pay to protect yourself if any unfortunate event like this were to happen to you. People’s homes get flooded or burned down all the time, and you do NOT want to lose your life savings in the event that you fall victim to this.

As a side note, I recently wrote a free e-book that outlines the “5 Best Ways To Secure Your Cryptocurrency” and I highly recommend you go to the home page and click the orange button to get your free copy! Now, onto this review of the CRYPTOTAG premium device. Do I really need one even if I’m careful? Let’s find out below.


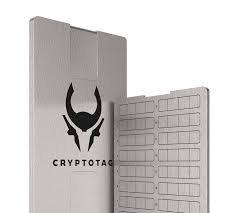
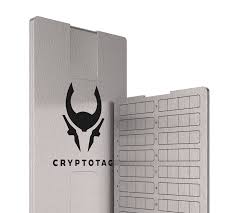
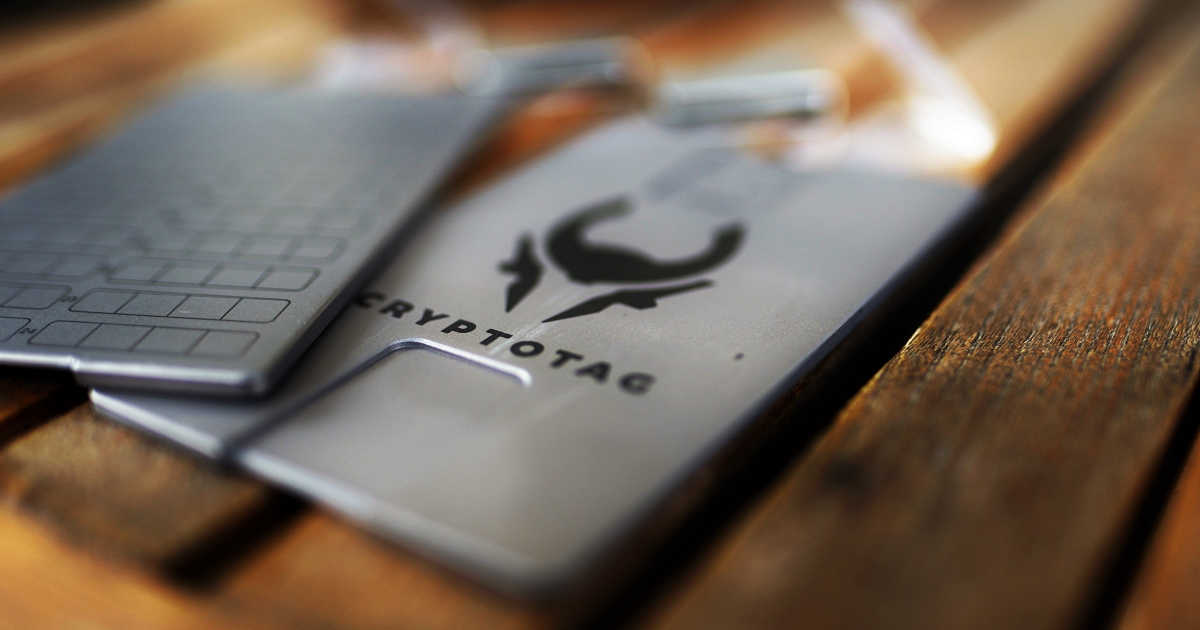
cryptotag

CRYPTOTAG: What’s In The Box?


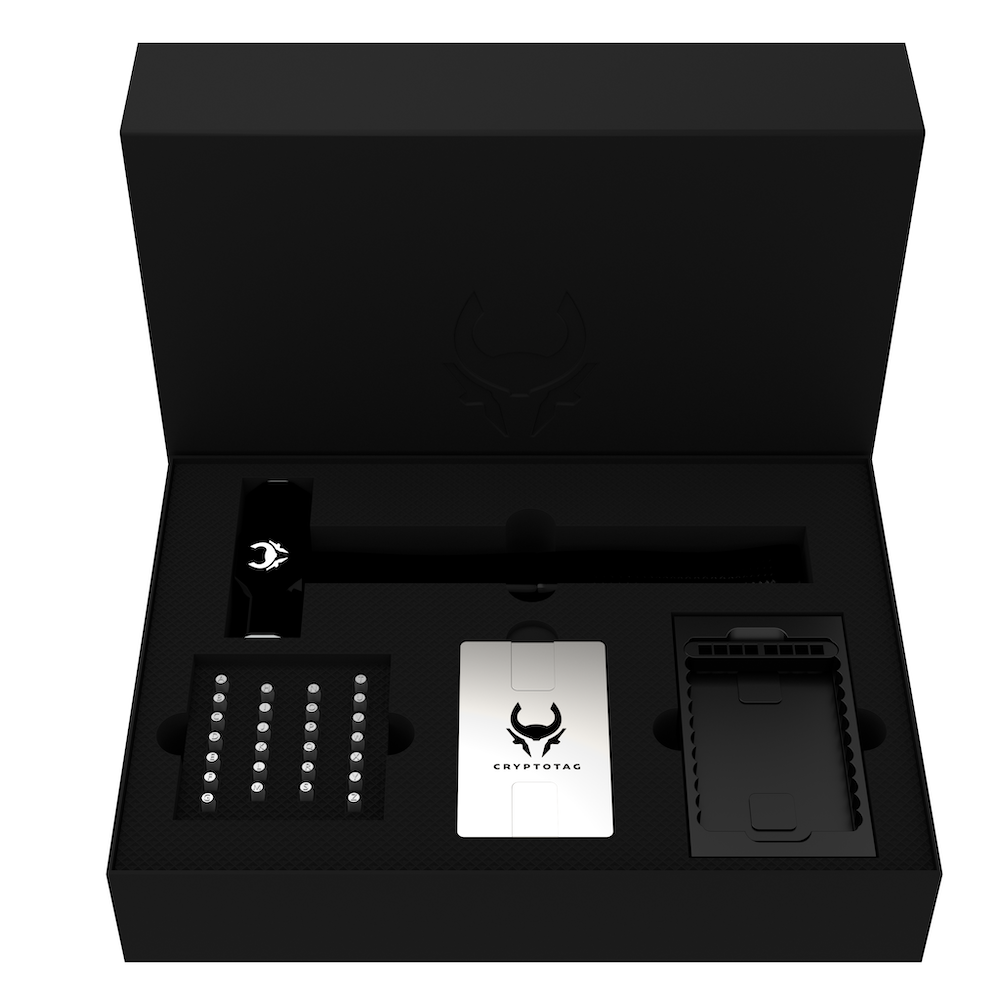
CRYPTOTAG Hammer

-2 Titanium Plates (96 Letters Per Plate)

-26 Letter Bits

-An Anvil

-A Bit Holder

-Ear Plugs

-Matches To Burn Your Paper Backup When Finished!


As you can see in the picture, the packaging is beautifully done and contains everything you need for engraving your recovery seed phrases into the plates itself. It’s a unique experience as the assembly or installation process is quite different from using a CryptoSteel or Bill Fodl, but in my opinion way more enjoyable. I will elaborate on this process below.


Design & Setup


This is device is the strongest plate I’ve personally ever seen. It even says during the testing phase that it was tested with a semi-automatic weapon firing at bullet at it, and it still not puncturing the device. This product can literally stop a bullet. Additionally, it has been tested with extreme heat at over 1665 degrees celsius. It can also handle extreme cold, and does not crack or falter under extreme pressure or ice. It also goes without saying that it does not rust or is subject to any level of corrosion.

Setup – When you open the box, you will see everything evenly laid out with a set of instructions and your 2 plates with a clip to hold them together. The hammer is very hefty and is specifically designed for this personal engraving process and has a texture that is designed to make sure it doesn’t slip and overlay your letter you begin hammering. My experience was that I had to very vigorously slam the hammer down on the bits for engraving about 5-6 times to ensure that it made a deep enough engraving on the titanium plate.

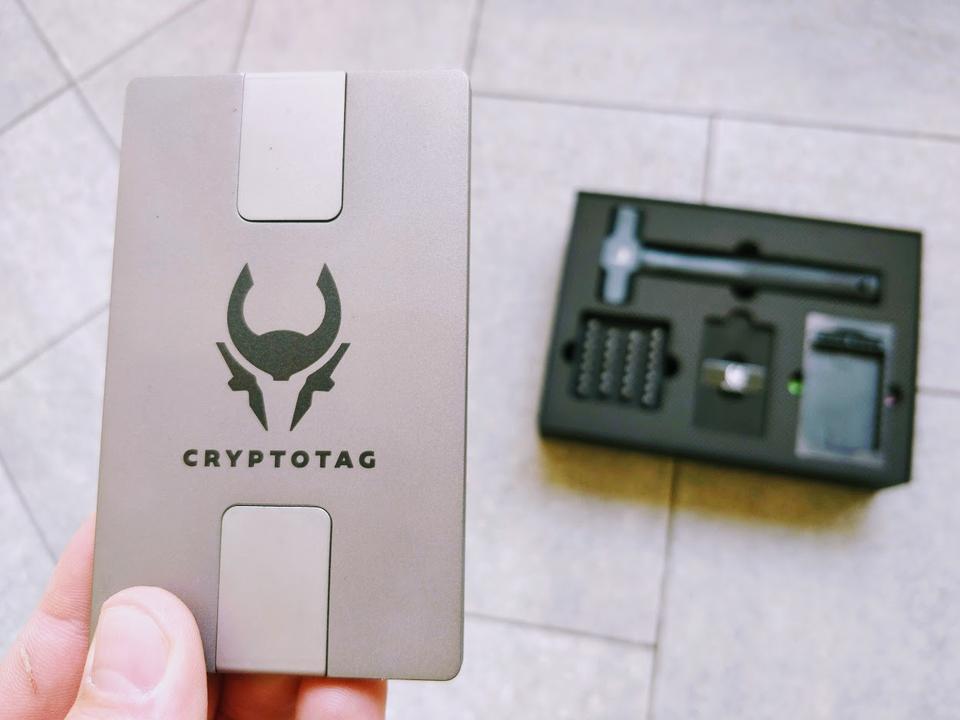
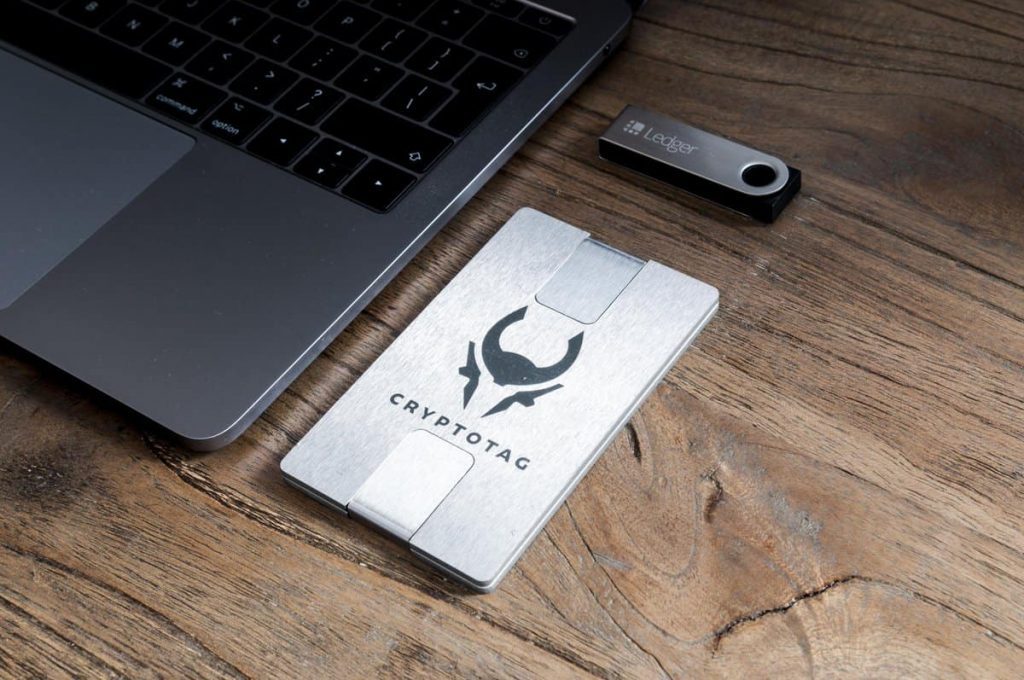
Design – The outside of the CRYPTOTAG proudly displays the products’ logo and name — which looks cool but makes the sensitive ‘document’ less discrete. Should it ever catch the eyes of a potential thief, he or she would have little doubt as to what kind of information the sheet holds. (Even if someone has no idea what a recovery seed is, most people know that “crypto” means money.)

Of course, a wise person would never leave a CRYPTOTAG in sight — just as one would never leave their gold coins or valuables lying around. Still, a little more discretion would’ve been preferred.

Aside from that, there is very little to fault with the CRYPTOTAG, which we find to be the best storage solution for your private keys and recovery seed backup available on the market.


Who Is This for?

This is for ANY cryptocurrency holder who has more crypto than they can afford to lose. Ultimately, this is the best form of an insurance policy in becoming your own bank, as it cannot be destroyed under any conditions. Having this device in conjunction with a hardware wallet is the best combination of security and ease of use. This is the backup to your backup recovery seed phrase that you have on paper, and without this phrase being kept in a secure location, you put your entire wallet at risk.

In this new era of “Becoming your own bank“, that also comes with a new responsibility of being a banker that put safeguards in place to protect you in the event of an unforseen event. This is by FAR the best way to ensure that your recovery seed is safe and cannot be destroyed. I recommend that ANYONE that has more cryptocurrency than they can afford to lose, should have one of these. After all, if you lose your hardware wallet AND you lose this, you are completely out of luck and have no one to blame but yourself.


CryptoTAG Vs. CryptoSteel Vs. Bill Fodl


So, as you can see, this is a pretty unique device. However, you may be wondering, “How does it compare to the CryptoSteel or Bill Fodl”? Well, the latter 2 devices are very simillar. I will leave the in depth review for each of those respectively HERE and HERE. The CryptoSteel and Bill Fodl use tiles that are already pre-made with certain letters and require you to slide them into place and requires unscrewing some levers that allow you to slide them into place in the proper order.

There is no hammer, no pounding, no engraving, and as a result….No fun when setting it up.

Going through the process of hammering my crypto legacy into place was really satisfying for me as I take my crypto holdings very seriously, as well as the security of my private keys. Yes, the CRYPTOTAG is a much more expensive device (almost twice as much as these 2 competitors), but also has a superior quality in terms of manufacturing, materials used, and the overall presentation. This device is not for everyone, but if you take as much pride as me with my cryptocurrency, there is no more satisfying way to protect your keys than the CRYPTOTAG.


https://www.youtube.com/watch?v=kLAaHjGX7Dc&t=326s

Conclusion


Overall, this device is probably the nicest version of a recovery seed backup you can find. The titanium is completely indestructible and can withstand even the harshest elements and has been thoroughly tested under every condition imaginable. As detailed above, it is a bit more expensive than the CryptoSteel or Bill Fodl, but it also is much nicer quality, and has a MUCH better user experience. Being able to “forge” your own seed into metal is a really fun experience and really connects your digital world with your physical world.

The one downside, which may have been mentioned in other reviews is, if you make a mistake on a letter, you will need to buy a new plate. Whereas, the other 2 devices you can simply just replace or slide out a tile with a new one if something changes. This makes those devices re-usable, whereas this one is literally written in titanium and cannot be changed. However, if you take your time and “measure twice and cut once” (so to speak), this proves to be a much sleeker and overall “better product” If you can comfortably afford the 169 Euros price tag for the starter kit.

You will not be disappointed. Additionally, if you have multiple wallets and need to expand, you can also get an expansion kit with new plates as needed, since you will be able to use the same hammer and stampers.

Bottomline: If you have the means and want to protect your seed phrase in the sexiest way possible, then CRYPTOTAG is your absolute BEST option. Hands down.


What do you guys think? Have you used a metal recovery seed backup before? Let me know down in the comments!


Cheers,


The Crypto Renegade


NOTE: This post may contain affiliate links. This adds no cost to you but it helps me focus on giving as much value as possible in every single post by being compensated for recommending products that help people succeed.

Shapeshift’s New Platform Launches Today! (July 2020)

It’s finally here! Shapeshift’s New Platform launches today! I have been using their beta platform for several months now reporting bugs and helping add some user friendly features by reporting feedback and ways to improve this brand new non custodial platform. I wrote a pretty in-depth review of the beta a few weeks back, so I won’t rehash the entire user experience here, so I will link that review so you can get the nitty-gritty details HERE.

This is an exciting time for cryptocurrency in general. Facebook is launching a controversial new coin called “Libra”. The government has sent a request to have the development of it stopped so they can review it and “approve” it before it’s released. The audacity of this, as if they have any say in what private organizations can and cannot work on is baffling, but I digress.

I will briefly detail below some of the key features and benefits of using this platform and non custodial exchange for all your crypto asset management.


Trade Assets Offline


The cornerstone feature here (in my opinion) is the fact that we can perform trading assets while having our private keys kept completely offline via the KeepKey (Or Trezor). They are also planning to add Ledger support soon as well, but the easiest hardware wallet to use is by far the KeepKey, as it was the primary wallet used during beta.

Shapeshift's New Platform

As you can see above, the dashboard is very streamlined and easy to view and manage the assets you can trade, view the balance and the price, view market cap, and so much more. The ability to have all the information I need in one place is very convenient. additionally, I can view my portfolio without having my hardware wallet present. In fact, I only need it to sign a transaction. Once you sign, you can disconnected it and it will be transferred to your wallet balance immediately and be reflected next time you connect.

Shapeshift has really thought of the user experience and making it easy for anyone of any skill level and knowledge of crypto to safely manage their private keys and learn how to trade using this platform.  Now that the platform is out of beta, they will be focusing on adding more assets being added to the platform for trade and asset management. As this is also a trade engine, as well as a portfolio manager, incorporating more detailed analytics will only improve upon this foundation.


Manage Your Portfolio In One Location


Here are some of the touted features of this platform, and why you should sign up for free HERE:

1.) Shapeshift Trading – You can seamlessly buy, sell, or trade dozens or crypto assets directly in the platform. Trading is non-custodial, so there is no need to trust a third party. This is a MASSIVE plus and a differentiator from any other exchange out there.

2.) Hardware Security – Utilize the best practice of offline security. Retain control of your private keys while enjoying an intuitive web interface. This is the best of both worlds and I will add that this is not currently possible on any other hardware wallet platform currently.

3.) Real Time Market Data – Get real-time market prices and historical data without ever having to leave the interface. This means no extra tabs or historical charts from any other 3rd-party site that you have to toggle between to get the data you need. This allows you to enjoy a beautiful ad-free experience.

4.) Portfolio Performance – Visualize your portfolio performance through graphs, sparklines, and real-time value movement. View your dashboard balances at anytime, anywhere. Your hardware wallet only needs to be connected for signing transactions.

The video below gives you a quick demo of how this works. It truly is a unique hardware wallet experience.


Shapeshift’s New Platform: Conclusion


After personally testing this platform and providing feedback and improvements for several months, I am very proud of what the Shapeshift team has accomplished. I am also excited to see how it expands with other hardware and new features and coins that will be added. There is NO other exchange that offers non-custodial trading, and to me that is a HUGE deal.

Part of “Becoming Your Own Bank” means maintaining full control over your funds at all times and not having to put trust in anyone but yourself. Self sovereign finance is the way of the future, and that is very exciting to see how this will continue to play out as adoption continues to snowball.


***CLICK HERE TO BUY KEEPKEY FOR 50% OFF FOR A LIMITED TIME ONLY***


Just click the above link and use code “GENESISFOX” at checkout


What do you guys think? Are you excited for the revolutionary change in asset management? Let me know in the comments below!


Cheers,


The Crypto Renegade


NOTE: This post may contain affiliate links. This adds no cost to you but it helps me focus on giving as much value as possible in every single post by being compensated for recommending products that help people succeed.
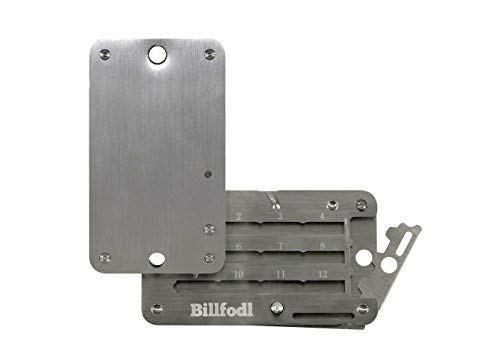
Bill Fodl Review (2020): Is It Better Than Cryptosteel?

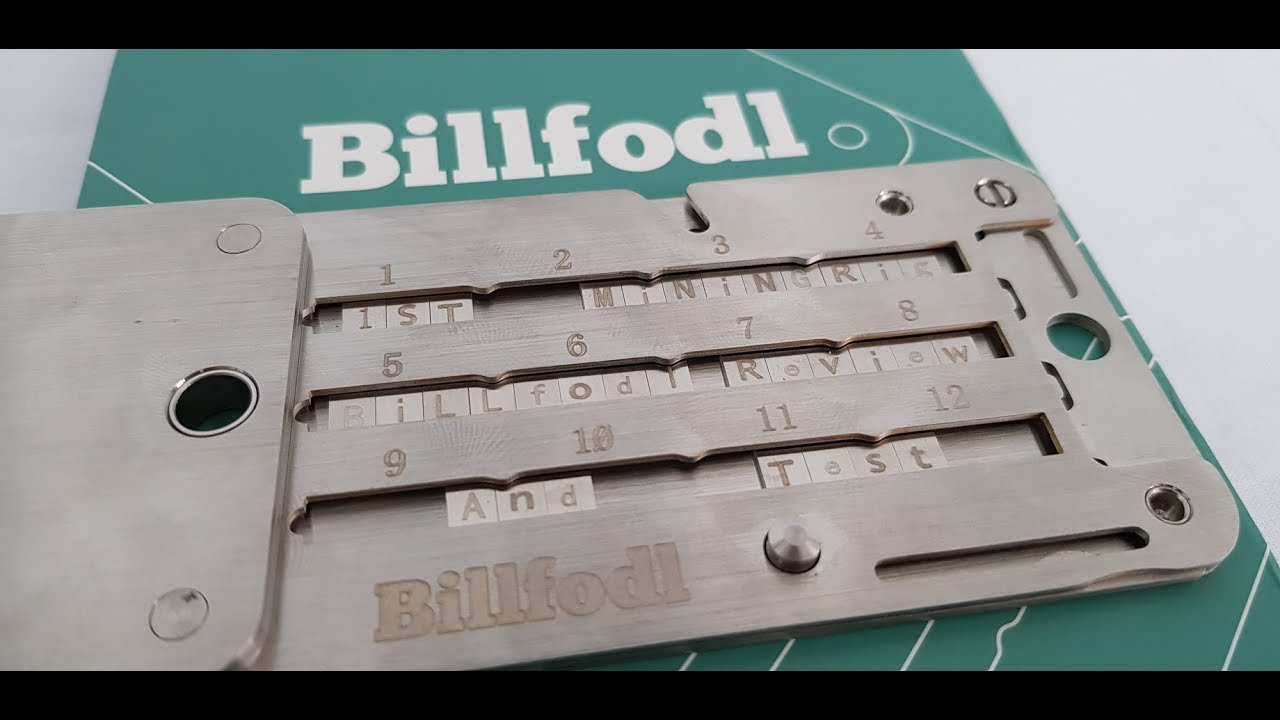
In this review, I am going to deep dive into the Bill Fodl and whether or not you need one, and if you do, is it better than Cryptosteel? So what is Bill Fodl? It’s essentially a backup of your backup. It’s a stainless steel recovery seed backup for your cryptocurrency and your recovery seed words that you most likely have written down on paper.

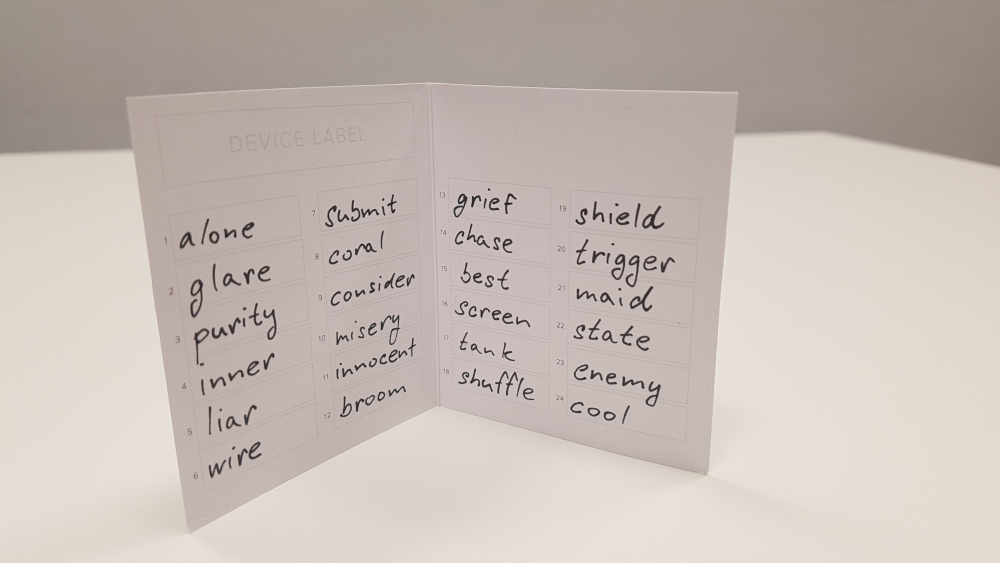
As you may already know, when you setup a cryptocurrency wallet, you will be asked to write down your recovery seed phrase which is a series of 12, 18, or 24 words. These are given to you as a method to restore the funds in your wallet, in the event you lose access to it digitally or physically. This is primarily is used in conjunction with a hardware wallet.

When I started this site back in 2016, I was mainly focused on hardware wallets as the primary method to safely storing your private keys offline, and these types of devices didn’t exist at that time. As this industry has brought on more innovation, indestructible crypto seed backups were born! I also had a friend who had multiple bitcoins on a hardware wallet, and when he was moving, he realized that his recovery seed was in an open plastic bag that was in proximity to a spilled shampoo bottle.

As you can probably imagine, this didn’t end well. When he went to move and locate his recovery seed, it was useless. The oils of the shampoo had removed the ink he had on his paper backup and it was all but destroyed. This is just one of MANY reasons why you need an indestructible backup of your paper recovery seed card to protect yourself against, well, yourself. It also is designed to withstand the elements such are fire, water, wind, corrosion, and even your dog eating it.

As it’s relevant here, I wanted to point out that on the home page of this website, there is an orange button that will link you to my free e-book that I recently wrote that goes in depth on this topic and provides you the “5 Best Ways To Secure Your Cryptocurrency“. Go check it out, it’s free, and it may even save you from loss in the future. One of our motto’s here is “We help you protect YOUR private keys”. So there you go, let’s get to nitty-gritty of this review on the Bill Fodl!


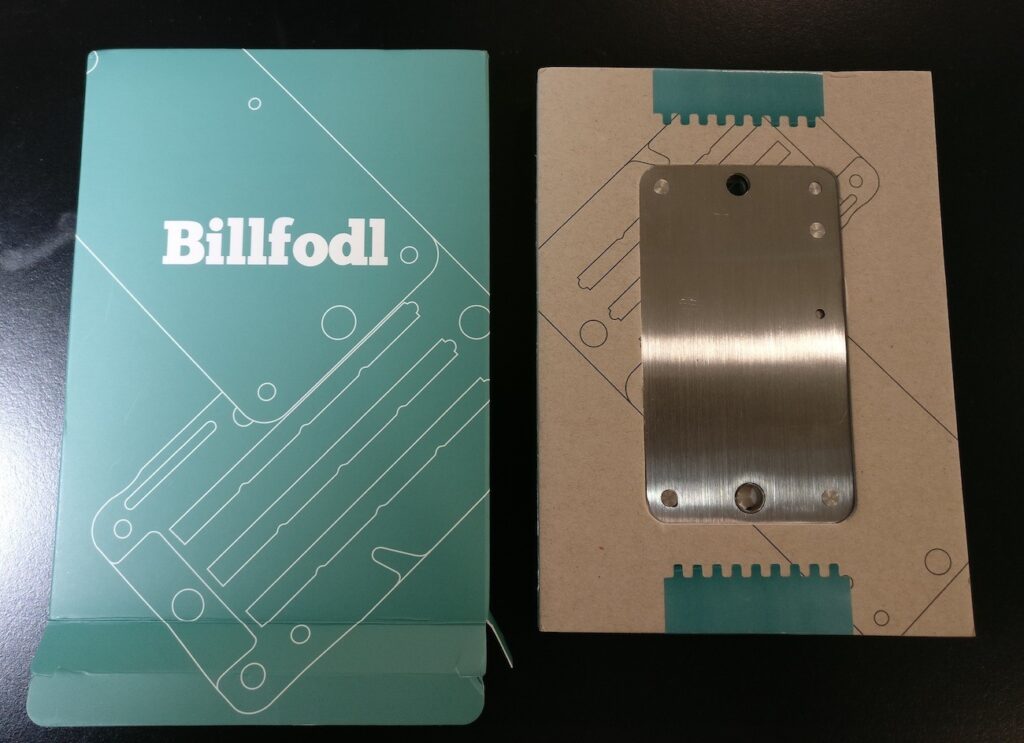
Bill Fodl: What’s In The Box?


You can store up to 96 characters, allowing you to backup an entire 24 word seed in one unit. Don’t worry if your entire seed is longer than 96 characters; you only need the first 4 letters of each seed word to fully backup your coins. You can read the full setup guide and video from their website HERE.

They also have expansion packs, and multi-wallet packs that you can get as well that will enable you to receive a quantity discount for multiple wallets. I used this option as I have multiple hardware wallets and therefore need this protection.

This Bill Fodl device is really a solid insurance policy on your crypto holdings, that doesn’t require you to trust any 3rd party or custodial solutions. This device is typically used with all models of Trezor, Ledger, and KeepKey. Pretty much any standard BIP39 wallet, and you can also use this for hot or online wallets as a backup as well.


Why Do I Need One?


As I mentioned above in the first paragraph, your recovery seed is typically written down on paper. Most people don’t realize how important these words in succession are as they are writing them down, as this is your only saving grace of recovering any lost cryptocurrency if you lose access to your wallet (Hot or Cold). If you lose these recovery words, you have no one to blame but yourself, and there is no way to recover your funds.

In this new era of “Becoming your own bank“, that also comes with a new responsibility of being a banker that put safeguards in place to protect you in the event of an unforseen event. This is by FAR the best way to ensure that your recovery seed is safe and cannot be destroyed. I recommend that ANYONE that has more cryptocurrency than they can afford to lose, should have one of these. After all, if you lose your hardware wallet AND you lose this, you are completely out of luck and have no one to blame but yourself.


Bill Fodl vs. CryptoSteel


Bill Fodl vs. CryptoSteel. I’ll be honest… these two devices are eerily similar, however, there are some key differences that set that apart. For starters, I noticed that the CryptoSteel has some tiles that are not the exact same shape and size, therefore making it more difficult to setup. There is a small slot for each of your letters to fit in, and even 1/8th of a millimeter difference is noticeable when you’re performing this task, as it takes steady hands and precision.

Secondly, the slats are smoother and the screws are easier to open than the CryptoSteel when it comes to opening it and closing it during the installation process. It’s not a massive difference, but still noticeable. As I said, these are VERY similar, but I am noticing that the quality on the Bill Fodl to be slightly nicer.

Thirdly, Bill Fodl takes lightning payments via bitcoin to purchase, while the CryptoSteel does not. Now, I know that doesn’t matter top most people, but I am very vocal about wanting to support vendors and businesses that accept cryptocurrency as payment. You would think that both of these companies would do this by default, but CryptoSteel only accepts credit cards at the moment.

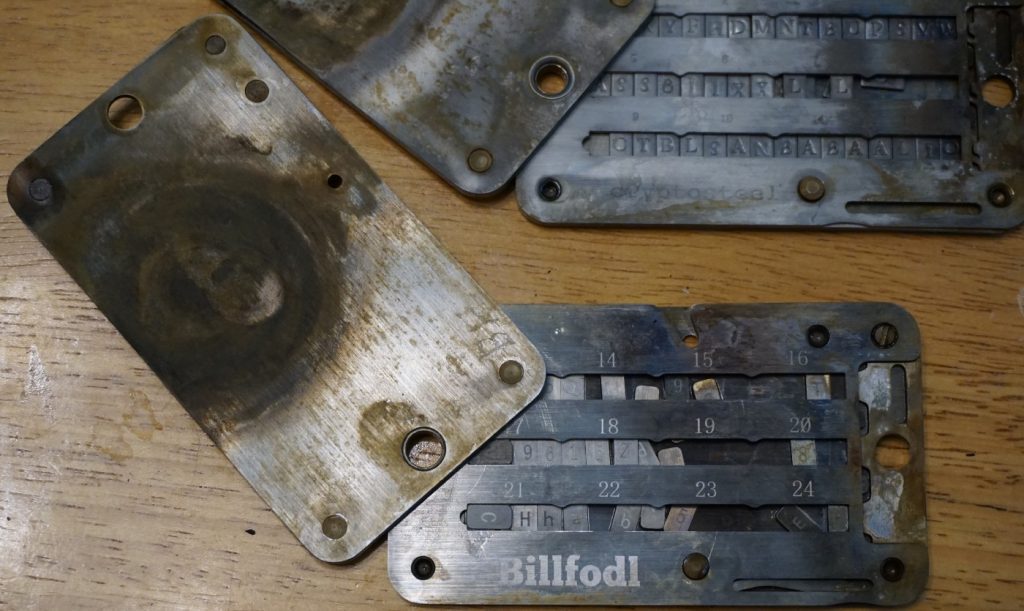
The one thing I didn’t like about the Bill Fodl, is that the stainless steel gets scratched very easily. This won’t affect the integrity of your tiles or have any affect on the readability of the device in the event of a catastrophe, but it also doesn’t look as sleek and brand new after a handling it after just a handful of times. Lastly, the Bill Fodl is cheaper than the CryptoSteel. Bill Fodl is only $79 for their device and the CrypoSteel charges $99 for the equivalent device. Seems pretty straight-forward to me.

If you want to check out my full review on CryptoSteel, you can check it out HERE.


***CLICK HERE TO BUY BILL FODL FROM THEIR OFFICIAL SITE***


Are There Any Other Premium Options?


As mentioned above, the Bill Fodl and CryptoSteel are very similar devices, with only minute differences. So you may be asking, are there any other options out there? Any other options I should consider? Well, the short answer is, yes. You may have seen some knock-offs of this product on Amazon or eBay, but I strongly recommend you ignore those completely. The wannabe’s found there are not as durable or easy to use as these two (I bought one for comparison and it wasn’t pretty). However, there is a premium version of this product, but is made out of titanium instead and has a much different, (but good) user experience and setup process. Behold, the CryptoTAG!

The CryptoTAG is a high-end device that comes with 2 titanium plates and even comes with a heavy duty hammer to literally pound your seed phrase into these plates, and has been tested thoroughly for quality. In fact, I personally think the quality is MUCH nicer than the Bill Fodl, but not everyone can afford $199 for a recovery seed backup, and ultimately is only differenced by the quality and personal experience you get with personally engraving your seed.

Ultimately, both will get the job done, but if you want the “Ferrari” of recovery seed backups, you check out the CryptoTAG HERE on their official site. I also will be writing a review on this device shortly, so keep your eyes our for it.


https://www.youtube.com/watch?v=FyEqb9Z8leE

Conclusion


So, Is the Bill Fodl better than Cryptosteel? Personally, I would say yes. They have some small differences that makes it better and easier to setup and use. For instance, all of the lettered tiles are all the same size and shape, so installing them into the steel plate makes it much easier for them to slide into place. The overall user experience was easier and I was able to fully set it up in about 20 minutes or so, which isn’t bad at all. It took almost half the time of the CryptoSteel setup.

This device is also the cheapest (legitimate) stainless steel recovery seed backup starting at only $79 and an unprecedented 1-year warranty and a 125% money back guarantee. If you’re getting your first recovery seed backup and you’re on a budget, I would recommend you start here. It’s a quality, durable device and it gets the job done whilst making you feel like a true crypto enthusiast.

I actually have 2 of these, but I also have multiple hardware wallets and have a lot more at risk at stake, but I’m a bit of an extremist. Overall, You can’t go wrong with the Bill Fodl, and if you have more than $79 worth of crypto, then you definitely NEED this to be safe. Don’t be sorry when it comes to your crypto savings.


***CLICK HERE TO BUY BILL FODL FROM THEIR OFFICIAL SITE***


What do you think? Do you have a metal recovery seed backup? If so, which one do you use? Comment down below!


Cheers,


The Crypto Renegade


NOTE: This post may contain affiliate links. This adds no cost to you but it helps me focus on giving as much value as possible in every single post by being compensated for recommending products that help people succeed.


Trezor One Vs. Trezor Model T – Is One A Clear Winner? (2020)

In this article, we are going to unravel the differences between the Trezor One Vs. Trezor Model T. I have been personally using each of these devices for years. The Trezor One first made it’s debut in August 2014 and was the first commerical hardware wallet out on the market. It paved the way for many competitors and started a revolution with a mission of keeping your private keys safe and completely offline in your control.

The Trezor Model T was unveiled in 2018 after years of development and tweaking. I was a reseller at the time and I received one of the first batch of devices to test out and even actually did a tear down and compared the internals and was very interested to see the differences between the two devices. Before that occurred, I tested it with many different coins and was a very pleasant experience.

They have even added a large number of “Native” apps (or coins) that were supported with their web-based wallet, and they will continue to do so for years to come. But does that make the Trezor One irrelevant now? Stay tuned for the whole article to find out!


First Look And Unboxing


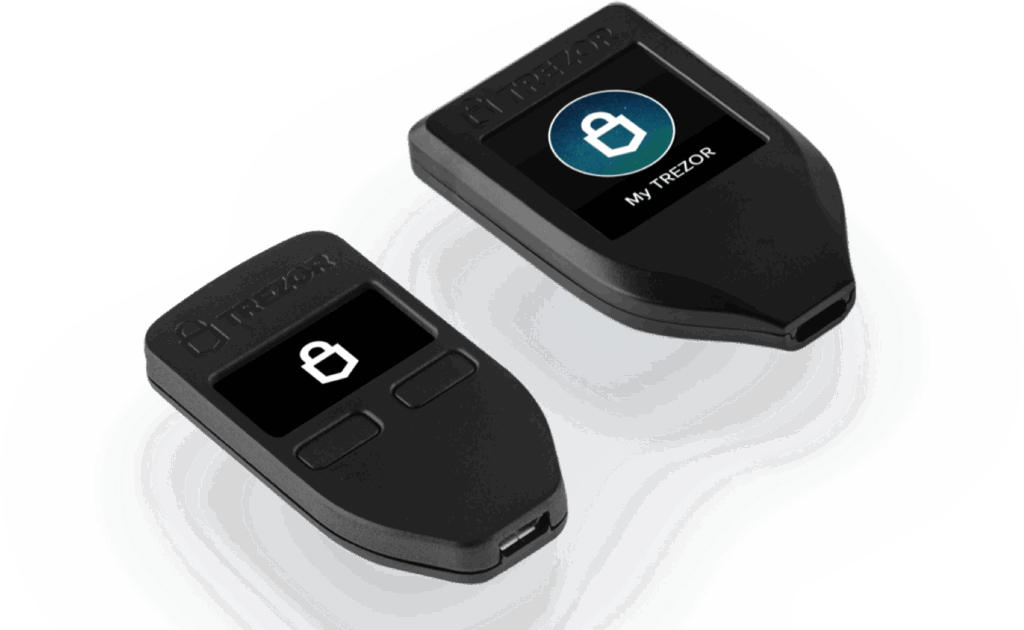
Trezor One Vs. Trezor Model T

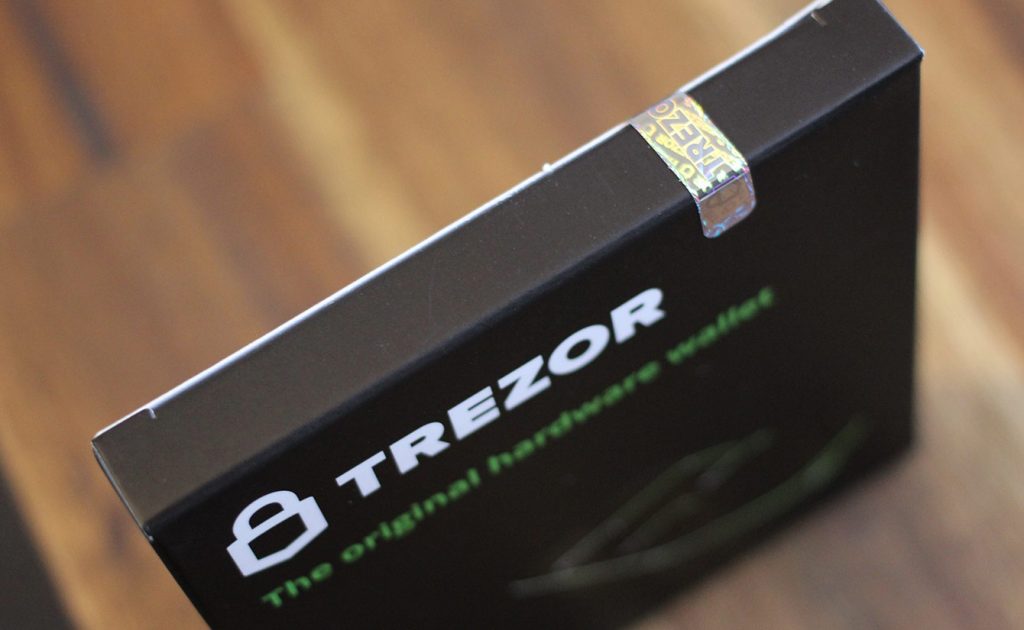
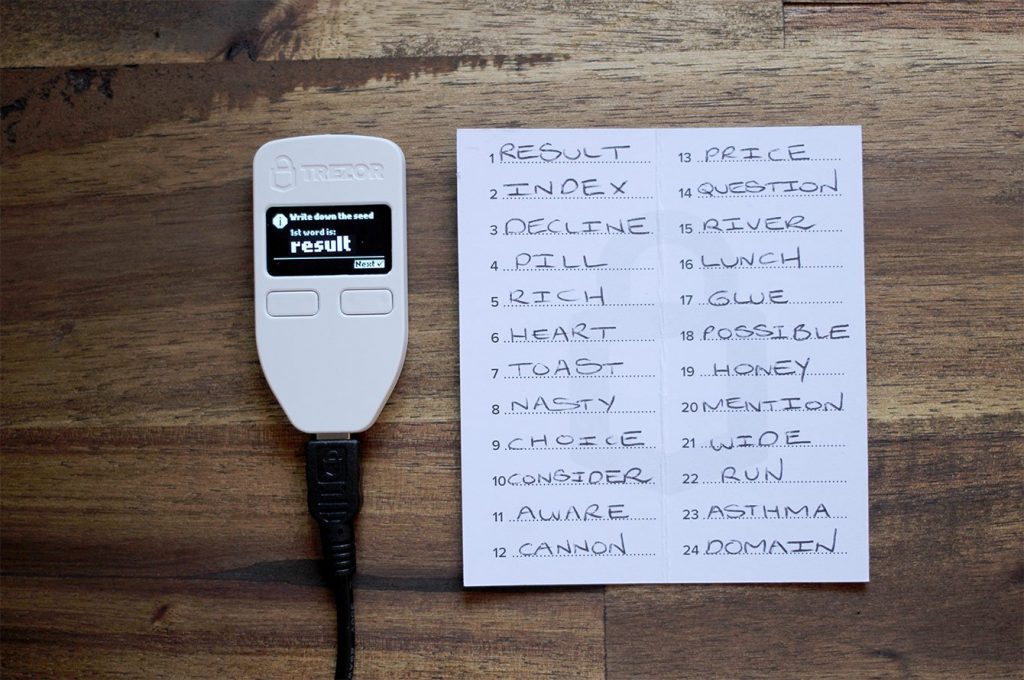
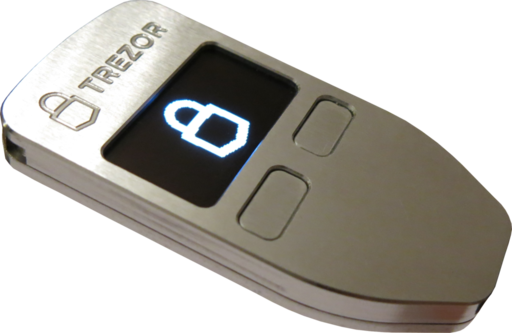
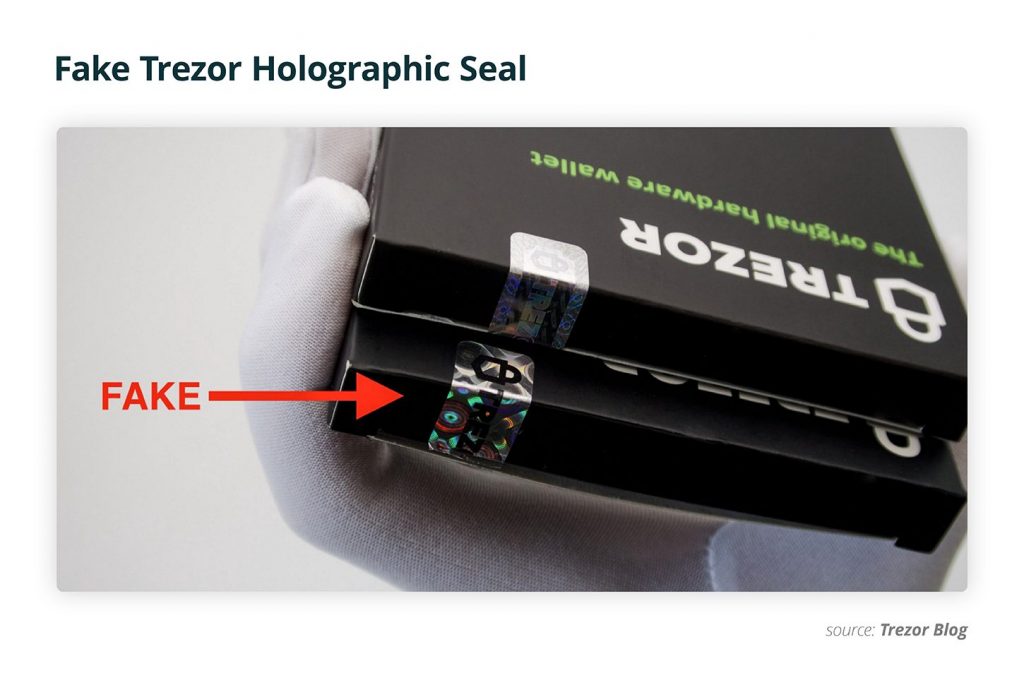
The Trezor One is a very simple device and yet, the complexity comes in it’s security packaging. Let me explain. The device is in the shape of a small plastic trapezoid with 2 mechanical buttons and a small OLED screen. When you first receive the device, it comes in a small plastic box and you will see that it has 2 holographic anti-tampering stickers on the box covering the seals. One is on the top and one is on the bottom.

This was put in place to not only show if the box has been tampered with, but also has some visual clues that reveal it’s authenticity. This was put in place as a preventative measure and to avoid supply chain attacks. Additionally, it has some vert strong adhesive glue that is designed to destroy the box in it’t opening.

This self-destructive box again is a secondary security measure designed to reveal if the box has been tampered with it’s journey from the manufacturer to the end user. In my opinion, it’s very simple, yet clever solution, as MIM attacks and supply chain attacks are a very real threat.

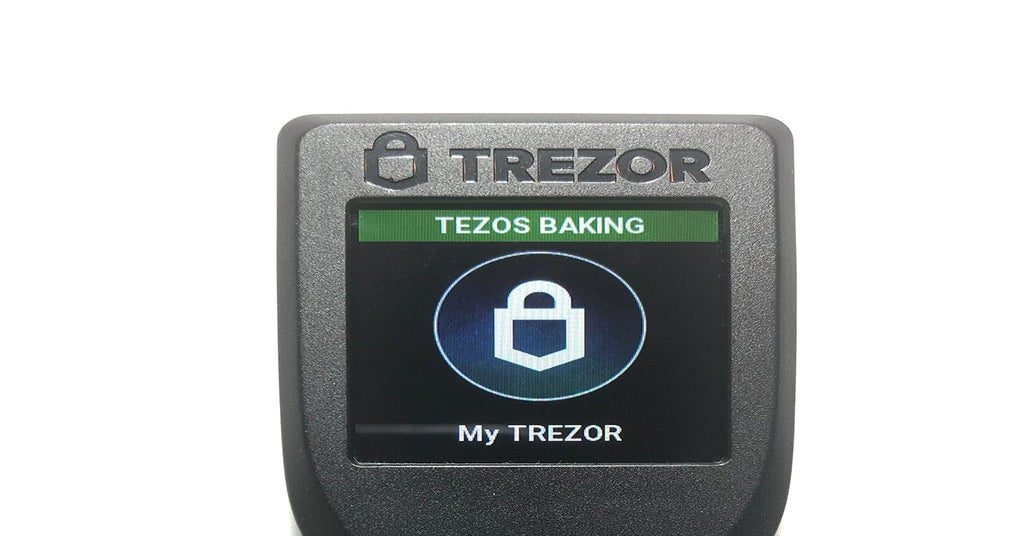
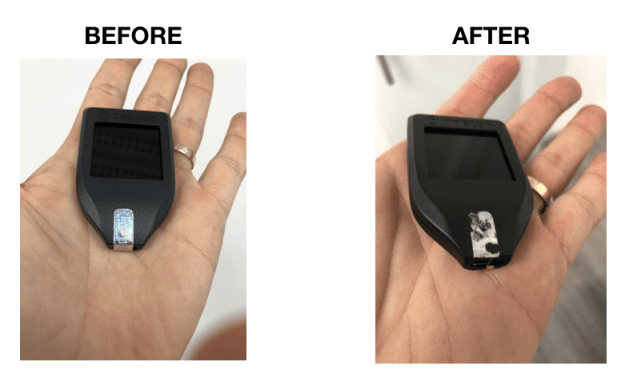
The Trezor Model T, however decided to go with a much simpler box design that does not include these contraptions. Why? Well, they decided that evidence of tampering really only matters on the device itself, so they forewent the process of securely packaging the device. Instead, they decided to put a very adhesive and protective seal on the device itself over the USB-C port.

The one downfall of this design, is that it when you unbox it and peel off this protective seal, it leaves a very sticky and noticeable sticky residue that is VERY difficult to take off. And as the device is plastic, it cannot be removed or scraped off, as it will completely scratch the device. I touched on this on my dedicated review of the Trezor Model T that I wrote HERE.


Trezor One Vs. Trezor Model T: Supported Coins


This in my opinion is the large differentiator between these two devices and the distinction will ultimately sway most of you in deciding which device you should buy. Both coins have a lot of the same coin support, at least in terms of the larger cap coins and what is supported in third-party wallets, such as MyEtherWallet or Mycelium.

I will note the primary difference here is noted in the available “Native Apps”. What are Native Apps? These are the wallets built directly into the web application that Trezor has built to manage your coins directly on your platform. They are very easy to use, manage, and view in a very easy manner. This is NOT the case when you deal with certain coins that are only supported with 3rd party integrations. As a result, they are fundamentally better for the end user.

I am going to list a handful of what I consider the notable coins that are supported by these native apps and differences. I will not overlap these and point out some coins that are only supported by the Trezor Model T, and NOT supported on the Trezor One. Note this below:

Trezor One Supported Coins:

Dash (DASH)

Digibyte (DGB)

Vertcoin (VTC)

Namecoin (NMC)

Dogecoin (DOGE)


Trezor Model T Supported Coins:

Ripple (XRP)

Ethereum (ETH)

Chainlink (LINK)

Holochain (HOT)

USDcoin (USDC) *Stable Coin*

This is just a brief example of some popular coins that are supported on each wallet natively using Trezor’s web app. Ther are some additional coins that are supported on the Trezor Model T through 3rd party wallets that will not work with Trezor One, such as Tezos (XTZ) and Monero (XMR).

This is important to know, as there are over 1,000 ERC-20 tokens that are expanding into native app support by Trezor Model T, that is not going to be supported by Trezor One, however, using some 3rd party wallets, will still support them, if you’re so inclined.


Trezor Security


I will briefly touch on this here as most of this was gone over in depth in my Trezor One Review. As mentioned above, the physical security measures and differences are pointed out in its physicality of it’s packaging, but I will point out that there is one feature that I particularly like that is available on the Trezor Model T.

Both have an option to set a “passphrase” or a 25th seed word when accessing your account. This means that if/when you have to use your recovery seed to restore your device, you not only need the 24 seed words in the correct order, but you will need to enter in the custom passphrase in order to fully restore your wallet.

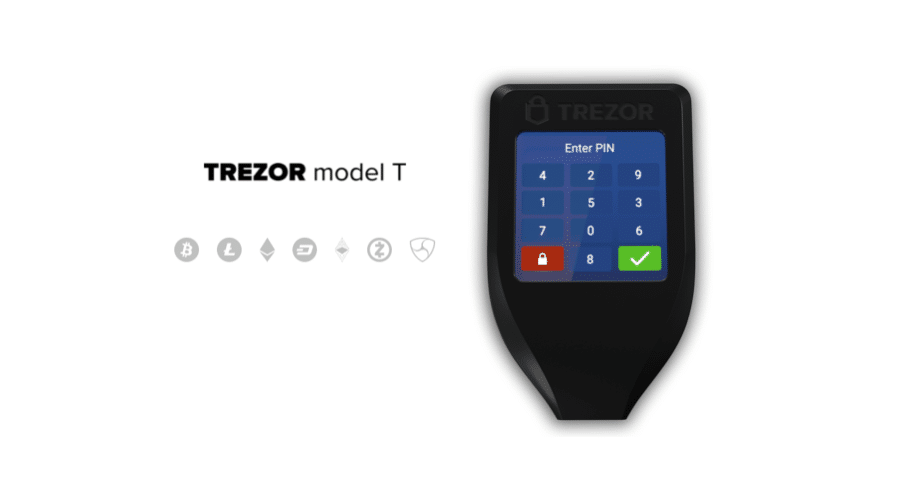
Here is the main difference on the Trezor Model T. Because the device has a touch screen, both the PIN and the custom passphrase (if you enable it) will be entered in on the device itself, and not the web app. Why is this important? Well, in the event that your web app is compromised or you have a key logger on your computer, you have a separation from your device and what you enter on the web app to unlock or access your device.

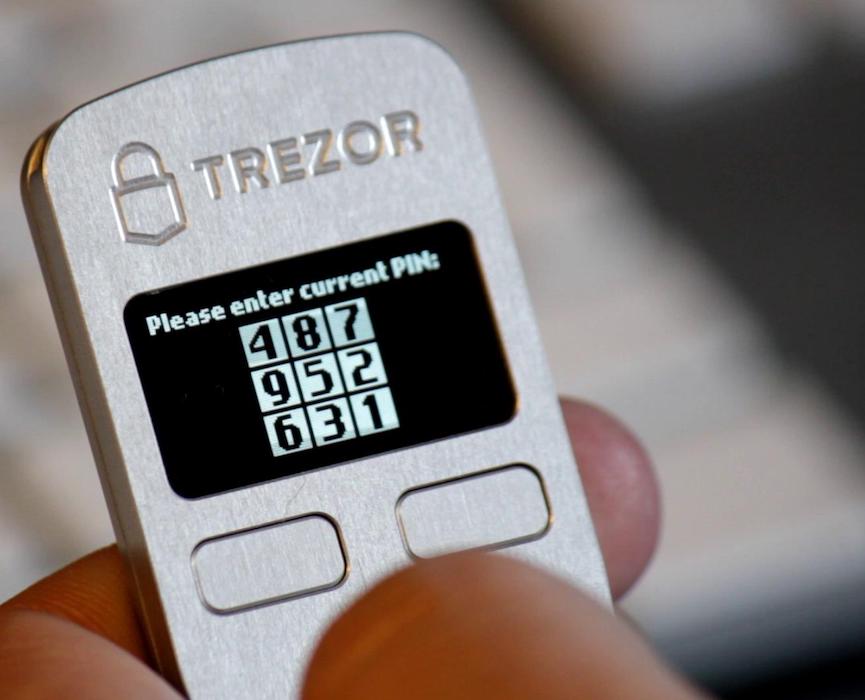
The Trezor One requires you enter in your PIN on the web application with a number grid, since it does not have a physical touch screen that allows you to enter it in on the device. Pretty cool if you ask me.


Trezor Prices


The Trezor Prices are pretty significant in terms of the difference between the Trezor One and the Trezor Model T. As we’ve discussed above some of the differences of coins that are supported and the overall design, the prices are pretty notable as these devices cover a lot of the same ground. The current prices are listed below as of this writing:


Trezor One – 69 Euros or Approx. $78.00 USD

Trezor Model T – 149 Euros or Approx. $169.00 USD


This means that for the almost the same level or security you can get the original hardware wallet, the Trezor One for $91 less than the upgraded model. However, you have a lot more room to grow in terms of coins and token supported natively on the Trezor Model T, which means it will be more “future proof” and more expandable than the original.

Setup And Recovery Seed Differences

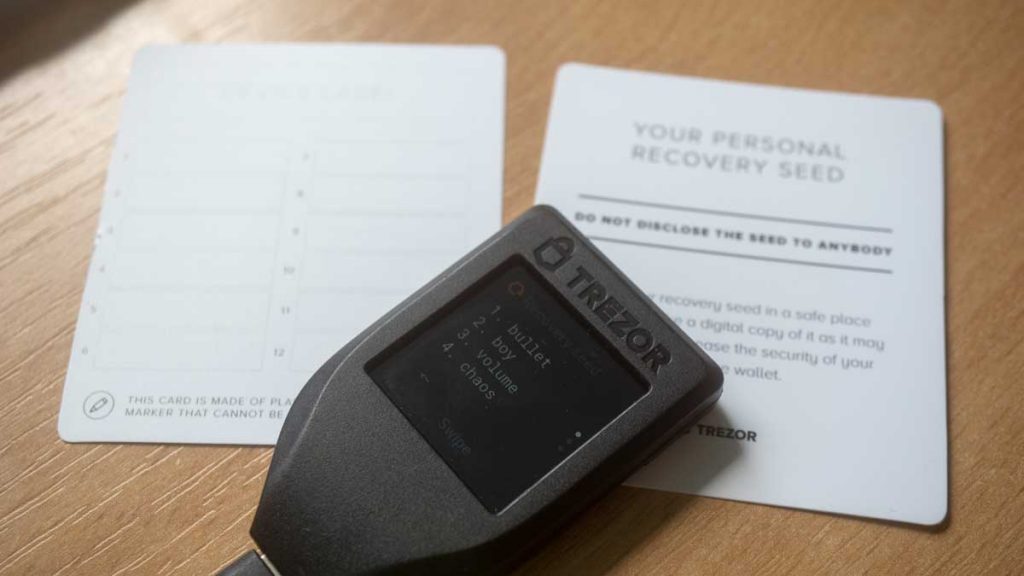
The primary differences in the two devices is fairly straightforward. The Trezor One includes a 24-word seed phrase when setting up and backing up your device. The Trezor Model T includes a 12 word seed phrase when you receive the device and that limitation is indicated on the included recovery seed cards in the box.

Why did they make this difference? Whether you choose a 12, 18, or 24 word seed phrase, it ultimately includes the same level of security. Additionally, since the Trezor Model T includes the option to set a custom passphrase you can enable on the device in addition to requiring the PIN, they felt that it was extra secure that way, although it’s optional.


Trezor Vs. Ledger Vs. KeepKey


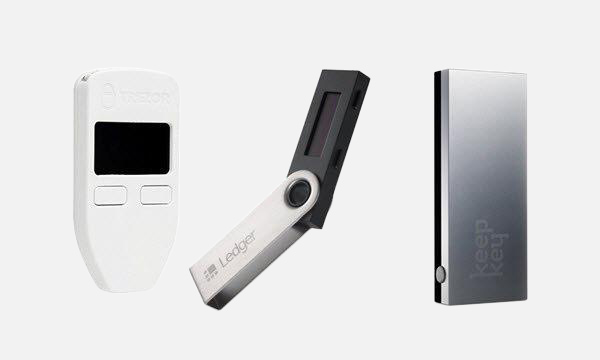
The highest end device of these 3 is going to go to the Trezor Model T. Not because of the price tag, but because of the extra security features and the vast coin support that is way ahead of the competition currently. The Ledger Nano X is on par with this and even allows you to manage your device via bluetooth and can hold up to 100 apps directly on one device, which has it’s own edge over the rest.

The KeepKey is one of the oldest devices, but it is the “nicest” in terms of it’s physical presentation as it’s a very solid and sleek device that just “feels” premium. Additionally, it is going to release their new platform very soon that integrates directly with native coin support and non-custodial trading directly on the hardware wallet, that makes it probably the safest trading experience I have seen yet. I have tested this platform and have a detailed review of it HERE.

Additionally, if you want more details on the key differences of these devices, I will link that specific article here that I wrote entitled “KeepKey Vs. Trezor Vs. Ledger – Which One Should I Buy? (2019)“.


Conclusion


So which one is better? Well, to be honest there is no clear cut answer and it varies for each person. Here’s how I would put it to you. Are you going to be getting more and more into crypto and expanding into more altcoins as time goes on? If so, go with the Trezor Model T. If you are simplistic and you just want to “HODL” Bitcoin, Ethereum, and maybe a few other larger cap coins for a long period of time? Then Just got with the Trezor One.

The truth is, both will continually receive security and firmware upgrades as time goes on and will be very usable for years to come. In this professional’s opinion, it really comes down to any specific coins you want native support for (VERY IMPORTANT) and if you plan on expanding. You can’t go wrong with either one, as they have stood the test of time and I’ve used both for various coins over the years and I’ve seen the positive changes in both devices. Click the links below to buy The Trezor One and The Trezor Model T below directly from their website!


***CLICK HERE TO BUY THE TREZOR ONE WALLET***


***CLICK HERE TO BUY THE TREZOR MODEL T WALLET***


What do you think? Would you choose the Trezor One Or Model T? Which one do you use? Sound off below!


Cheers,


The Crypto Renegade


NOTE: This post may contain affiliate links. This adds no cost to you but it helps me focus on giving as much value as possible in every single post by being compensated for recommending products that help people succeed.
Trezor Model T Review – Best Hardware Wallet Yet? (2020)

In this article. I am going to provide you with an in-depth Trezor Model T Review! The Trezor Model T Is the second generation device in the Trezor family and it came with a plethora of upgrades and a new capacitive touch screen for authorizing transactions, firmware updates, and entering in your security pin on the device itself versus the one the web application as with the Trezor One.

I also recently wrote an in-depth review of the Trezor One, which you can find HERE if you’re interested and I will be writing a comparison review shortly between both Trezor models.

Additionally, before I jump into the review of the Trezor Model T, I wanted to point out that I just wrote an in-depth guide on the 5 best ways to secure your cryptocurency in the form of a free e-book. It goes over some basic and advanced techniques to make sure that your crypto is the safest it can possibly be and provides you some tips and tricks to ensure your private keys stay protected forever. You can get that free e-book HERE.

Ok, phew, here we go, let’s get to the full review of the Trezor Model T Below! You will also find an attached video of the unboxing at the end. Let’s do this!


Trezor Model T First Impression And Unboxing


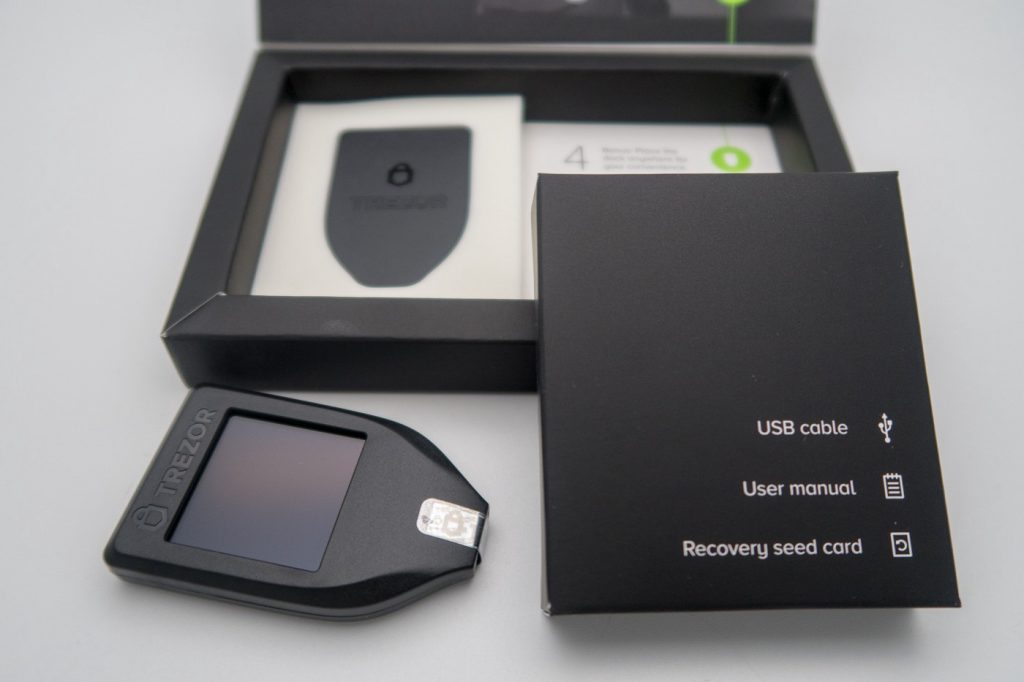
So when you first get the box in your hand, you’ll notice that it is substantially different than the Trezor One box. First off, it’s covered in plastic and then is a slide out box that separates into two parts (see video below). When you go to open the box, you’ll notice there are no security seals or holographic tapes on the box to promote anti-tampering and has a window on the box that shows the device in a display window.

It has a magnetic clasp that you can use to open the box where you will find the device sitting on a foam cushion that is surrounding the device and a blank black box with a green sticker right next to it.

Here is the reason why there is no security tape on the box when you first go to open it (unlike the Trezor One). The security tape is on the device itself covering the USB-C port on the bottom of the device and they have decided to bypass the security measures on the box. I understand why they made they choice and wanted to narrow down the security to the device itself from any side-channel attacks or MIM attacks. However, when you peel off the security tape, it purposefully leaves a very sticky residue on the device and it since it’s plastic, it is very difficult to get off without scratching it.

The touch screen is sleek and very bright, which is nice, but it is also very small. Even if you have average sized hands, you may have difficulty with entering in the pin-code and/or additional “25th seed phrase” as a password on the device. More on that later.

This is one of my biggest complaints as the device itself doesn’t look that good when you’re ready to use it and it it has a sticky film when you hold it and un-plug and plug in your device. I will say that this is the worst of your worries as the device is pretty solid and has a lot to offer in terms of security and functionality. The final thing that I noticed this device upon opening it up is it has a very sleek SD card slot that can be used for signing transactions offline and import them.


***CLICK HERE TO BUY TREZOR MODEL T FROM THEIR OFFICIAL SITE***


What Coins Are Supported?


I will leave a link to the official list of what Trezor has listed on their website HERE, but I will point out a few of the coins that this device supports that you don’t really see on other hardware wallets that stands out to me and is what I use on my device as well. The primary coins

NOTE: This device hold over 1,200 coins in total, but the majority of them have 3rd party wallets developed by either the development team for that coin specifically that can be connected, OR major third party wallets that hold hundreds of ERC-20 tokens, such as Mycelium and MyEtherWallet.

Just to name a few coins that are now supported on the beta wallet or (native app wallet) on the web app that is easy to manage and is unique to this hardware wallet is: HoloChain (HOT), Lunyr (LUN), Chainlink (LINK), and Polymath (POLY). They are adding Native support to new coins and tokens all the time, so make sure to keep your eye out for it!


Does this work with any 3rd party wallets?


Yes. Although I personally recommend using the native apps on the web application on the Trezor website. Why? Because it’s easily managed and located in one place. Additionally, because this wallet for managing is web-based you can easily take this wallet and manage your coins on the go without having download multiple wallets and setting it up and import it when you may not have access to the same computer.

This is safe to do because this hardware wallet is completely resistant to malware or any other viruses that may be present on unknown or public computers.

In regards to 3rd party wallets, there are a handful that are known to work and integrate directly with the Trezor Model T (and Trezor One) such as: MyEtherWallet, Mycelium, MyCrypto.com, and the newly announced partnership between Trezor and Exodus!

I will be doing an in-depth review and video on the Trezor user experience with the Exodus desktop wallet very soon! It looks very promising and they have hyped it up as a much better user experience than the standard web-based wallet, so we will see that review in the next week or so.


How Do I Set It Up?


Once you take the device and remove the security tape and unbox your recovery seed cards and the USB cable, you will open an internet browser tab and visit Trezor.io/start. This will take you through the process of downloading the “Trezor Bridge“, which is a small downloadable executable file that is required to use your wallet with the web app. Once you download this, you will follow the prompts on your device to download and install the latest firmware update.

NOTE: As a security measure, Trezor ships the device with no firmware installed to ensure that your device is activated properly when you set it up for the first time and the proper firmware will be activated with Satoshi Labs signed firmware. This ensures that no one can alter or tamper with the firmware of inject any malware in the device after it is shipped before it lands in your hands.

Once this firmware update is done, it will ask you on the web app to create a new wallet (recommended for new users) or import an existing wallet. You would only choose this option if you are trying to restore a previous wallet from on older recovery seed.

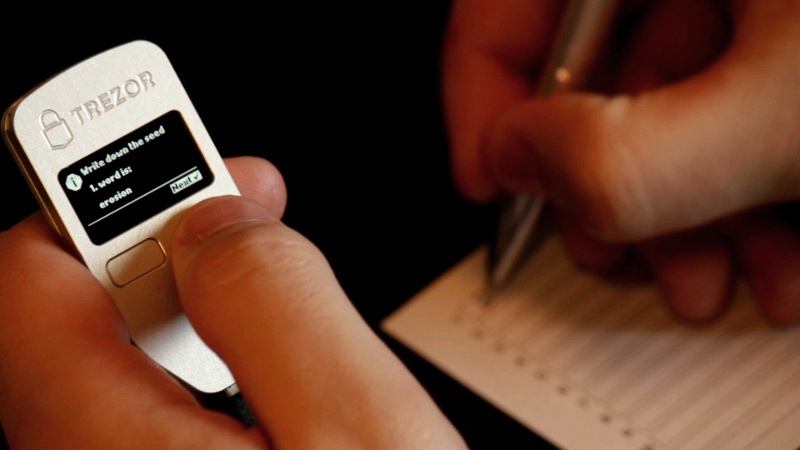
If you choose the new wallet option, it will prompt you to write down your recovery seed words on the card provided to you in the box and the words will display in succession on the device and will have you verify them in the correct order before the device is fully activated.

Once this has been created and you have decided if you want a 25th seed word as an extra layer of protection (I STRONGLY recommend that you do), you can now send, receive, and view the available coins in your dashboard!


***CLICK HERE TO BUY TREZOR MODEL T FROM THEIR OFFICIAL SITE***


Does It Support Monero And Ripple?


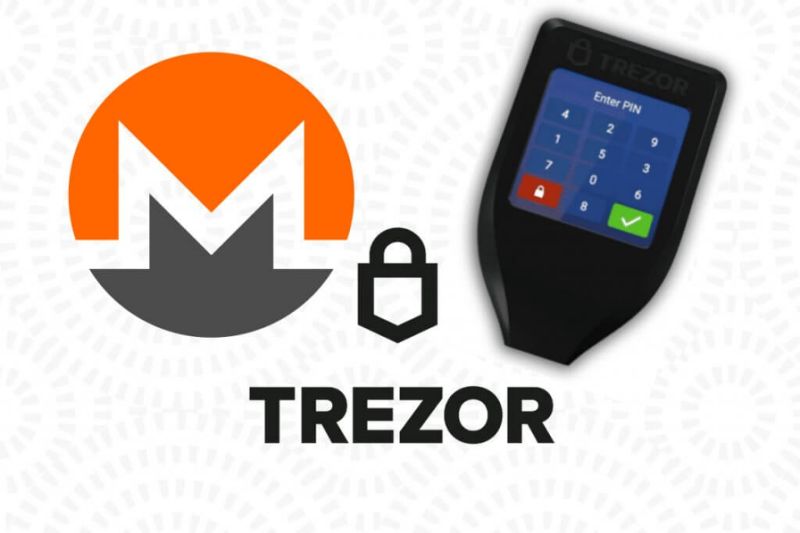
Yes and No. Let me explain. First, let’s talk about Monero support with the Trezor Model T. Although the firmware is setup to support this coin, there is currently no wallet that has been setup to use with it yet. This is currently in development and you will need to periodically check the Github page setup by Trezor to monitor the status of this, or await the newsletter that Trezor will inevitably send out once this is activated.

NOTE: I recently wrote an article HERE that goes over the 4 best Monero wallets, which includes hardware wallet support with the Ledger Nano S, albelt with the integration of a 3rd party wallet.

What about Support for Ripple (XRP)? Yes. Ripple has an easy to use native application that has recently been added to the web app for Trezor Model T. I have personally used and tested this and I am pleasantly surprised on how easy it was to manage. In fact, it was an even better experience than I’ve used with Ledger in regards to XRP.


How Does Trezor Model T Compare To Ledger And KeepKey?


Overall, this is a higher end wallet that supports many more coins than either Ledger or KeepKey. Additionally, it offers a touch screen for ease of use and independent security that is managed on the device itself. This includes being able to type in a custom password of “25th seed word” to access the device whenever it is connected or having a wallet being restored, in addition to the standard security PIN code.

This also means that it is more expensive. The current price of the Trezor Model T is 149 Euros or approximately $169 USD at the time of this writing. Ultimately, it depends on how many coins and WHICH coins you are specifically looking to hold on your hardware wallet.

If you are a beginner and you only want to hold the main higher market cap coins, like Bitcoin, Ethereum and Litecoin, then you really just need an entry level device, like the Ledger Nano S or The Trezor One. keepkey wallet

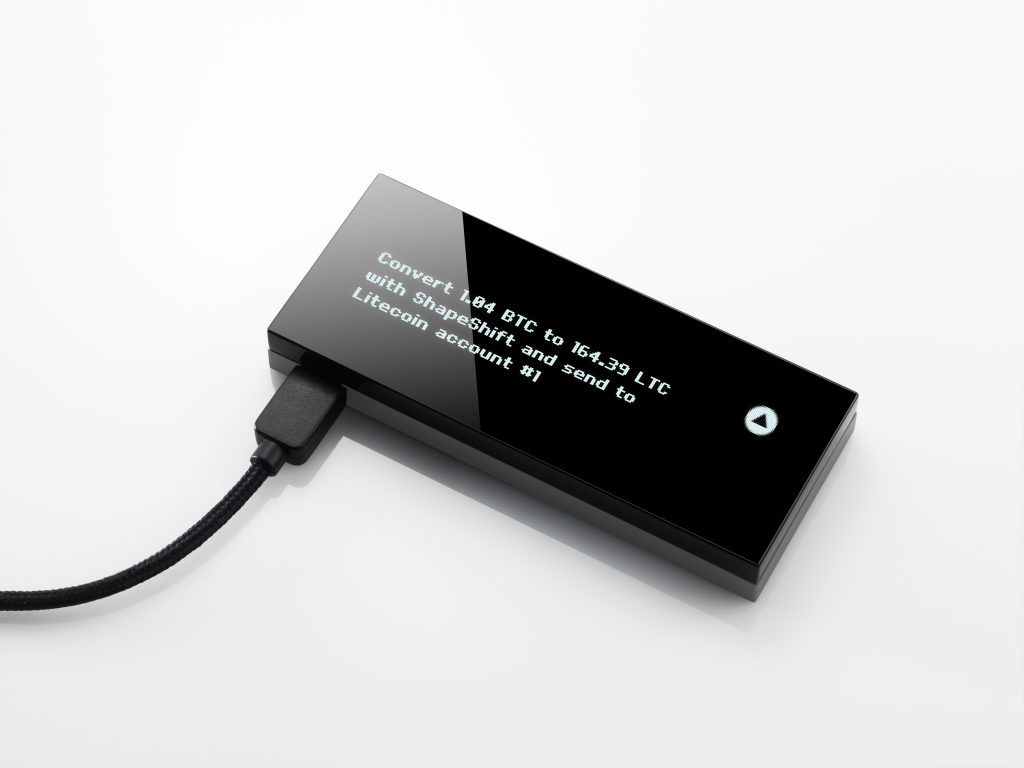
However, If you want to be able to trade and swap coins directly on your hardware wallet without exposing your private keys, I would recommend going with KeepKey. They have a new platform (currently in beta, check out my in-depth review HERE) that allows you to trade on the ShapeShift platform while having your device connected and you never have to give up your private keys. This will be key if you are trying to be primarily trade, instead of just sit and hold.


***CLICK HERE TO BUY TREZOR MODEL T FROM THEIR OFFICIAL SITE***


Conclusion


So what’s the bottomline? I would recommend the Trezor Model T to anyone that is trying to expand their coin selection and are smart enough to know they need to keep their coins on a hardware wallet at ALL times. This wallet will continue to expand it’s coin support and they have already grown this support dramatically over the last 12 months. If there is a coin in particular that it currently doesn’t support on it’s web app, there is a STRONG chance that it is either supported with a 3rd party wallet you can integrate this with, or it will be natively supported very soon.

If you are just looking to buy and hold Bitcoin and Ethereum (or even Litecoin), you really don’t need a device as nice as this. At least not yet. As you understanding of this technology and your taste for new altcoins grows, you will probably want to expand into a new wallet, and in fact, it’s quite normal for people to have more than one active hardware wallet at once to diversify and protect themselves as well.

Additionally, you may want to consider using a device like CryptoTAG, as a metal backup to your recovery seed card, if you are holding enough funds that you want to have a backup of your backup. This makes sense for anyone that is holding more funds on their hardware wallet, than they actually paid for the wallet. This is actually not that much, so make sure you download the free e-book I mentioned above, so you can get the free tips above.


What do you think? Is the Trezor Model T the best hardware wallet out there today? Let me know in the comments below!


Cheers,


The Crypto Renegade


NOTE: This post may contain affiliate links. This adds no cost to you but it helps me focus on giving as much value as possible in every single post by being compensated for recommending products that help people succeed.
Bitpay Card Review: My Experience Living Off The Debit Card (2020)

In this review, I am going to cover my experience living off of the Bitpay Card. In 2017, I was hired to build a cryptococurrency hardware wallet for a prominent crypto company and I was paid directly in bitcoin and bitcoin cash. I needed to find a way to pay my bills with crypto in this legacy financial system that would not allow me to pay directly for my rent, groceries, gasoline, etc… This is when I did thorough research and discovered there were several crypto debit cards that existed.

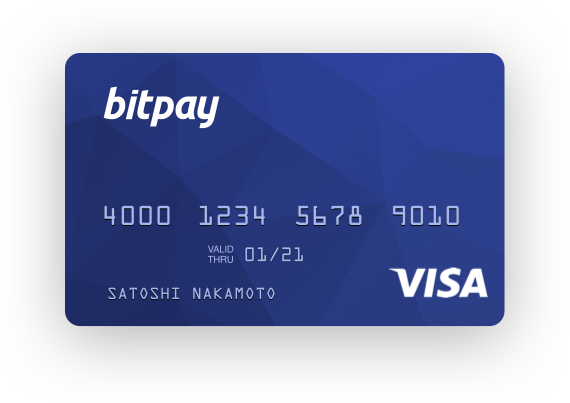
bitpay card

Which one should I use? Which one works best and has the lowest fees? How much does it cost to get one? How easy is it to use? These were all questions I had when I first started researching these options and after doing a few weeks of research, it was clear that the best solution was to use the BitPay card.

I was already using BitPay to accept payment through this website when it was used for ecommerce, but I was unaware at the time that they had a crypto to Visa cash option that works for personal use. I was already happy with the experience I had using them as a payment processor, so I figured I would try their debit card for every day use. My experience and FAQ’s are detailed below!


HOW DOES THE BITPAY CARD WORK?


So here are the basic process of using the card from start to finish:

  1. Go to Bitpay.com/card and request a card. It will cost $9.95 as a one-time fee after you’ve filled out the application, which requires your personal details to send the card to.
  2. Wait 5-7 business days for the card to arrive (if you’re in the U.S.) It can take up to 21 business days for other countries.
  3. Once the card is received, call the 1-800 number on the front sticker to activate and set a PIN. Then go to your account to enter in the secret code sent in the letter to activate.
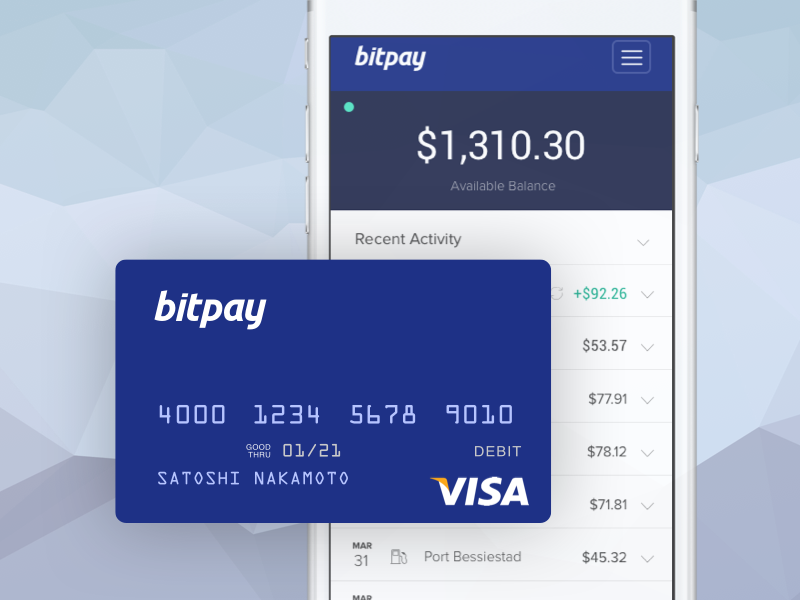
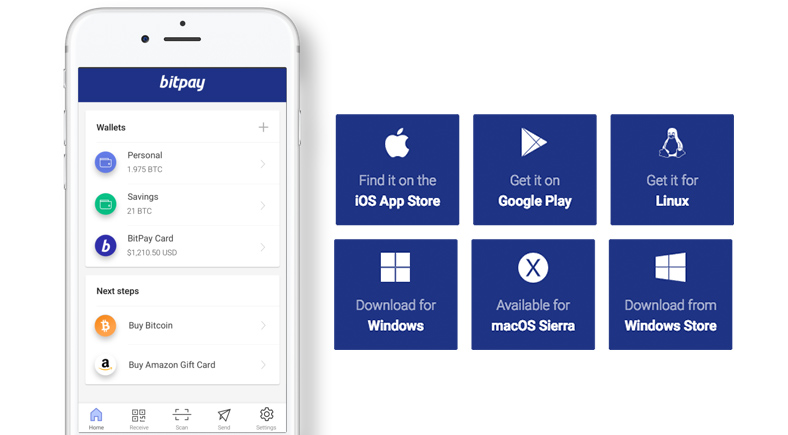
  4. Once activated, you are able to see your card available for crypto loads from the Bitpay mobile app and start using.
  5. Choose the wallet (either bitcoin or bitcoin cash) that you want to load onto the card, the choose the USD amount you want to add, then authenticate with your password and Face ID (if one is setup for extra security on the Bitpay wallet app)
  6. You’re done, money is loaded instantly and you will receive a confirmation email once you have completed the “Slide to Pay” function on the final screen.
  7. You are free to use this Bitpay card online, in person at any merchant that accepts Visa, or at the ATM.

My experience has been one that has shown this to be not only a very simple process, but also one that you can load money on in a pinch if you need to top off or load up your card because you don’t have enough funds. I have also experienced an issue where the card was declined once, but it was the merchant who I was using who said his bank was declining it. Once I called Bitpay’s card services, I was able to have them unblock it on their end and it went through perfectly.


WHAT CRYPTOCURRENCIES CAN I USE WITH THIS BITPAY DEBIT CARD?

Currently, the only two cryptocurrencies that can be used to load up the card on the prepaid Visa is Bitcoin (BTC) and Bitcoin Cash (BCH). There have been plans to add more in the future, but for the time being, these are the only coins that are supported on Bitpay’s platform for debit card usage. There have been rumors that Ethereum (ETH) may be the next coin added for further altcoin support, but that has not been confirmed by the company.


HOW DO I PUT MONEY ON MY BITPAY CARD?


Once you have the card activated and you have linked your card account online, you will see the card option to “Add Funds” on the Bitpay Wallet App. Once you click on this, you can select the USD amount or toggle to the BTC or BCH side to calculate the exact amount you want to load. This will have you select the wallet you want to fund with in the drop down menu. Once you select the wallet, you will confirm the total and continue with “Slide To Pay” at the bottom, and will load instantly!


(PRO-TIP: If you are concerned about price fluctuation, you can keep your funds on your wallets and only top off the card at the exact moment before you purchase. This gives you flexibility in trying to monitor and maximize the price volatility in your favor!)


CAN I USE THE BITPAY CARD TO WITHDRAW CASH FROM AN ATM?


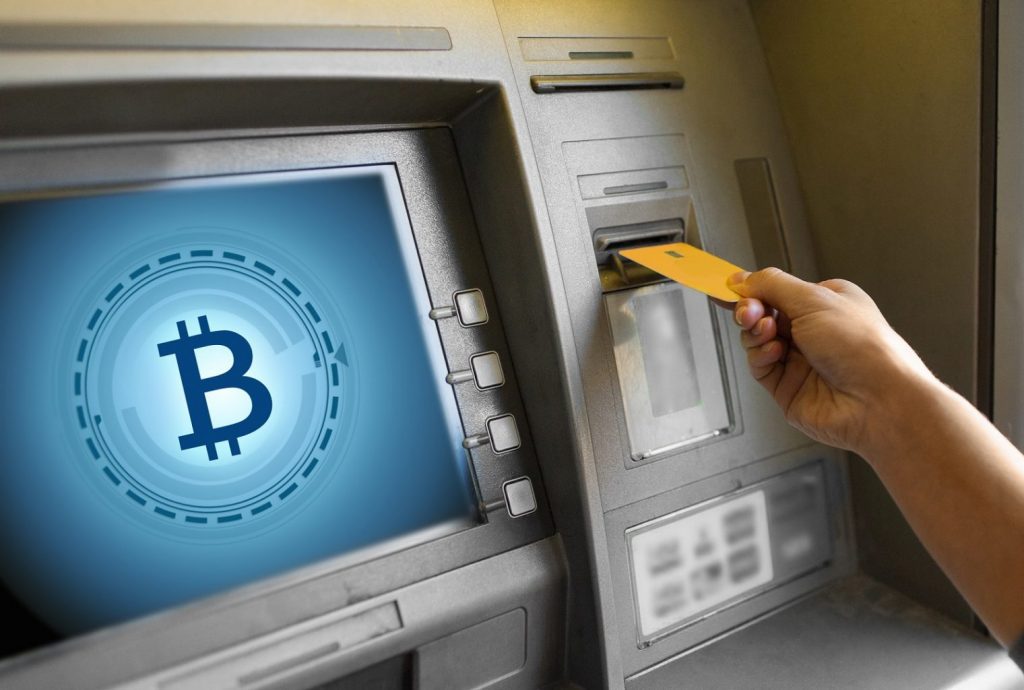
Yes. I have used this in a pinch where a card is not accepted when I went to a concert venue, however, keep in mind you will incur a $5 fee for ATM withdrawals and that does not include any ATM fee’s the machine you are using will incur. In some cases, it is not worth it to use this feature, but it is nice to know you have the option if it’s required.

It is also nice to know that when using a debit option at a merchant, you can easily choose the “cash back” option as a free way to get cash back, but that is usually limited to $100 dollars. This is a work around I would frequently use if I knew I needed to have some cash on hand for certain occasions and is nice to avoid those fees.


CONCLUSION


I was able to successfully use this to make most purchases I needed to make for the past 2 years. There are some bills that people pay that required ACH and will not take a debit or credit card. IN these instances, I was able to use Coinbase to as a crypto to fiat off-ramp, but I avoided using this as much as possible as the fees were not helpful, and I liked the idea that I could use crypto top make payments in the real world, without a hitch.

I also negotiated a way to start paying rent and other bills via Venmo, which was a nice workaround top using ACH. I was so hell-bent on using crypto as a viable payment source to pay my living expenses, that I went out of my way to make this happen. Any funds that I did not load onto my card, I only kept a little of it on the Bitpay wallet app and then kept the savings (as everyone should) onto my KeepKey hardware wallet.

If you are unfamiliar of the best practices for securing your cryptocurrency the right way, I will leave my link here for my FREE E-BOOK that details the top 5 ways to secure your cryptocurrency, and I recommend giving it a look, as it’s free.

All in all, this was a viable solution to live on, but I understand that some people are unable to use this in their particular country or their particular circumstance. If you live in any European or Asian countries and would like the option to use a crypto debit card, you can also try Wirex.

The Bitpay card is an option that does have a monthly fee, but it primarily used on that side of the world and has a similar user experience. I would recommend using this card for ANYONE that wants an option to “cash out their crypto” in a moments notice that would prefer not paying any exchange fees and needs it to happen within seconds.


What do you think? Are there any better crypto debit card options that you have used? If so, let me know in the comments below!


Cheers,


The Crypto Renegade


NOTE: This post may contain affiliate links. This adds no cost to you but it helps me focus on giving as much value as possible in every single post by being compensated for recommending products that help people succeed.
KeepKey Review: Is It Better Than Ledger? (2020)

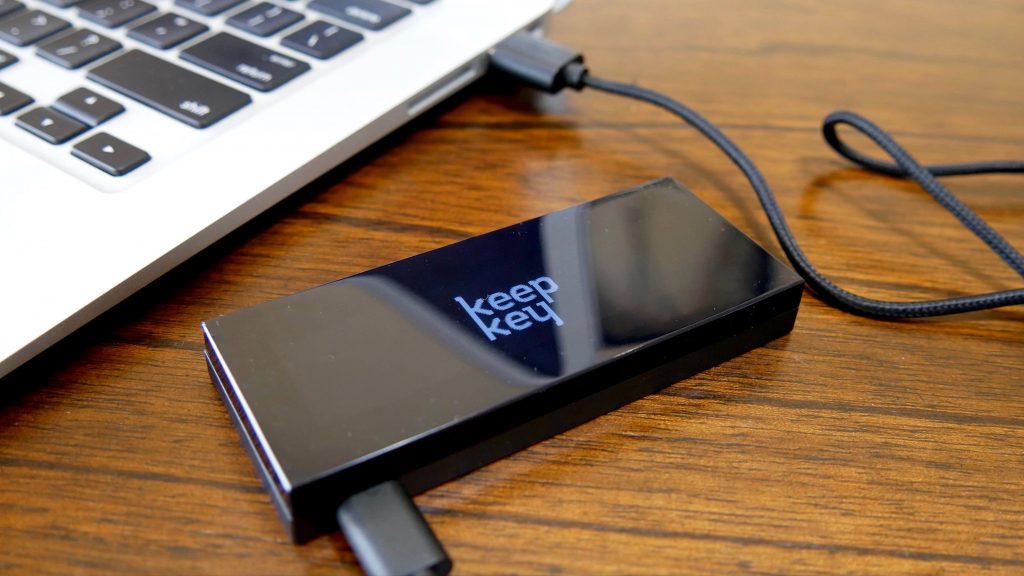
In this article, I will give you a deep dive into the KeepKey wallet and provide you a review of my personal experience thus far with a keepkey review. I started using KeepKey about 3 years ago and boy has it come a long way. At first it was the simple bitcoin wallet that only supported about 6 coins, and was the easiest wallet to use at the time (including Trezor and Ledger). It’s selling edge was the physical wallet itself which is a nicer aluminum finish and clean and upscale look and significantly differed from the flimsy plastic Trezor and Ledger presented you out of the box. keepkey review

As a result, it was priced as such, and many people would not pay more for a device that only supported 6 coins. In 2018, it started adding 3rd party wallet support, like MyEtherWallet and MyCrypto.com and ERC-20 tokens. In this review, I will go over what has changed since then and ultimately if this wallet is the best choice for you or not.

I also recommend you download my free e-book that I just wrote that gives you some expert tips on how to secure your cryptocurrency and ensure you are protected for the next bull run. You can click the link above to gain access now, and it will only help you on this crypto journey. Addtionally, I recently wrote a detailed review on the new ShapeShift platform, that will have elements of it woven into this review as they both utilize the KeepKey wallet to operate. Let’s get started!


CLICK HERE TO BUY KEEPKEY FROM SHAPESHIFT’S OFFICIAL SITE DIRECTLY


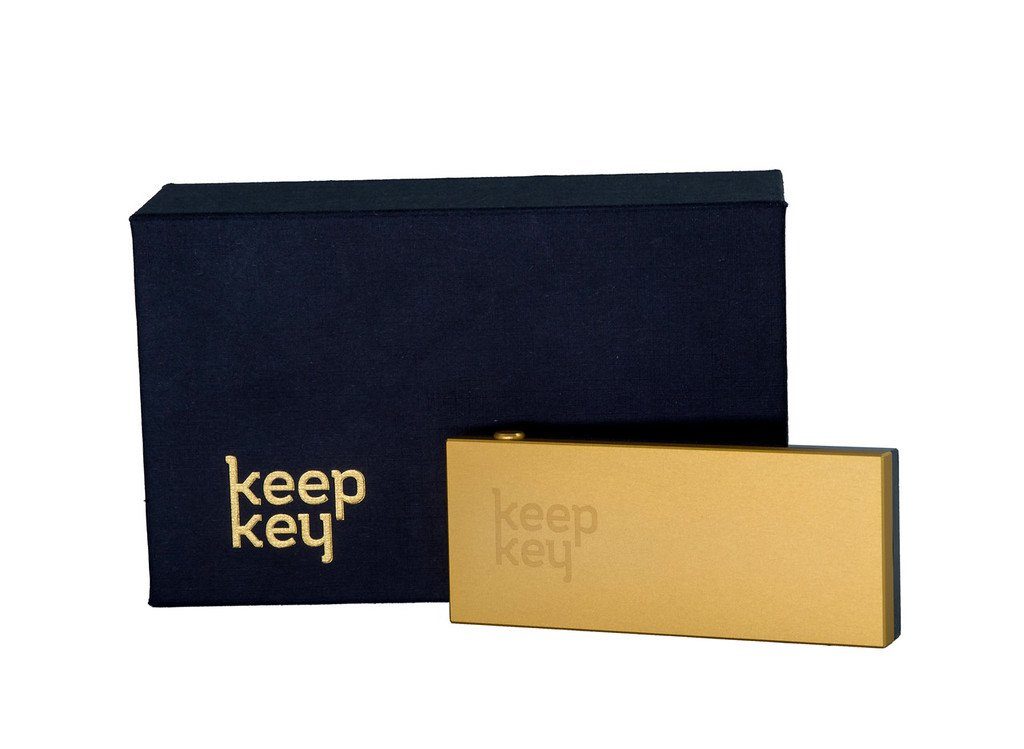
KEEPKEY REVIEW: WHAT COMES IN THE KEEPKEY BOX?

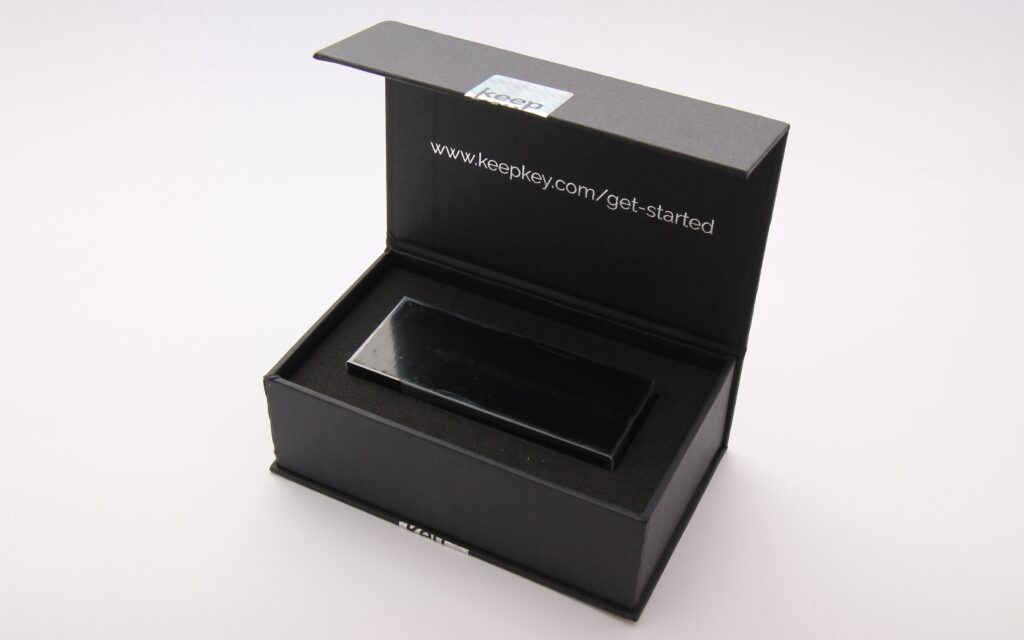
First off, they have a really solid presentation. The box is a quality box and is sealed by an anti-tamper sticker to indicate if the box has attempted misuse or access to it. Secondly, it comes with the following items in the rectangular apple-esque box:


-Nylon Woven USB to Micro USB cable

-2 Recovery Seed Cards

KeepKey Hardware

-Getting Started Guide


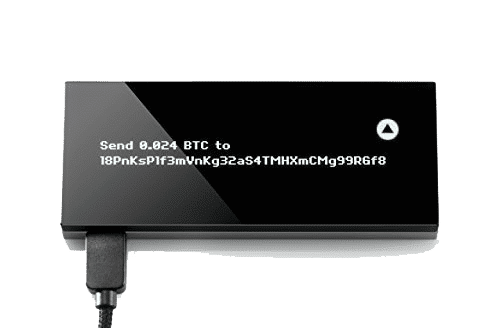
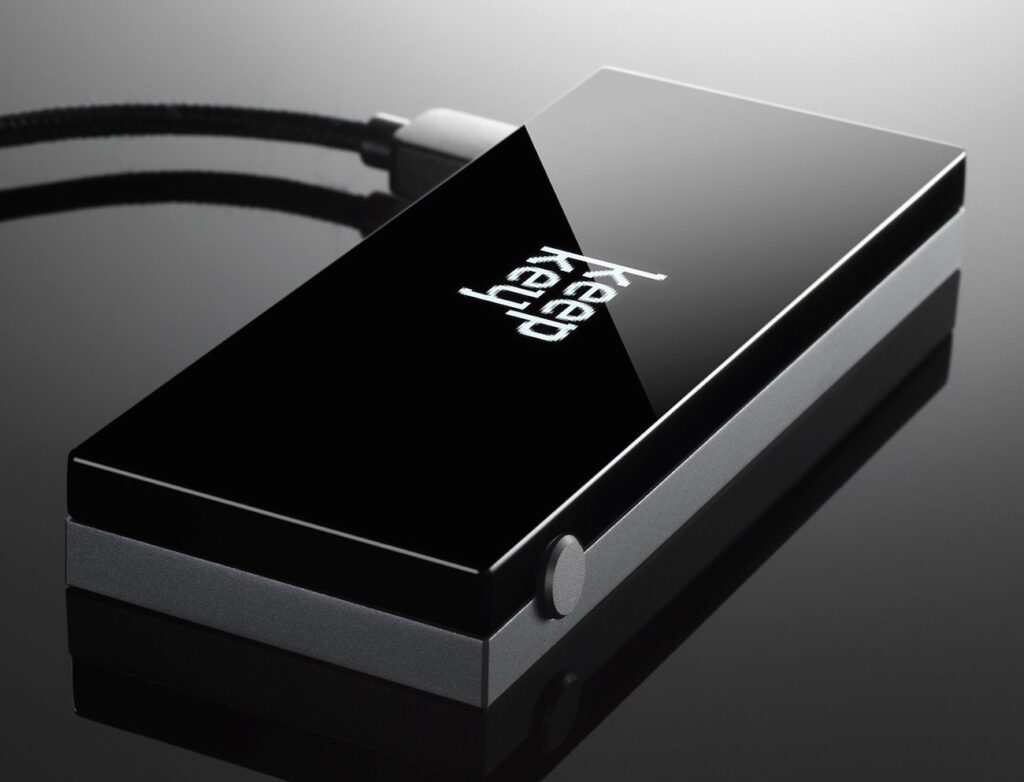
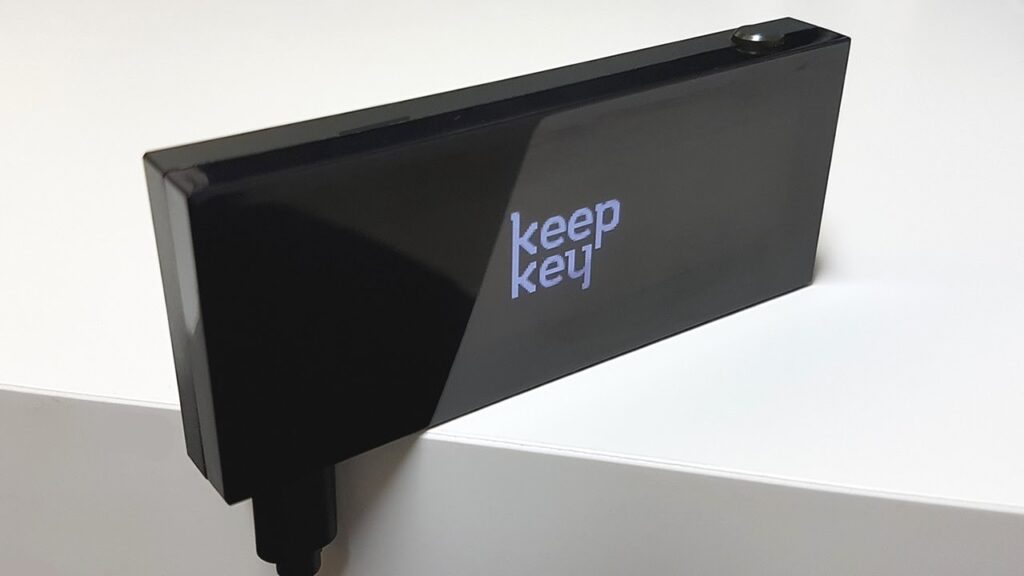
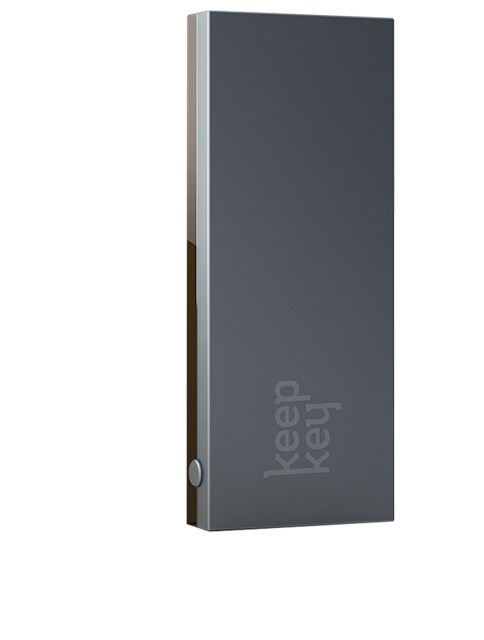
The device itself is rectangular and only has one singular button on the top right used for signing and authorizing transactions. This is why it can be defined as the simple bitcoin wallet and is mechanical in design. Overall, this is a non-nonsense wallet that is made up of solid, sturdy construction and is physically larger than the Ledger and Trezor wallets.


CLICK HERE TO BUY KEEPKEY FROM SHAPESHIFT’S OFFICIAL SITE DIRECTLY


KEEPKEY REVIEW: WHAT COINS ARE SUPPORTED?


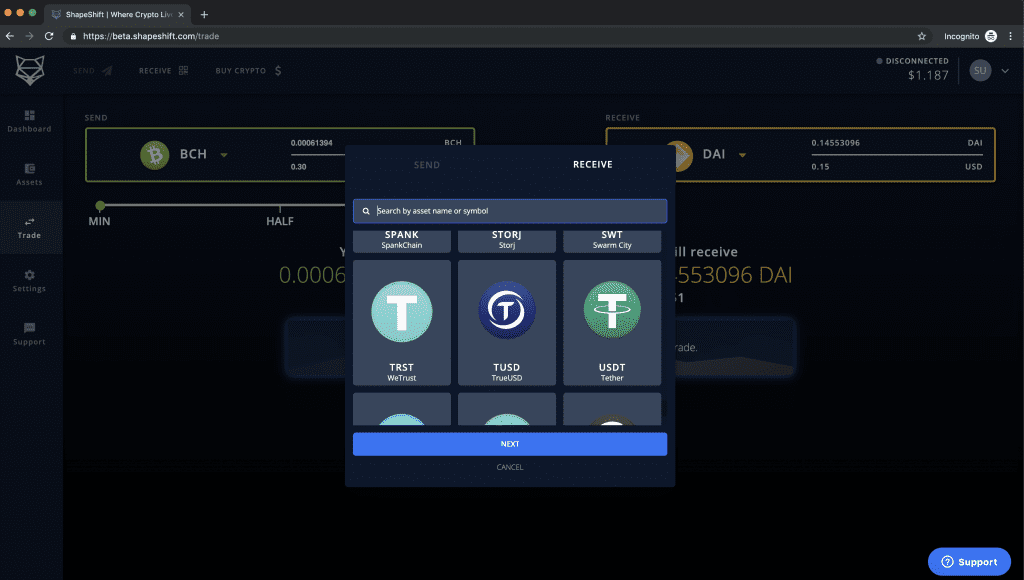
Natively, this wallet in the current beta form supports over 40 assets with more on the way! Here is a current list of assets that are supported right now.  Now let’s get into the nitty-gritty. For years, KeepKey only supported: Bitcoin, Litecoin, Ethereum, Namecoin, Dogecoin, and Dash. For a hardware wallet that needs to compete in this market place, that needed a serious upgrade.

Luckily, they have been making some AMAZING changes and not only added a ton of ERC-20 Support, but more importantly, they are revamping their entire platform to have one fluid, seamless application that integrates all of their core services (See my previous post for details on this). This is extremely powerful, and a decision that I believe will catapult them ahead of the competition. They are currently in a closed beta, and it is expected that they will be releasing this later in 2019. Stay tuned for news on this.

Some of the notable coins that have been added are:

-DigixDAO (DGD)

-Binance Coin (BNB)

-Dai (DAI)

-Maker (MKR)

-TrueUSD (TUSD)


CLICK HERE TO BUY KEEPKEY FROM SHAPESHIFT’S OFFICIAL SITE DIRECTLY


KEEPKEY REVIEW: HOW TO SETUP THE DEVICE

This information will be outdated soon, but I will leave a link to the current setup and initialization of the device as of June 2019 for most people here. I am more interested in talking about my experience with their new unified platform that will be released to the public shortly. Essentially, once you take the KeepKey out of the box and plug in the USB, it will prompt you to download the firmware updater and initialization steps once you login to your account. Currently, this is done on beta.shapeshift.com.

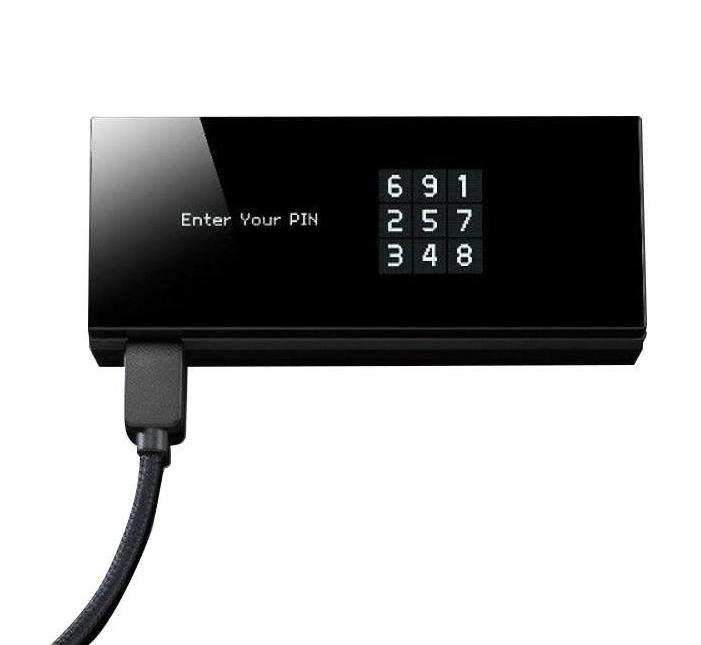
Once you have updated the firmware by plugging it in and holding down the single mechanical button as you disconnect and re-connect, it will process the update for you very quickly, usually within about 30 seconds. From here it will connect your KeepKey and there will be an animation in the top right of the dashboard letting you know it’s current status and then prompt you for the pin that is randomized every time it’s plugged in to ensure you have proper access to the device.

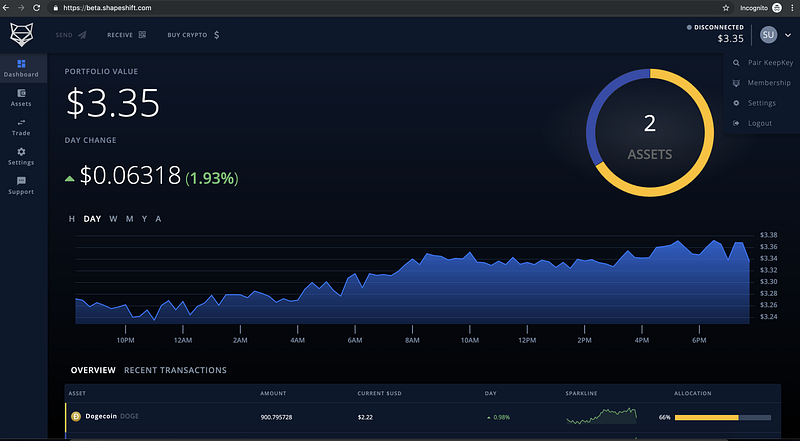
Once you’re validated, you can trade, view your accounts, and send/receive from your existing accounts and it’s a seamless process that will prompt for your PIN again to make any changes. I will leave a photo below for you to see the dashboard layout and it is very clean.

CLICK HERE TO BUY KEEPKEY FROM SHAPESHIFT’S OFFICIAL SITE DIRECTLY


KEEPKEY REVIEW: SECURITY


KeepKey has a true random number generator (TRNG) for it’s PIN interface for extra physical security. In addition to offline storage, KeepKey’s PIN code and number randomization makes sure that

1) Your wallet is secure from physical theft.

2) That a hacker couldn’t steal bitcoins from your wallet with malware.


KeepKey is an HD wallet, meaning your entire wallet can be backed up with the 12 words generated on setup. 12 words is the default setting, although KeepKey supports seed lengths of 18 and 24.

The seed is generated using entropy from both the device itself and the computer used for setup. The seed is generated offline on the KeepKey and displayed on the device’s screen. The device’s offline screen makes sure the seed is never displayed on an internet-connected device.

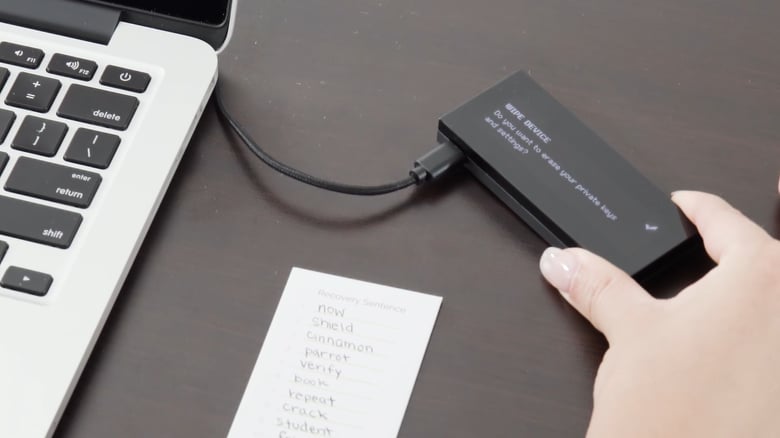
You can recover your wallet using the backup seed if your device is lost, stolen, or damaged. Recovery can be done in this new beta platform, but it has yet to be released on the current version. Make sure to keep multiple backups of your seed and use a metal recovery seed backup for extra protection.

The wallet’s screen allows you to sign and confirm the transaction on the device itself, so you can verify the address matches when sending on the web app and the device to prevent unauthorized bait and switches, but does not prevent phishing attacks.


CLICK HERE TO BUY KEEPKEY FROM SHAPESHIFT’S OFFICIAL SITE DIRECTLY


KEEPKEY AND SHAPESHIFT: USER EXPERIENCE (UX)


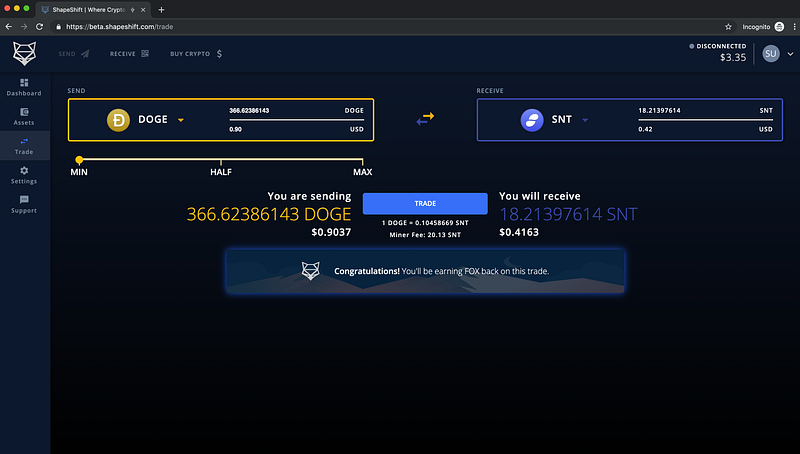
As you can see in the interface, besides the assets list on the left, most people like to trade within the app. All this is done within the app, so your private keys are never exposed online or to a 3rd party, which again, makes this new platform EXTREMELY compelling.

Additionally, unlike most exchanges you do not need pre-designated trading pairs that are usually defaulted to BTC. This means you can trade from altcoin to altcoin without having to trade back into BTC first, which will save you a ton on trading fees.

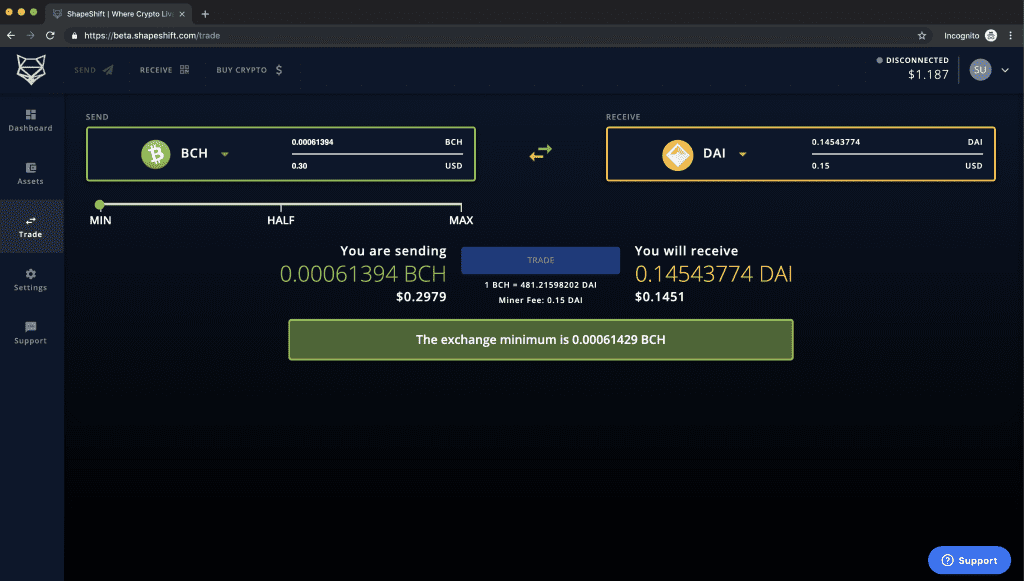
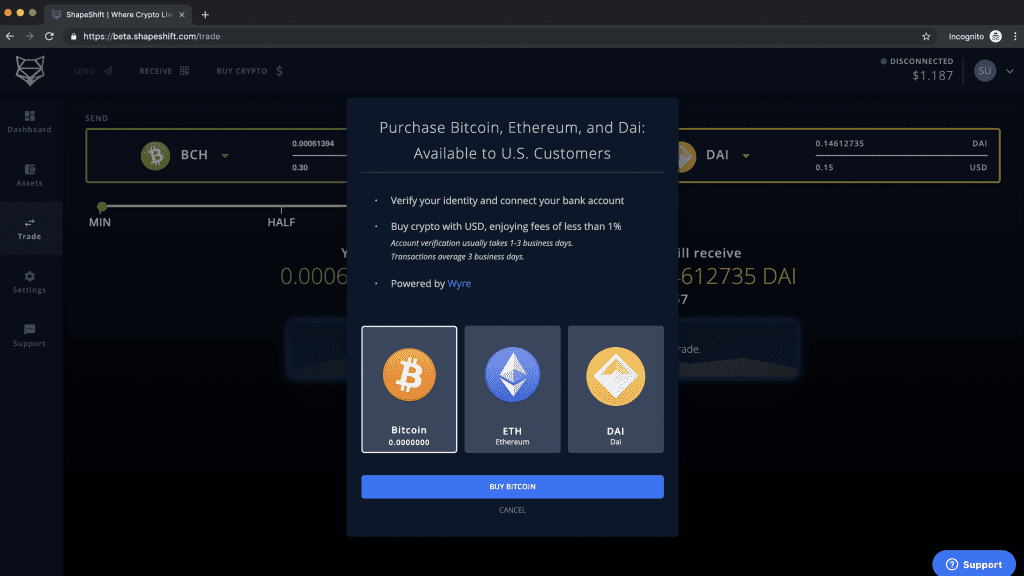
You can also buy crypto directly in the app via Wyre and can do a bank transfer that takes only 1-3 days and with only minimal fees. This is a huge advantage over Binance or other exchanges that charge exorbitant fees to have it done via a credit card and pay a lot more for that instant gratification. Again, when you do this, the private keys will go directly on your KeepKey so they are never exposed to the internet , even for a second.

Finally, here is a glimpse of the assets list. At the time of this screenshot, I only had 2 assets for testing and I haven’t tested this with bitcoin directly and dealt with DOGE and SNT at the time. I have since distributed that between about 9 different assets and have had a good experience with seamless trades that all end up on my hardware wallet, instantly after signing and authorizing a trade.


CLICK HERE TO BUY KEEPKEY FROM SHAPESHIFT’S OFFICIAL SITE DIRECTLY


KEEPKEY REVIEW – CONCLUSION


In the end, I still would take the KeepKey over the Ledger if I had to choose. The Ledger Nano S only holds 3 or 4 apps at the same time, and if you plan to expand or add more, you will have to remove and uninstall what you have to make room. KeepKey does not have this storage issue.

As mentioned above, with KeepKey will not give you this issue and you can trade assets very seamlessly and without the need to give up your private keys over top an exchange. This is a HUGE advantage and not one that any other hardware wallet can compete with. Having a non-custodial wallet is key and having one that is designed to never expose the private keys is even better.

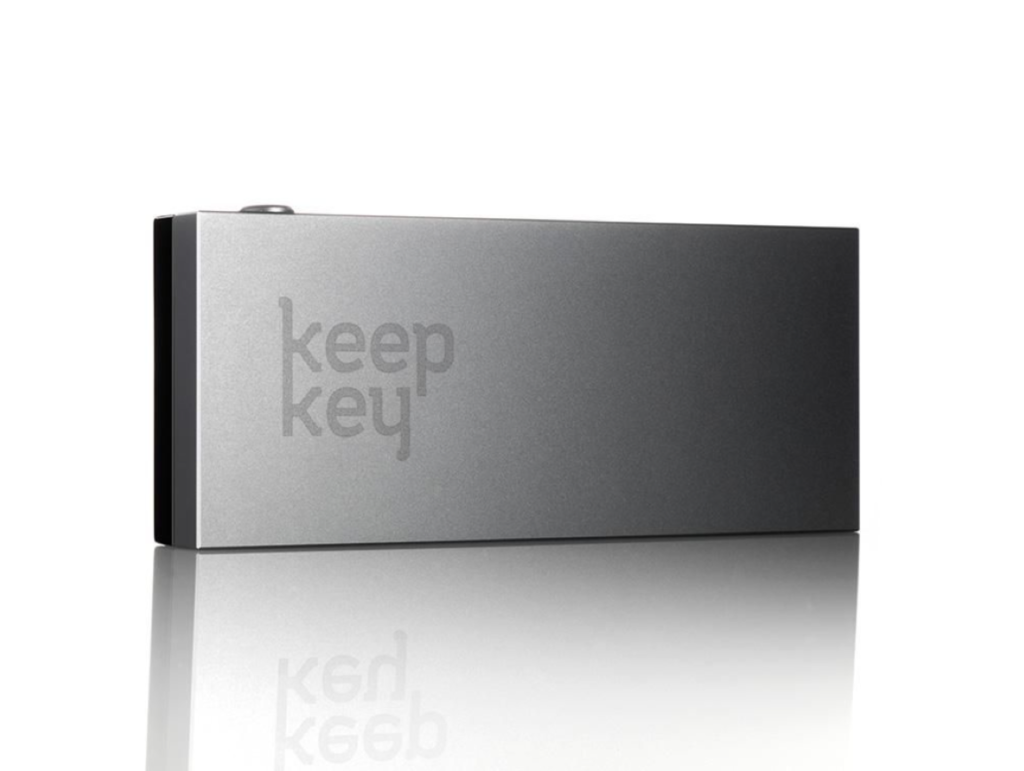
keepkey

The UX has been greatly improved and you can actually initiate a trade, sign the transaction on the device, and then unplug and off you go. You do not need to wait for the trade to take place, which is super convenient. Right now it costs $79 and is only 20 bucks more than the Ledger. It feels like it should be worth twice that since the quality you get is superior. Honestly, if you asked me which wallet should I choose a year ago, and is KeepKey is better than Ledger?

I would’ve said “No”. But, this new user interface and overall experience managing your assets all in one place and one screen, and not needing to install and uninstall several applications is unbeatable. Using their beta and testing their new platform has been a great experience and one that I would recommend to my closest friends and family at this point. Even if you are brand new and don’t have much experience. KeepKey is the best choice for a hardware wallet right now in 2019.


CLICK HERE TO BUY KEEPKEY FROM SHAPESHIFT’S OFFICIAL SITE DIRECTLY


***Leave a comment below and I will message you a coupon for 50% off for a limited time only!***


What do you think? Which hardware wallet is your favorite and why? Sound off in the comments below!


Cheers,


The Crypto Renegade


NOTE: This post may contain affiliate links. This adds no cost to you but it helps me focus on giving as much value as possible in every single post by being compensated for recommending products that help people succeed.
CryptoSteel Review: Indestructible Or Not? (2020)

In this CryptoSteel Review, I am going to cover a few things that you may not see on any other reviews. This mainly consists of the quality of the product and if you have any other options out there to consider for an indestructible recovery seed backup. As a promoter of hardware wallets and complete offline cold-storage solutions, this was a no-brainer for me to try out for myself.

After all, I had recently met with a friend who was moving and found that his recovery seed was destroyed because it was in a toiletry bag and some shampoo leaked and removed the ink and made his backup completely worthless.

It was after he told me about this that I was really glad I already had my CryptoSteel in place and I felt relieved knowing that if my house burnt down or it got flooded, etc… That my precious seed words would not be lost or otherwise inaccessible. I do not wish that fate on anyone, because he had a size-able number of crypto attached to that recovery seed, but that was before any of these devices existed.

I also recently published my FREE E-BOOK that explains the what the five best ways to secure your cryptocurrency are. Give it a free download HERE.

In the next section, I am going to go over, what this product does, who it’s primarily for, and how it compares to some of the other options out there. Stay tuned for the full article!


WHAT DOES THIS PRODUCT DO?


This product is designed for having a backup to your backup, essentially. When you setup any cryptocurrency wallet or bitcoin wallet (hot or cold), you will be prompted to enter in a 12-24 word recovery seed phrase. This is to protect your private keys and to restore your coins to a new wallet in the event that your hardware wallet proves to be lost, destroyed, or otherwise inoperable.

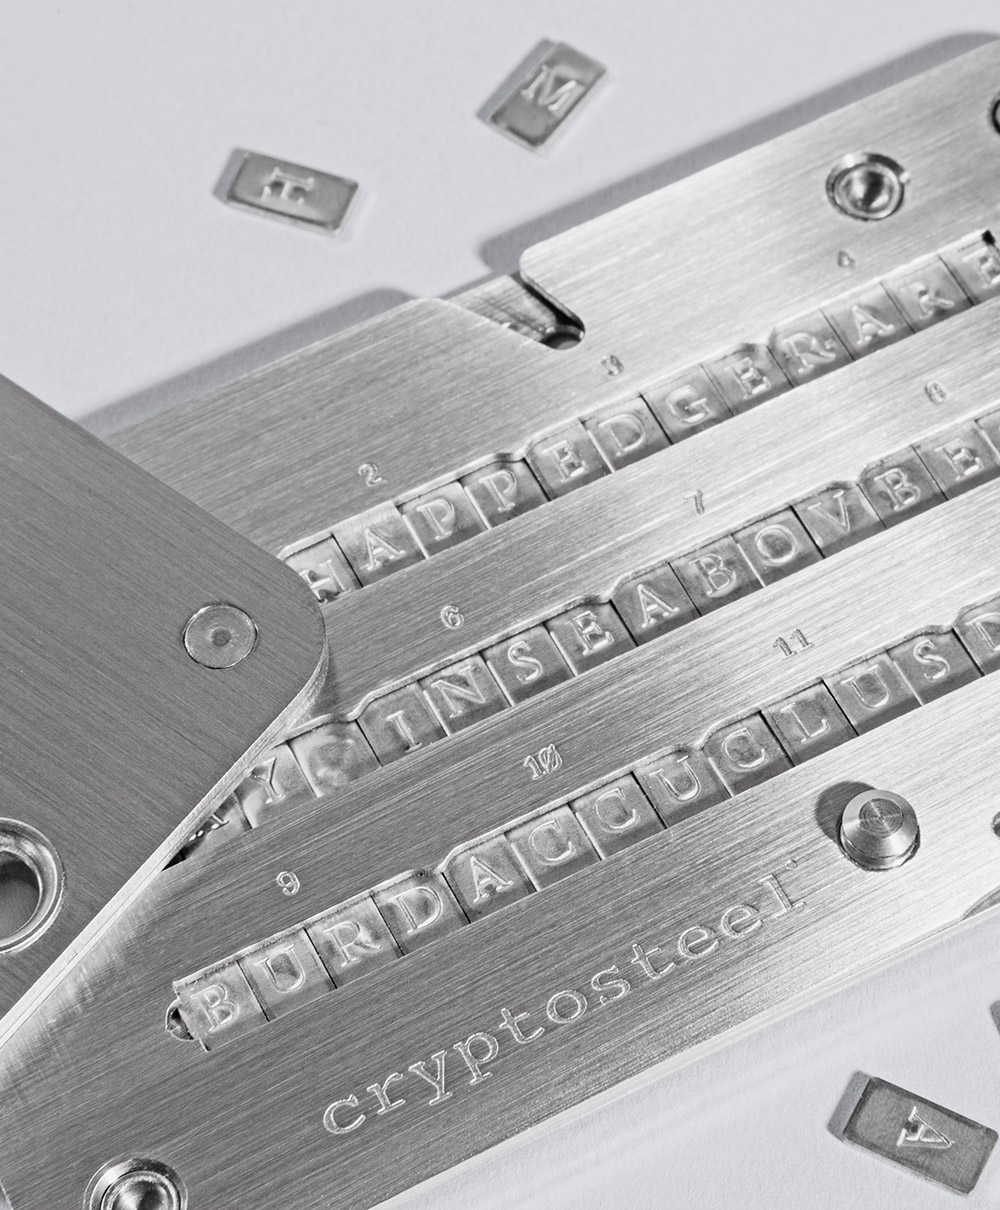
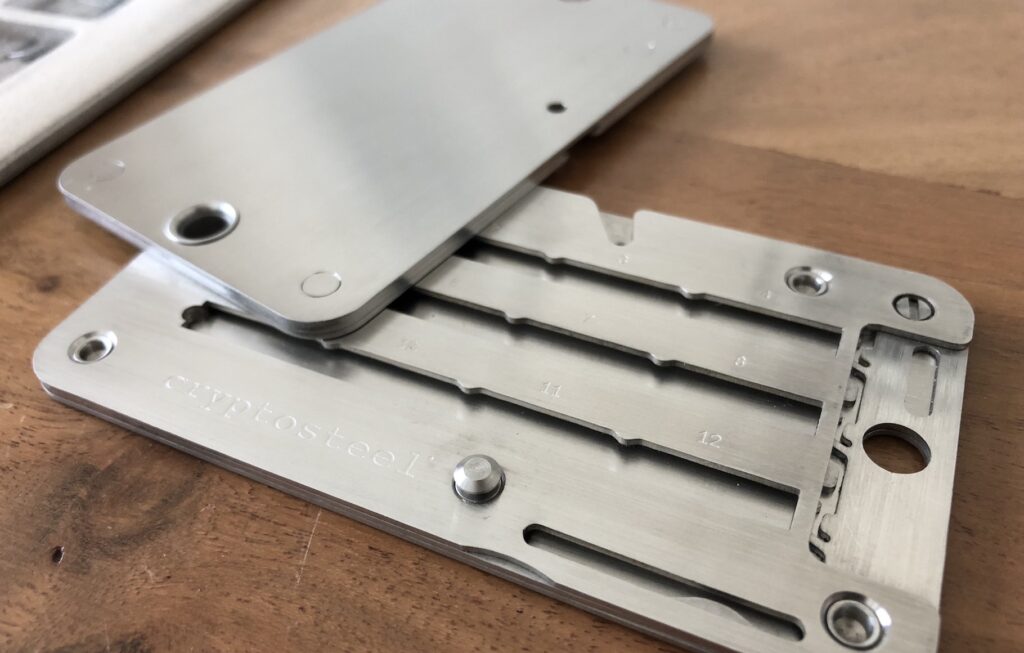
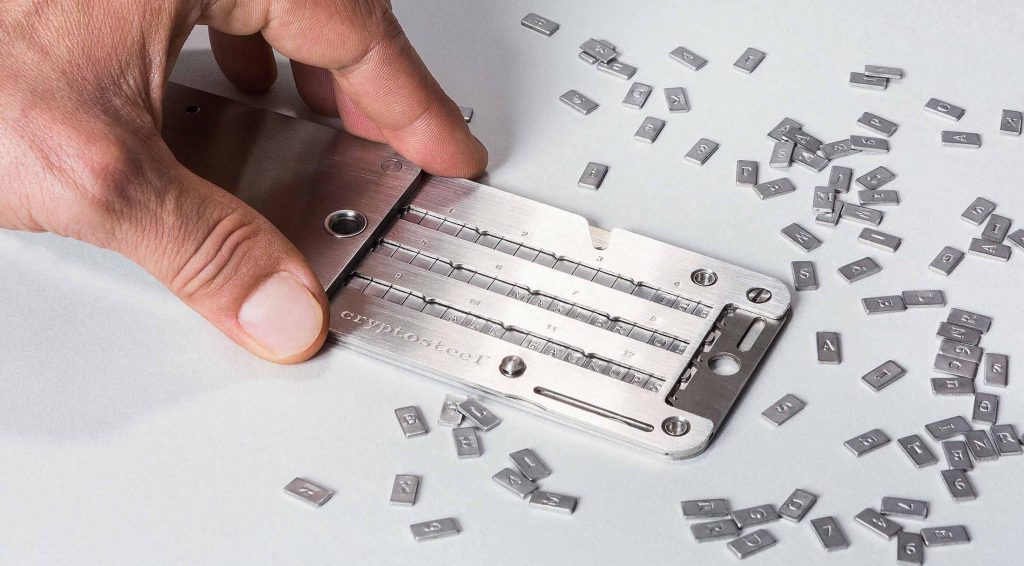
It comes with several little tiles that contain letters and a metal plate for your to slide them in to form the words. This process can be tedious, but it’s worth it to have peace of mind. It took me about 30-40 minutes to input my entire 24 word recovery phrase as the tiles are tiny and some are mis-shaped and not the same size. That’s the bad part.

Assuming that I don’t need to do this again for any other seed phrases, it’s really not that bad. The good news is it comes with enough tiles to have 2 two full phrases if needed, so you have backups for redundancy, or can fashion another device to use it with if you happened to have an additional plate.

It’s fairly simple to use once you find the tiles you need, but for me it was kind of reminiscent of getting an Ikea table and opening it to an 86 page instruction book and over 500 pieces that needed to be assembled. Sure, that is exaggerating but it can be a tad overwhelming if you don’t know what you’re doing.


WHO IS IT FOR?


This device is for every single cryptocurrency or bitcoin wallet holder that has enough cryptocurrency that they cannot afford to lose. Unfortunately, paper just doesn’t cut it and even if you laminate it, it still wont be protected if there is a fire or any other type of destructive force, even if it happens to survive water damage.

As cryptocurrency is the wave of the future, it is extremely likely that almost every single person on the planet is going to have a bitcoin wallet at some point in their lifetime, and some people have many (myself included). It is only smart that if you are going to be self-sovereign with your finances, that you find a way to be responsible and have a back-up for the worst case scenario. There is no 1-800 number to call and complain to if you lose your “secret code words” to recover your bitcoin or other crypto.

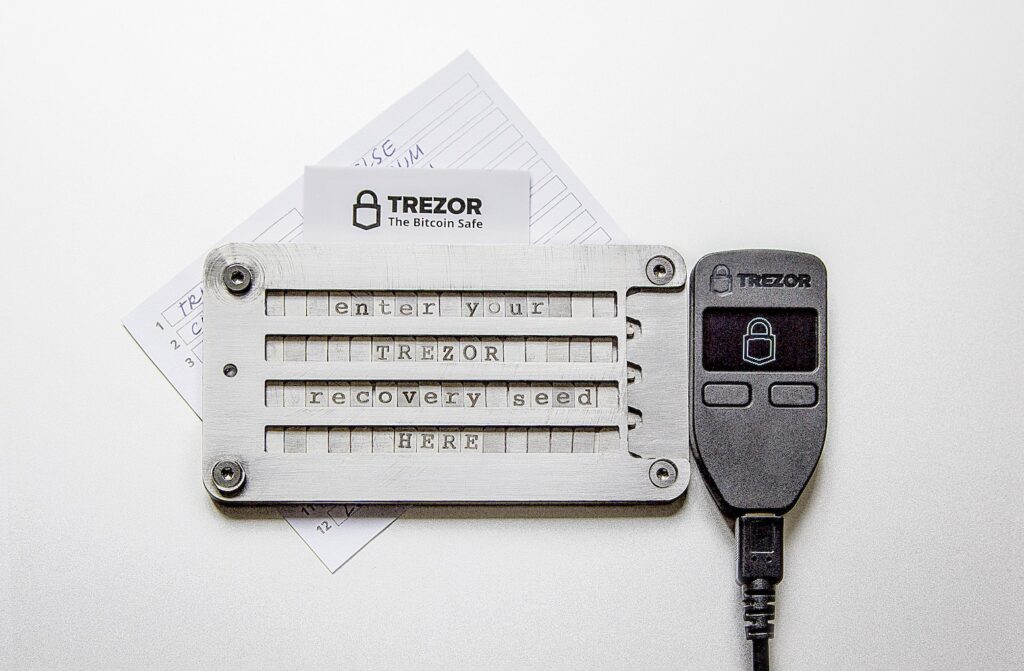
Because it’s relatively cheap and most companies now even bundle it with hardware wallets, like Trezor, you can save money and have a backup and a hardware wallet for about $200, which is a small price to pay to protect your wealth and investment. It’s an entry level device and is one I would recommend if you currently hold more than $200 worth of cryptocurrency or you plan to in the future. This is a no brainer.

It’s also nice that it has a hole big enough to stick a padlock in there to lock out potentially nosey intruders, nice security touch!


HOW DOES CRYPTOSTEEL COMPARE TO THE COMPETITORS?


This is an entry level device and it absolutely gets the job done. I have found and tested this myself by having it sit in water overnight, and even used a blow torch to see if I could burn it to the point where I couldn’t make out the letters and it’s rock solid. It does everything as advertised and currently comes in multiples versions, depending on how much of a maximalist you are. For instance, the Cryptosteel Hex, features a unique way to secure just the private key without any seeds.

cryptosteel


“Featuring just the right character combo to keep things “necessary and sufficient,” the Cryptosteel Hex allows users to store raw cryptocurrency private keys with no third-party involvement.

The set contains one double-sided Cryptosteel stainless steel cold-storage wallet and over 285 tiles optimised for hexadecimal passkeys. These include uppercase letters, numbers and the lowercase x.

If you’re a less-is-more pragmatist – here is all you need and nothing you don’t.”


This is rarely used, but it’s nice to know they have several other options, instead of just the standard mnemonic phrases that come with standard bitcoin wallets.

The premium level recovery seed backup wallet that competes with CryptoSteel is called the CryptoTag. This device allows for a different method of actually using a hammer to imprint your seed phrase directly onto the device and is made with much nicer quality titanium and has a cleaner look and finish.

This is NOT targeted for your average cryptocurrency user and is designed for the more seasoned and upper class investor. It is a fantastic device, but at $199, it is more than double what the Cryptosteel offers and essentially does the same thing. It also has a much nicer presentation, and an entirely different user experience.

https://www.youtube.com/watch?v=xmEINI08g3U


CONCLUSION


In the end, you can’t go wrong with this device. It solves a proven problem and it is trusted and cheaper than the current competitor or CryptoTag. If you have the means, I would strongly recommend getting a CryptoTag, as it is a MUCH nicer version of this product, but hey, we all can’t necessarily afford that level of a premium product.

Someone asked me, “Can’t I just forego the hardware wallet and just get the CryptoSteel? After all, if my mobile wallet gets hacked, I can just use this seed to restore it to a new mobile wallet”. Here’s why that’s a bad idea. Sure, you could do that, and if your hot wallet does get hacked, it’s not very likely that you will be in a place where you can quickly access your CryptoSteel, setup a new wallet, and go through the full recovery process on a BIP39 compatible wallet before the “hacker” already transfers it to its own wallet with backup recovery.

It’s a smarter and better practice to have both, a hardware wallet AND a backup recovery seed device, whether it be CryptoSteel for the average consumer or the CryptoTag for the consumer that wants a higher end device that has a nicer feel and user experience. This will make it easier to have both devices stored in separate secure locations for when you need it most. That way, you never have to have the thought of your “Hot” wallet being hacked and rushing to your secure location when/if that scenario happens. Just my two satoshis…


Buy CryptoSteel Starting At $79 From Their Official Site


What do you think? Do you think CryptoSteel is a good device for Recovery Seed Backup? Sound off below in the comments!

Cheers,


The Crypto Renegade


NOTE: This post may contain affiliate links. This adds no cost to you but it helps me focus on giving as much value as possible in every single post by being compensated for recommending products that help people succeed.
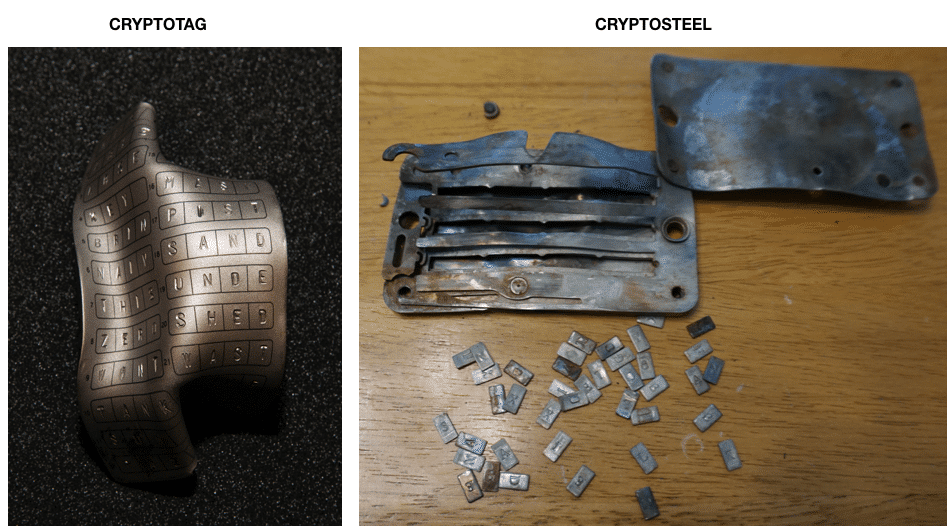
Craig S. Wright Gets Patent On Bitcoin White Paper And Code: Here’s Why It Doesn’t Matter

“Craig S. Wright Gets Patent On Bitcoin White Paper And Code” … This is what I read when I got out of the shower and I thought to myself. “How is this possible?” The code is open source, you can’t hold a patent on it. It turns out I am right and you cannot do that. This is an insane attempt to “prove” to the world that he is something that he is not.

As I learned after I read this, anyone can register for a patent, and in order to dispute it, you have to fight it in court. To clarify, the U.S. patent office does NOT recognize Craig S. Wright as Satoshi Nakamoto. This just means that he registers a file to be recognized as Satoshi (since no one else has before). You can read that article here.

patent on bitcoin


PATENT ON BITCOIN -BREAKING NEWS: 5/21/19


Craig Wright, the self-proclaimed creator of bitcoin, has filed registrations with the U.S. Copyright Office supporting his claims of authorship over the original bitcoin code and the Satoshi white paper.

The registrations, which are visible here and here, pertain specifically to “Bitcoin: A Peer-to-Peer Electronic Cash System” and “Bitcoin,” meaning the original 2009 code.

To be clear, registration does not imply ownership nor is this an official patent. The copyright process allows anyone to register anything in an effort to prepare, say, for lawsuits associated to ownership.

Computer code and white papers can be copyrighted insofar as they are considered literary works and, as the copyright office writes: “In general, registration is voluntary. Copyright exists from the moment the work is created. You will have to register, however, if you wish to bring a lawsuit for infringement of a U.S. work.”

In other words you, the reader, could register this post and I would have to fight you in court to contest it.

Jerry Brito, executive director at advocacy group Coin Center, tweeted:

“Jerry Brito@jerrybrito

Registering a copyright is just filing a form. The Copyright Office does not investigate the validity of the claim; they just register it. Unfortunately there is no official way to challenge a registration. If there are competing claims, the Office will just register all of them.

Neeraj K. Agrawal@NeerajKA”

Craig Wright filed a copyright registration for the Bitcoin whitepaper

WHAT’S THE VERDICT?


“People register things for a reason. They want to exploit it and they want the credit for it,” said David H. Faux, Esq., an intellectual property attorney in New York City. “Someone dishonest would register the Bitcoin white paper to put it on his website and get speaking engagements. But at some point it would catch up with him.”

“The market takes care of itself,” said Faux.

When asked for comment noted Wright critic Jameson Lopp said “LOL.”


UPDATE – WRIGHT WROTE:

“BTC is not bitcoin. Bitcoin is set in stone and does not change. Where there is a protocol change, there is developer control which is the exact opposite of what bitcoin is about. BTC is passing off as Bitcoin. It is an air drop copy that has been designed to slowly alter the protocol allowing the system to be anonymized to such an extent that criminal activity can happen. The goal is to create a system that allows people to commit crimes, extort money, have automated ransomware and worse. This is not the goal of Bitcoin.”

CONCLUSION


In the end, I don’t think anyone is going to recognize Craig as Satoshi, regardless of this filing. There is absolutely NO way that Satoshi would go through these measures to “prove” who he is, mainly because he came from out of nowhere, and then provided the world with a ton of value, and then disappeared. This was no accident. He created one of the most powerful, open source tools the world has ever seen and made it impossible for people to find him.

He believed in liberty,freedom, and democratizing power by undermining the the world governments and banks. Satoshi would never try to use these powers against the community it developed from the beginning. This is just a slap in the face to all the believers and early adopters who nurtured and cultivated this technology from the very beginning.


Do you think that Craig is Satoshi? Sound off below!


Cheers,


The Crypto Renegade


4 Best Monero Wallets To Store Your (XMR) Offline (2020)

In this article, I am going to go over the 4 best monero wallets to store your Monero (XMR) offline in (2019). As an advocate for privacy, I strongly believe in the value proposition of this coin. Monero is a unique flavor of privacy and being able to have coins on a blockchain, while still remaining completely anonymous and untraceable. This coin has been in and around the top 10 market cap for the past several years and is currently hovering around number twelve at the time of this writing. best monero wallet

The problem we’ve had for a while is the fact that if you wanted to store your Monero on your own desktop wallet, you needed to know how to use a command line and we did not have a GUI (graphical user interface) wallet for the longest time. Those days are now over as there has been added support for desktop, mobile, and now hardware wallets.

I am going to discuss below the 4 best wallet options for using and storing your Monero offline (and one online option, due to the fact the wallet has a fantastic user experience). I have been highly cautious of keeping my Monero (until recently) on any wallets off of the exchange, due to the fact that it was extremely cumbersome and not very easy to manage in an easy way. Luckily you can now use XMR in your day-to-day transactions as well as securely store them offline. Below are the list of wallets that I have personally used an recommend. Let’s get to it!


#1 LEDGER NANO S

The Nano S is the first hardware wallet to support this coin in being able to keep your private keys offline. When dealing with Ledger Live, it requires you to download the app and then you can use the official desktop wallet from Monero’s website to link it with to manage your funds via graphical user interface. This will ensure that your private keys never leave the device (safest way) yet you can manage balances and authorize transactions from the official wallet when the device is present.

Keep in mind, this will require you to setup a node. What does that mean? It means it will download the entire blockchain onto your computer and index it properly for you to operate the wallet and contribute to the blockchain verification. This does not mean you will “mine” Monero, but it will require your hard drive to stay up to date with the latest version and blocks of the current blockchain.

This is a downside, however, nothing is safer than keeping your private keys offline, so make sure you have enough room on your computer for this task to run and operate. I also wrote a recent article with how this works with Tezos as well, as the process is similar, but still easier than this.

The steps to do this are listed Below:

  1. Download the Monero wallet for your platform.
  2. Extract the package you’ve just downloaded.
  3. Open the monero-gui-v0.14 folder.
  4. (optional) Move the monero-wallet-gui file to your applications folder.
  5. Launch the Monero wallet by opening monero-wallet-gui.
      On Windows: Click Allow access so the firewall does not block the Monero wallet.
  6. Choose your language.

Set up with Ledger Nano S

  1. Unlock your Ledger Nano S and open the Monero app.
  2. Click Create a new wallet from hardware device in the Monero wallet.
  3. Enter a wallet name.
  4. Enter 1720000 in the restore height field, then enter 3:100 in the subaddress lookahead field.
  5. On your Ledger device, choose whether to export the private view key to your computer:
    • Approving view key export enables your computer to identify your transactions. However, if your computer is compromised, your transaction privacy might be at risk.
    • Rejecting view key export optimizes privacy protection since the view key remains secure on your Ledger device. However, identifying your transactions will be slower.
  6.  You may have to press the device button twice, then wait for your addresses to be generated.
  7. Enter and confirm an optional password. Then continue to the next page.
  8. Choose an option for the Daemon settings:
    • Start a node to download and validate the full blockchain. This offers the optimal level of privacy and contributes to the strength of the Monero network. This requires at least 60 GB of disk space, and initial synchronization may take several days.
      >> Select the first option and leave the rest blank.
    • Connect to a remote node to immediately use the wallet and preserve your computer resources. However, you will not benefit from the optimum level of privacy, nor will you contribute to the strength of the Monero network.
      >> Tick Connect to a remote node, choose a remote node and enter its Hostname and Port.
    • Start a local node, but use a remote one while your local node synchronizes.
      >> Tick Start a node and also choose a remote node and enter its Hostname and Port.

#2 LEDGER NANO X (Best Monero Wallet)


This is the newest iteration of the Ledger hardware wallet and is designed to handle over 100 apps on the device at once, as opposed to the current limit of about 2-4 apps on the Nano S (it depends on the apps you use). You can also manage this wirelessly via bluetooth and the new iOS mobile app for Ledger Live that was recently released.

The same rules and steps apply above, however, once you install the desktop wallet and sync it up, you will be able to manage your Monero from the mobile app and send and receive transactions wirelessly, which is powerful if you use this as an actual currency, as most enthusiasts do.

The device is now currently $119 and is shipping at the end of May 2019, as it will be caught up with it’s inventory by then. I look forward to doing a review for this device in the very near future.


#3 TREZOR MODEL T


The Trezor Model T is a slick device and has some unique security features enabled on the device, including PIN verification on the device itself instead of the web application that is required by it’s predecessor. This device only has one caveat at the moment. Even though the firmware does technically support Monero at this time, there is no GUI to access or manage it, like you can with the Ledger devices above.

So how do you access it? I hope you know how to work the command line, as there are a few lines of code required to generate a wallet and start using it. The link above goes into those commands, but I do not recommend it for new or novice users, as it can get a bit technical.

The good news is, there has been word on their github page that there is currently work on a GUI wallet to be integrated with the Trezor Model T. This is serious progress, as the only other hardware wallets that currently support this is Ledger, and it would be lovely to have a native application built out for this coin.

That would be a HUGE advantage to whichever company can pull this off, but it requires intense collaboration and cooperation from the Monero camp to get this done. I am looking forward to see who get this done first, because I will dedicate a specific article to this, as I think it deserves it.


#4 (BONUS) EDGE WALLET


Now, the reason I included this as a bonus, is because this is technically not an offline solution. However, Edge is an amazing mobile and wallet that has an beautiful graphical user interface and supports Monero in an easy and convenient way. This is noteworthy, because I am not aware of any other mobile wallets that do this, and that means if there are any that exist, they are probably not that reputable.

At any rate, There are some screen shots listed here to show you how the user flow works and how this is probably your best solution for sending/receiving Monero in a very easy way.

It should also give your comfort that your private keys will be encrypted on your mobile device, so even if Edge servers do get hacked for any reason, your keys are safe on your mobile device, where only you have access to them. This is one of the more “secure” mobile or hot wallets on the market.

I keep some of my every day spending crypto on this wallet as it feels very robust and safe, but again I cannot stress this enough, nothing beats a hardware wallet in terms of security, and I only typically keep a small amount of crypto on a hot wallet like this at any given time.


CONCLUSION


So what’s the best Monero wallet? All in all, these are the best solutions for securing your Monero offline (and one “hot wallet” option as well). I highly recommend using a hardware wallet for all of your crypto storage solutions and I strongly recommend reading my free e-book, where I go in depth and provide you the 5 best ways to secure your cryptocurrency. It is absolutely free, so click the orange button at the top of the site to get your free download.

As mentioned above, I have a soft spot for privacy-focused coins and Monero is absolutely one of my favorites. Depending on your technical aptitude, you may just want to use a Ledger listed above, and I will update this article as time goes on with any relevant updates and changes as they develop. Thanks again for reading!


What do you think are the best ways to store your Monero offline? How do you store yours? Sound off below in the comments!


Cheers,


The Crypto Renegade


NOTE: This post may contain affiliate links. This adds no cost to you but it helps me focus on giving as much value as possible in every single post by being compensated for recommending products that help people succeed.
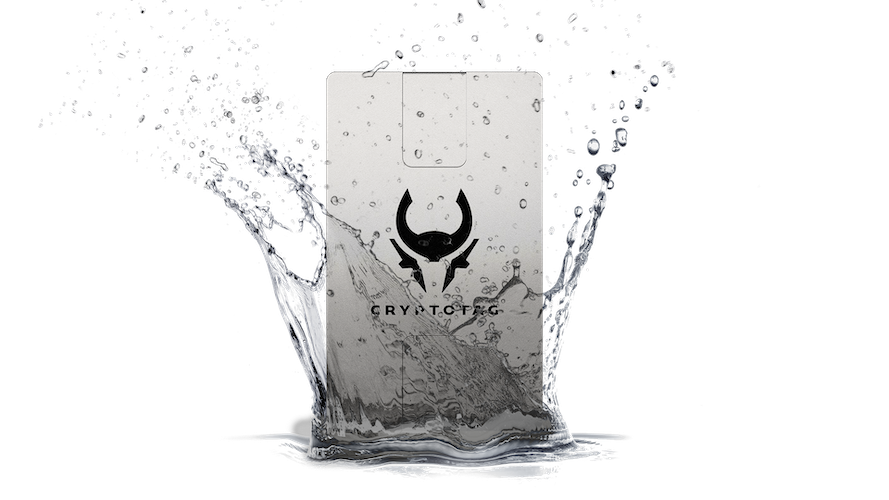
ShapeShift’s Brand New Platform – Review (2020)

In this article, I will review Shapeshift’s brand new platform! I’ve always been a fan of ShapeShift, and in fact, Erik Voorhees is one of the inspiring figures that helped get me into the crypto space to begin with, as we share a lot of the same fundamental philosophies on freedom and liberty. That’s why I was thrilled and honored when I was asked to join the private beta to test out the new platform, especially since I have a KeepKey and I use it frequently to manage my crypto on a regular basis.

It did not disappoint.


**Keep in mind that this is currently in BETA, and is not finalized in terms of design, complete look and feel, or full functionality**


This is a complete overhaul that includes all of their services including: Instant Trades, Real-Time Market Data via CoinCap, In-App Crypto Purchases, and KeepKey Integration. That last part is of particular interest to me because I’ve wanted to find a way to execute purchases and trades while having my KeepKey connected, while ensuring that my private keys are protected throughout the entire process.

This is a very important detail, especially if you want to make purchases online with that extra protection and also ensure that my private keys are never compromised in a trade. This truly is the ultimate non-custodial hardware wallet solution. Here’s a few screenshots and user flows based on my experience using this web app.

When first gaining access to beta.shapeshift.com, you will be asked to register for a trading account (if you haven’t already), so that you can seamlessly use the trade feature in the dashboard when your KeepKey is connected. Second, you will plug in your KeepKey and it will notice you will need a new firmware update to “Pair” your KeepKey to the new platform.

This will require a few steps of plugging in the device and unplugging it a few times to confirm this upgrade. Additionally, it will pull up the random number generator here so you can enter the PIN that is listed on the device screen to sync and authenticate your device and session.

This where the fun begins.


Shapeshift Beta


(PRO-TIP: You can view all of your transaction history, assets, current prices of assets and contents of your KeepKey WITHOUT having it plugged in. This can provide you a quick snapshot of where everything stands, even if your device is not present)


As you can see below, this a very clean, simple, and easy to user interface. You have all the key information at a glance that you need to manage your portfolio. It show’s your asset allocations, any losses or gains of your combined assets in real time, and the most recent transaction history below the chart. In the top right, it will show if your device is synced and connected, and will show your current fiat value of each individual asset if you drill down, or the combined asset value as a whole. At a glance, this is the information most people need to decide what action they need to take next.


ASSETS

The assets you see here are just a handful of the assets that are supported. If you would like to see the full asset support list, click here. At the top, you will see the 2 assets I have been using to test this software in order from the most USD value, to the least on my KeepKey at the time. The assets that you see below that are greyed out will show you what’s supported and available for you to receive on your KeepKey when ready. Each asset breaks down the charts over time in terms of price and you have a toggle view with the balance. Pretty slick.


TRADE

The trade feature is super easy to use and automatically calculates any minimums or fees needed in order to execute a trade, almost instantly. One thing I will point out is that some assets that are supported on the KeepKey itself, may not be available to trade via the ShapeShift platform, like SPANK for example.

If your particular coin is not showing in the drop down menu when swapping assets, it simply means it’s not supported on the ShapeShift trade engine. Another key feature is that all trades are executed on the KeepKey device directly, so you don’t have to risk exposing your private keys while they are in transit. This is a mix of the classic ShapeShift trade engine, but is simplified and integrates with your hardware wallet very seamlessly.


PURCHASE

This is done via a new feature they have been testing out with a button “Buy Crypto $” at the top, next to “Send” and “Receive”. This is facilitated through Wyre, which is a 3rd party platform that you can purchase crypto with your bank account or credit card. I have not tried this feature yet, but I plan to shortly. This is just another great design decision where you have a platform with both on and off-ramp needed for users or all levels.

As you can see in the screenshot, you can buy Bitcoin, Ether, or DAI to get started and you will have an array of options to trade with directly on the platform once you’ve completed this process. Now, you can easily receive any amount of crypto with any of the supported assets on this list directly to your KeepKey (or without) that you have at another address. You also can receive any amount to the platform and once you connect the KeepKey, your private keys will automatically be transferred onto your device, and will update the dashboard when it syncs.

One thing that really makes this trading platform special is the fact that you are not restricted to trading pairs. for instance, when you are wanting to trade multiple coins and you’re on Binance for example, you need to first get BTC, then from there you can trade into any altcoin they support. Here, if you have a supported coin, you can directly swap it for another and not have to default back to BTC in order to pull the trigger. That’s a game changer for me.


STABLE COINS (EASTER EGG)

shapeshift

This was a pleasant surprise to find that assets are able to be converted into various stable coins directly in the system. This is especially helpful if you are trying to lock in profits on a recent trade and have it stand idle until you either decide to invest your profits into another asset or simply wait for another trade.

Unlike the Ledger Nano S that only lets you hold a handful of apps on your device at one time, this allows you to have any assets private keys on a single device at any given time. As seen above, they also feature DAI (Ethereum’s Stable Coin) as well that is a very welcome addition to the stable coin list.

Below are some caveats and things that will hopefully be added over time. I am already thrilled by how my beta experience has been so far and I know that it will only continue to get better and better.


[One Caveat: You cannot complete any trades unless your device is there to sign and confirm the transaction.]


WISH LIST:

  • It would be nice to facilitate a trade from the ShapeShift mobile app to lock in a trade price on the go and then sync the private keys when I logged in via the web app
  • Support multiple browsers: Currently the WebUSB function in the beta only supports Chrome as a browser. I hope they widen this to Firefox (No pun intended), and hopefully Brave soon. I understand they do not currently support WebUSB yet, but the request has been put in.
  • Allow me to view my balance with “Satoshis” instead of fiat. At very least you should be able to toggle between the denominations and should support us looking at pricing in those terms.
  • The ability to label certain accounts on transactions. For instance, if I receive a transaction from another exchange or wallet to my KeepKey as in coming transaction, it would be nice to customize and label the transaction for my records. (i.e. savings/day-to-day spending/groceries, etc….)

At this point, these are just nice-to-have’s and with that said, this is just the first iteration of the beta. I am sure there are many new features and integrations planned for the future to make this even better, but that takes time and developer resources to properly implement them.

CLICK HERE TO PURCHASE KEEPKEY DIRECTLY FROM SHAPESHIFT!


CONCLUSION:


I don’t think I’ve been this excited when using my hardware wallet, since I first discovered them in 2016. There is no doubt that I have a new favorite user experience and I plan on helping improve this process in any way that I can to help inform people the best and easiest way to manage their portfolio and private keys.


CLICK HERE TO RESERVE ACCESS TO THE NEW SHAPESHIFT


You will be BLOWN away.


(PRO-TIP: Once you sign up via my link, you will get your own referral link. If you refer 5 people via your link and they sign up for a ShapeShift account, you will be given a code for a FREE KeepKey, in case you don’t already have one.)


Cheers,


The Crypto Renegade


NOTE: This post may contain affiliate links. This adds no cost to you but it helps me focus on giving as much value as possible in every single post by being compensated for recommending products that help people succeed.

KeepKey Vs. Trezor Vs. Ledger: Which One Should I Buy? (2020)

In this review, I will go over all 3 primary hardware wallets and see the show down of KeepKey Vs. Trezor Vs. Ledger. People always ask me when they realize they need to start taking their private key security seriously is “Which hardware wallet should I buy?“ This questions has been presented to me hundreds, if not thousands of time, and there is no one real “clear” answer.

It ultimately depends on which coins you want to store and how you want to access them. Do you plan on trading your coins often? Are you simply just trying to “buy and hold” for several months and several years, like a set and forget situation? Are you planning on using the wallet to “bake” or use to contribute to the blockchain on proof-of-stake (POS) networks?

While these are all valid questions, I personally have all 3 wallets and use them regularly. Why? Well, aside from being in the industry, and needing to stay up to date on these devices and their features and capabilities, the main reason is to diversify. What do I mean by this?

Well, if you have (or plan to have) significant holdings, it is smart not to have all of your coins or private keys on one wallet, just in case. Now I’ve created a free e-book that explains how to avoid this which you can get for free HERE, but ultimately if you are in the market for a wallet for the first time, I will tell you the wallet I like to use the best right now in May of 2019.


KeepKey VS. Trezor VS. Ledger


Stay tuned below for the final result, but I go over some pros and cons of each device below. They all are very secure and safe to use, but it really just comes down to preference and really how often you decide to interact with the device. Let’s get right to it!


#1 TREZOR

There are two versions of Trezor: Trezor One and Trezor Model T. The former is the entry level device that came out 2013 and has since received regular firmware upgrades enhancing it’s security and adding new software support for native and 3rd party applications for new coins. In 2018, they released their 2nd-gen product called the “Model T“.

The latter is a larger device with touch screen and is operated by a “Beta” wallet that supports over 1,000 coins between it’s native applications and 3rd party integration. Most recently, they added NATIVE support (which is a huge upgrade in my opinion) for Ethereum (ETH) and Ethereum Classic (ETC). This means it is connected to its unique application that was custom designed by Trezor to manage your ETH accounts directly in the app. Previously, any ETH or ERC-20 based token required to use a 3rd party wallet, which was annoying and cumbersome.

I understand there is a lot of development work that goes into creating and managing any native app, but Ledger and Trezor already had native support for this, (as they should) considering it’s been in the top 3 coins by market cap consistently for years.

Trezor Model T however, is a massive upgrade and adds not only native support for multiple coins, but has added security in the form of a PIN entered in on the touch screen of the device instead of the web app used on the web application. This upgraded device was used for several new features including a password manager and multiple additional security options and ease of use for recovery options on the device itself. Very powerful.  Below is the overall feeling I have about the device(s) and the overall team behind them. 3 best cryptocurrency cold storage solutions

Bottomline: They have upgraded some basic functionality, which is good, and to their credit they have added support for some coins that really need it, such as Monero and Tether. This is of course when their team collaborates and helps build a supported wallet to tie into their code base. They have been building a foundation for the future and that is going to work in their favor as soon as each coin’s respective development team decides to catch up.


Newest Notable Coins Added:

-Binance Coin (BNB)    

-Monero (XMR)

-Cardano (ADA)

-Ravencoin (RVN)

-Tether (USDT) *Stable coin*


#2 KEEPKEY

keepkey

Keepkey has always been a favorite of mine, as it’s a solid design and very sleek and stable frame that just feels good when you hold it in your hands. Now let’s get into the nitty-gritty. For years, Keepkey only supported: Bitcoin, Litecoin, Ethereum, Namecoin, Dogecoin, and Dash.

For a hardware wallet that needs to compete in this market place, that needed a serious upgrade. Luckily, they have been making some AMAZING changes and not only added a ton of ERC-20 Support, but more importantly, they are revamping their entire platform to have one fluid, seamless application that integrates all of their core services (See my previous post for details on this).

This is extremely powerful, and a decision that I believe will catapult them ahead of the competition. They are currently in a closed beta, and it is expected that they will be releasing this later in 2019. Stay tuned for news on this.

Bottomline: Keep an eye out for the newest upgrades and the new platform that is coming soon. I hope to gain access to the private beta soon, and if given access, I will ask permission to write a review for your guys. *UPDATE* I have gained access to the beta and have tested it thoroughly, please see below.


Newest Notable Coins Added:

-Basic Attention Token (BAT)

-DigixDAO (DGD)

-Augur (REP)

-Polymath (POLY)

-TrueUSD (TUSD) *Stable coin*


#3 LEDGER

Ledger is considered “The most recommended hardware wallet” on the market. The simple reason for this is because it’s cheap (low barrier to entry) and they have been working on upgrading their infrastructure and recently released Ledger Live, which is their new desktop (and iOS) application for managing all of your coins. This is much better than their previous solution of using a chrome extension to access the UI, but Ledger Live is not without it’s quirks.

Overall, the UI is pretty clean and is pretty straight forward in terms of first time setup and detects your device when it’s plugged into the USB port and asks you to authenticate to view the app. The one thing most people don’t understand is the Ledger Nano S has very little RAM, so even though they advertise that it supports over 1,100 coins, you can only have approximately 3 or 4 coin apps installed at once on your device.

You will want to make sure you choose your coins wisely and perhaps get multiple devices if you want to diversify and/or use a 3rd party wallet as mentioned above to manage more coins on the same device.

This however, does not apply to the new Ledger Nano X. In addition to the new design and being able to manage this wirelessly via bluetooth, you can manage your coins anywhere on an iPhone or Android effortlessly. You also can support up to 10x the amount of apps or “coins” to be supported on the same device at once. This is huge if you want to diversify and be able to hold more than 3 or 4 at a time. The device is approximately $119 right now and it should be available to the public within the next 7 days. Very exciting.

Bottomline: It’s not perfect, but it has made some good improvements over the last year and is continually updating it’s coin support. I will list below some of the coins that are supported on Ledger currently that are not yet available on other platforms, which brings it’s edge.

I will say the best advantage (for me, anyways) that Ledger has going for itself right now is the fact you can “bake” Tezos on your hardware wallet directly, and no other hardware wallet on the market currently supports that. As a firm believer in that project and the fact I can participate in the network, while keeping my private keys offline is a HUGE plus.


Newest Notable Coins Added:

-Ripple (XRP)

-EOS (EOS)    

-Tezos (XTZ)

-QTUM (QTUM)

-USD Coin (USDC) *Stable coin*


KEEPKEY VS. TREZOR VS. LEDGER CONCLUSION: WHICH ONE SHOULD YOU BUY?


As I mentioned above, there is no definitive “correct” answer, as each person’s needs may differ. Now that I have that disclaimer out of the way, I will provide my personal recommendation if you are a first time hardware wallet buyer and you only need one to start out with. I will say this was NOT an easy decision, but here is what I would recommend to my mother or personal friend who is looking to secure their cryptocurrency in an easy to use way. I would recommend getting a KEEPKEY. KeepKey Vs. Trezor Vs. Ledger

Why is this my answer? Well, as I updated above, I was invited to participate in their private beta (In depth review on that coming shortly) and I was blown away. ShapeShift (the company that bought KeepKey) has revamped their entire interface. This is extremely noteworthy because before, you had to download multiple applications, and chrome extensions to manage your private keys and it was not the best user experience. This has all changed.

Their new platform that will be coming out very soon and is by far the easiest to use and best hardware wallet experience I have seen yet. Not only can you easily trade coins while keeping your private keys on the device the entire time, managing your portfolio has never been easier. At the time of this writing, it is only $79, and while it is not the cheapest device, it is certainly the highest quality, and best user experience I have seen yet on their new platform.

As far I know, they have plenty of new coins and features in the pipeline, and it is so easy to use, even my grandma could use it and wouldn’t have to explain much. It really is the first plug and play hardware wallet experience I have used (and I’ve used them all). Again, it’s hard to give visualization of my experience, but with my upcoming review, you will see some screenshots and see what I’m talking about.

Overall, it has proven to be the easiest way (so far) to manage my funds safely, and the ONLY way to trade assets without handing my private keys over to an exchange or any other type of wallet or custodian. I highly recommend this hardware wallet if you are making your first purchase and trust me, you won’t regret it.


CLICK HERE TO BUY THE KEEPKEY HARDWARE WALLET DIRECTLY FROM THEIR WEBSITE!


What do you think? Would you have chosen something different? Please let me know below in the comments!


Cheers,


The Crypto Renegade


NOTE: This post may contain affiliate links. This adds no cost to you but it helps me focus on giving as much value as possible in every single post by being compensated for recommending products that help people succeed.

Trezor One Review: Is The Original Still The Best?

In this article, I will dive deep in the Trezor One Review: Is the original still the best? Trezor One is the original hardware wallet. What does that mean exactly? This was the first physical manifestation of the “hardware wallet” for bitcoin offline security and was introduced to us from Satoshi Labs in 2014. This device is a small, trapezoid shaped device with a small OLED screen and 2 mechanical buttons which are used for confirming or denying transactions.

is there a hardware wallet that can store all the top cryptocurrencies?

This is also used for generating your recovery seed during your first time setup, but we will address that a little later. This concept when it arrived in 2014, served a HUGE need in the market as at the time, most people mainly used a paper wallet for protecting their private keys and keeping them offline. This is still used today, but is used as a one way method, and is not ideal for making transactions or managing your portfolio. Not to mention, if anyone got a hold of that piece of paper, they could easily scan the QR code and steal your coins.


WHAT’S IN THE BOX?


The Trezor One comes with: 2 recovery seed cards, a lanyard/wrist loop, 4 stickers, USB cable, and the device itself. The device is very small and has two mechanical buttons on the front of the device below the screen. It is powered on only when connected to a computer.

When you setup and initialize the device for the first time, you need to visit wallet.trezor.io on your chrome browser and click on “Trezor One”. This will pop up a screen where it show the security tabs on the box for you to inspect the device, before opening the box. This box is self destructive and is meant to have clear visibility to see if it’s been tampered with in any way.

Once you have done this, you will finally be prompted to “Continue To Wallet”. This is where the “bridge” comes in. What’s the bridge you ask? This is a small file download that is required for you to download and install to manage your device. It connects the web application to the device itself and validates the firmware.


WHAT COINS ARE SUPPORTED ON TREZOR ONE?

Image result for trezor one coins supported

As of this writing, there are approximately 9 native applications that can be used directly in the web app, and about 1,000 coins supported via 3rd party wallets like Mycelium and MyEtherWallet. The native apps that Trezor One supports is as follows:

-Bitcoin (BTC)

-Bitcoin Cash (BCH)

-Litecoin (LTC)

-Dash (DASH)

-Zcash (ZEC)

-Doge Coin (DOGE)

-Bitcoin Gold (BTG)

-Digibyte (DGB)

-Vertcoin (VTC)


The list of all the other coins that are supported on the Trezor Model T or 3rd Party Wallets can be found here – https://trezor.io/coins/

To me, this is the weakest point of this wallet is the native application support. They have invested a lot of time and developer resources to developing their “Beta” wallet, which is currently only supporting the Trezor Model T, which is Trezor’s 2nd generation device. In my opinion, the Trezor One is a decent entry level device, but I would not expect a growth of new coins being supported in the future.

The current price for this device is 69 EUR, which is approx $77 USD at the time of this writing.


CLICK HERE TO BUY THE TREZOR ONE FROM TREZOR’S OFFICIAL SITE


HOW TO SET UP THE DEVICE: FIRMWARE PROCESS

When the device is first shipped, it comes with NO firmware currently installed. This is a unique security measure that Satoshi Labs has employed to ensure that no MIM attacks or corrupt firmware was planted in the device during transit. When you setup the device and install the bridge, it will check the device is genuine and runs a check to insure the firmware (signed by Satoshi Labs) can properly be installed.

This process is seamless and once it’s installed, it will prompt you to create a 4-8 digit PIN that is shown on the device in random way using what’s known as an RNG (Random Number Generator).

Next, you will setup the 24 word recovery seed phrase which will walk you through each word (in order) shown on the device screen and will prompt you to write it down on the provided seed cards in the box. Once you write it down, it will walk you through confirming, and then it will test you and ask you, for instance…”What is word #17?”. You will then be required to choose the correct word. Once this is completed on 4 random words, you can confirm and the device will be initialized and ready to use  the web application and make your first transaction.


CLICK HERE TO BUY THE TREZOR ONE FROM TREZOR’S OFFICIAL SITE


TREZOR SECURITY

What’s really unique about Trezor’s design is that there is no “username” or “password” for accessing the device. If someone walks up to your computer and see’s the dashboard, nothing can be done without physical access to the device to authorize a transaction.

In addition to the above, you can setup an optional “passphrase” or a 25th seed word so that if for any reason someone has access to your recovery seed, they still cannot steal your coins unless they also have your passphrase as well. If you decide to use this, DO NOT write it down anywhere and memorize this particular passphrase for extra protection. Image result for trezor one firmware

They also use a process to validate firmware and authenticate your device where you private keys are stored called “Secure Boot MCU”. This process requires the bridge to verify that your device is genuine and signed by Satoshi Labs. This is unique and offers a security check every time you boot up the device to ensure you are properly connected to the correct location when accessing the web app. If something goes array, your device will throw an error warning and let you know not to trust the device if for any reason the bridge cannot connect to the proper web app.


TREZOR VS. LEDGER (MY EXPERIENCE)

The two devices that I find are most used, especially for people who are new to hardware wallets, is the Trezor One or the Ledger Nano S. Let me first say they are both fantastic devices and serve a similar purpose. First off, they are both considered entry level devices and are built for the user that is not looking to store a lot of coins at once using the apps they each provide.

For instance, if you only want to store only Bitcoin and Ethereum, both devices would work, but only Ledger would have both of those work using native apps. Here are some questions you will want to ask yourself when deciding,


What coins am I planning to store on the hardware wallet?

What is my budget for getting started?

Do I plan to use any 3rd party wallets or just the basic apps that come with the device?


In terms of trust and reputation, I would lean towards the Trezor One, as it’s tried and true and is the original hardware wallet. The web app it uses can also be accessed from any computer, whereas the Ledger Nano S would require to download a desktop application to use it.

Final Thoughts On Both: Unless you plan on storing Ripple (XRP) or Tezos (XTZ), I would go with Trezor, as it’s easier to use on any computer, even if that computer is infected with malware, safely.


CLICK HERE TO BUY THE TREZOR ONE FROM TREZOR’S OFFICIAL SITE


CONCLUSION: BOTTOMLINE


PROS:

Trezor One has a clean and functional web app that allows for customization and password management in the web app for all passwords to be encrypted from any other site as well.

– The device is cheap and really easy to setup. This is perfect if you plan on using the device on multiple computers or if you plan to use it for travel or you plan to use public computers.

– Has the extra security feature for the “Passphrase” which is a unique security measure that is not employed with the Ledger Nano S.

– The screen is large enough to display the full address when verifying and confirming transactions, unlike the Ledger Nano S.


CONS:


– Does not support some popular coins like Ripple (XRP) or Tezos (XTZ). It also does not use a native application for primary coins, like Ethereum (ETH).

– Is not the cheapest entry level device. You can still get a Ledger Nano S for only $59 if you’re getting started and you are very price conscious.

-You will need to upgrade to the Trezor Model T if you plan to use a lot of the newer coins that are being rolled out or coins that previously did not have hardware wallet support.


CLICK HERE TO BUY THE TREZOR ONE FROM TREZOR’S OFFICIAL SITE


What do you think? Is there a better wallet you recommend for people getting started? Let me know in the comments below!

Cheers,


The Crypto Renegade


NOTE: This post may contain affiliate links. This adds no cost to you but it helps me focus on giving as much value as possible in every single post by being compensated for recommending products that help people succeed.
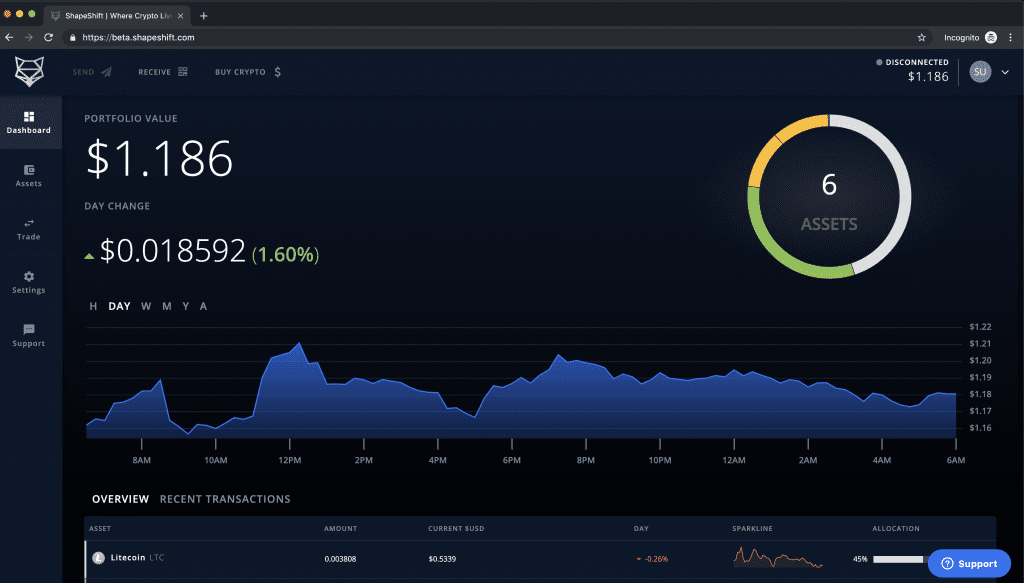
Scroll to top