Month: August 2019

Trezor Model T + Exodus Wallet Review (2020)

In this article, I am going to go over my experience with the Trezor Model T and Exodus Wallet integration and whether or not you should use it. There are a lot of things I like about this desktop wallet and a few that I really don’t, so let’s get into the details below!

Before I do, if you haven’t yet read the in depth review of the Trezor One and The Trezor Model T, then I will link them respective HERE and HERE. This will give some context below for the details of using these hardware wallets in general, before we compare how they work with the a hot wallet integration like the Exodus.

Here are the questions and answers I think you will find most helpful when deciding whether or not to use the wallet integration. Let’s get started!

Exodus Wallet – Overview
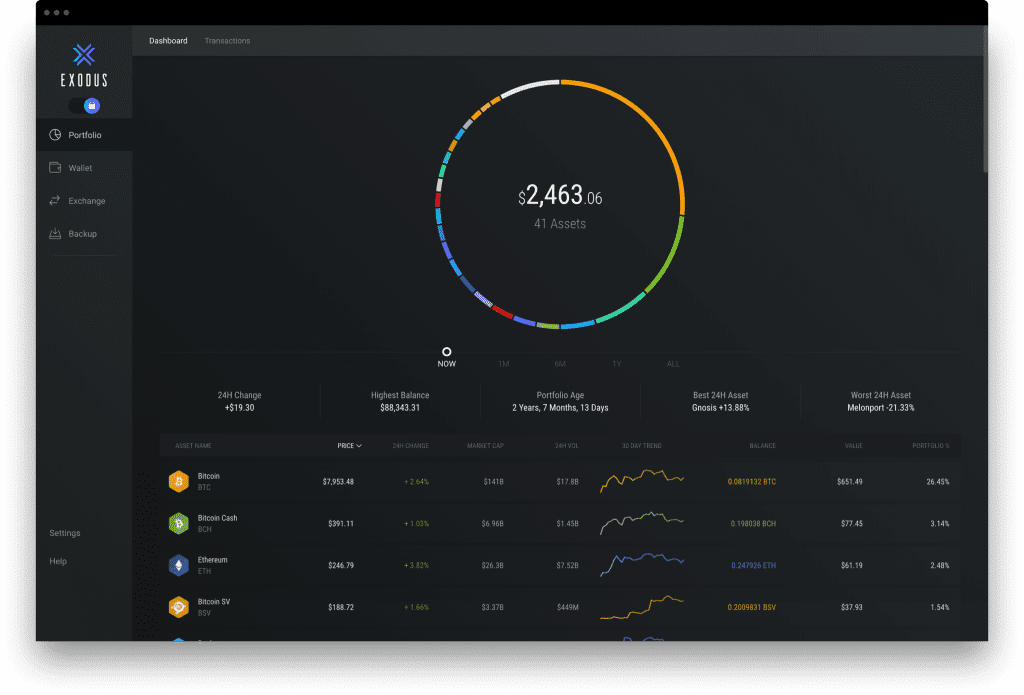
 

The Exodus Wallet (as mentioned above) is a crypto desktop wallet that you can download for free over at the Exodus Website. Why would I want to do this? Well, first, if you’ve only used a mobile hot wallet, then you’ll know that there aren’t many features or anything really beyond just the send and receive function.

This is ok (most of the time) for a mobile wallet, because you just need it to “work” when you’re trying to make a transaction out in the real world. However, when you’re managing a portfolio, it’s important to see the overall big picture before making some of your larger trading or managing decisions, such as: Overall Total Assets, Percentage Of Loss Or Gain (over a 24hr or 7-day or 30-day window), Percentages Of Asset Distribution, etc…

Not to mention the number of coins or assets supported. Because desktop wallets typically have more features and overall viewing space, you have the capability to manage more assets and do more that just send and receive. The Exodus wallet actually has both a desktop AND a mobile wallet, which is nice for syncing your portfolio between devices.

I am going to list the “Key” features that I found useful below, before we get to how the Trezor Model T integrates with these features to help improve the overall hardware wallet experience.


Features
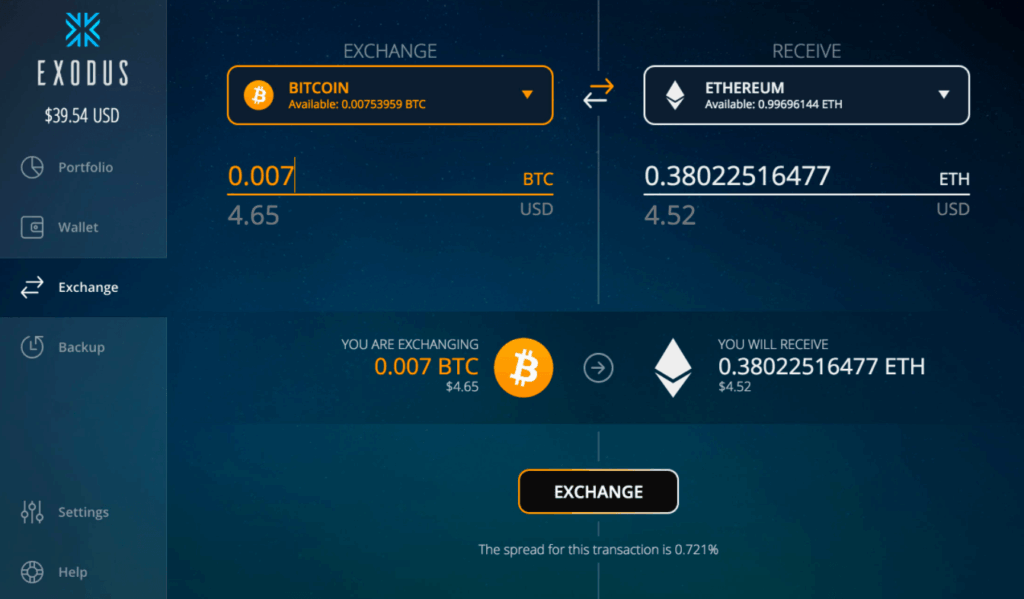


  • Functionality – Exodus provides a high quality user experience, and combines an aesthetically pleasing UI with an intuitive design. The desktop software client contains a wallet, portfolio tracker, and cryptocurrency exchange, and allows users to track their holdings and transactions around the clock, as well as store and exchange a wide range of digital currencies.


  • Flexibility – Exodus is available to Windows, Mac, and Linux users, and in addition to its internal integrated features, Exodus also provides an easy to use mobile app that is currently available to iOS users with Android support planned for the future. It also supports over 100 cryptocurrencies including popular currencies such as Bitcoin (BTC), Binance Coin, (BNB), Litecoin (LTC), EOS, and Monero (XMR). Ethereum (ETH) and a host of ERC-20 tokens are also supported.


  • Security – As a “hot” wallet, Exodus requires its users to create and use secure passwords, and when first installing the wallet, users are provided with a 12-word recovery seed phrase that is used to restore the wallet in the case of an emergency. The wallet also integrates with a Trezor hardware wallet and doesn’t require any personal information, and users’ private keys and transaction data are encrypted and stored locally on their devices.


  • Customer Support – Despite not operating as an exchange, the team provide a good range of support including their resource page which contains an FAQ section and over 100 articles, and their video The status page gives a quick overview of any issues that the team are experiencing, and they can be contacted via email. They also run a Twitter account, Facebook page, and Slack channel.


This is a full multi-currency wallet and will continue to add more coins being supported soon, including Tezos (XTZ) and some pof the newer TRC-10 and TRC-20 tokens. This is always evolving for the better.


Coins Supported


Exodus supports 103 cryptocurrencies in total (coins and token). The most notable coins supported by the wallet are:


  • Bitcoin
  • Ethereum
  • Ripple
  • Litecoin
  • Bitcoin Cash
  • Binance Coin
  • Tether
  • EOS
  • Monero
  • Dash
  • Raven Coin
  • Stellar
  • Tron
  • Bittorent


These are just a few notable coins, but you can find a full list of coin support HERE. This page is always evolving and will continue to add more coin support in the future.


Trezor Model T – Integration
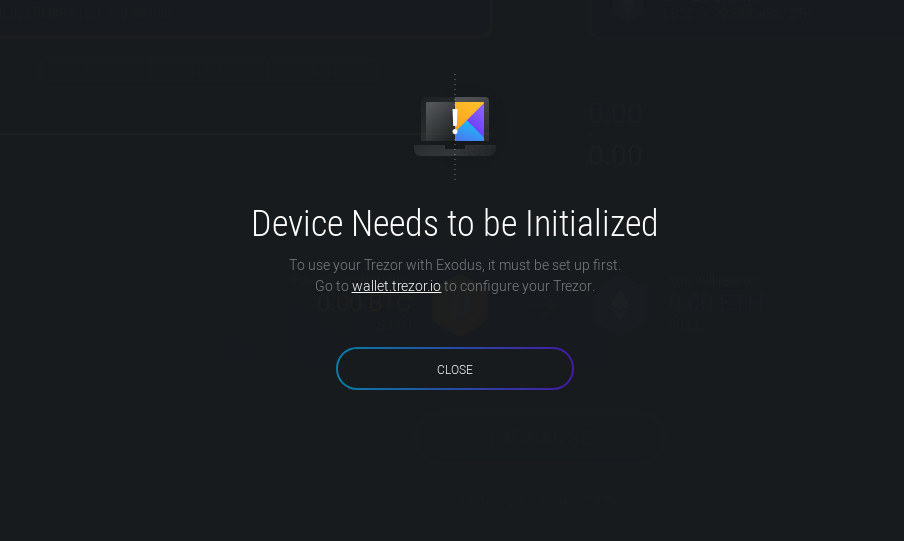
 

This is a major upgrade from the Trezor web app, and apparently even Trezor agrees. You can setup your Trezor Model T from scratch (like I did) and it’s a very seamless experience. The good news is if you decide to go back to using the web app, all of the features will be enabled, with the exception of the optional 25th seed phrase password when doing the initial setup on the device. This can easily be enabled once you login to the web app and is a security feature I use, personally,

Managing my portfolio, especially certain coins like Ripple and Monero, is a lot easier here, because I don’t need extra software or other add-ons like you would individually if you didn’t use i.e. Exodus. This makes managing ALL my important coins in one place, much less of a hassle. I prefer to actually manage my coins on this wallet, because it’s a one stop shop, so to speak.

(Note: Exodus uses an exchange integration and that is where they make the bulk of their money, since this is a free downloadable wallet. In my experience, the fees were a little too high for me, but the coin management and portfolio management more than makes up for it)


Does it Work With Trezor One?
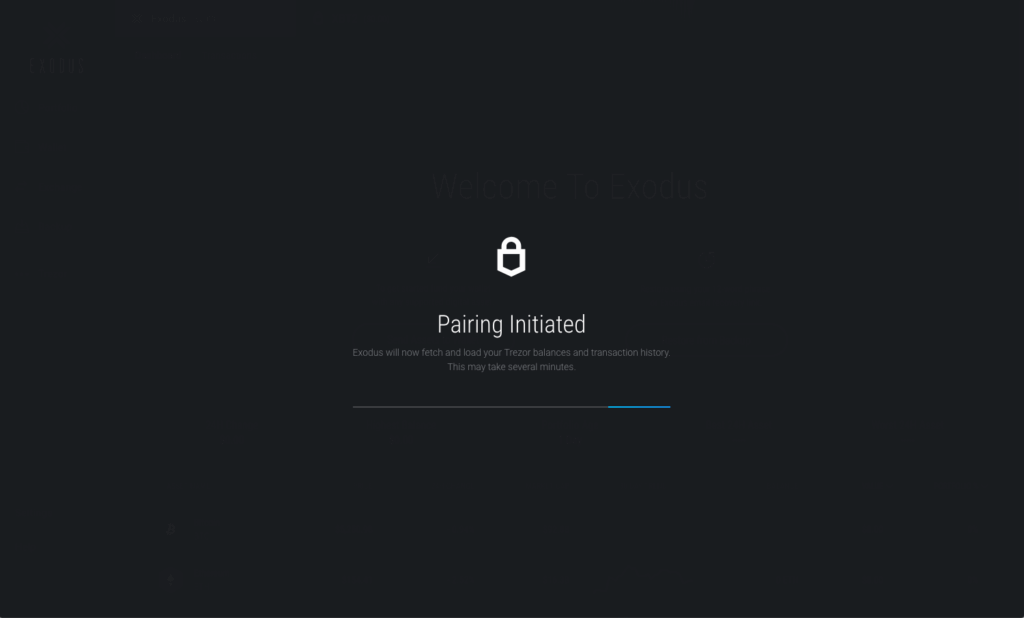


Yes, but not all coins are supported by the Trezor One firmware. Essentially, all coins and tokens that are supported on the Trezor web app willl be supported in this software wallet. You can view the full coin support and setup HERE. If there is any doubt, any coins or tokens not supported on this 1st generation device will be greyed out.


Exodus Wallet – Conclusion


Overall, using the Exodus Wallet has been a pleasant experience. I would absolutely recommend trying it out for managing your Trezor One or Trezor Model T, if you haven’t already. There is no KYC or personal information asked when you set it up, and when using the Trezor, your private keys are always protected. As I mentioned above, my only negative was the fees that are associated with the integration were way to high for me. If they lowered it, it would be the perfect solution to trade assets offline, which if preferable.

Other than that, it’s one of the best crypto management experience’s I’ve used. And when you’re serious about protecting your private keys like I am, and you need to manage or hold specific assets that you can’t directly manage on the web app, this is a really good solution. The closest thing to this is the recent Trezor integration with ShapeShift, which you can check out my review of that HERE.


What do you think? Is Exodus Wallet a good contender for managing your assets on your Trezor device? Let me know below in the comments.


Cheers,


The Crypto Renegade


NOTE: This post may contain affiliate links. This adds no cost to you but it helps me focus on giving as much value as possible in every single post by being compensated for recommending products that help people succeed.

Ellipal Titan Pre-Order Extends To 9/15! [SPECIAL OFFER BELOW]

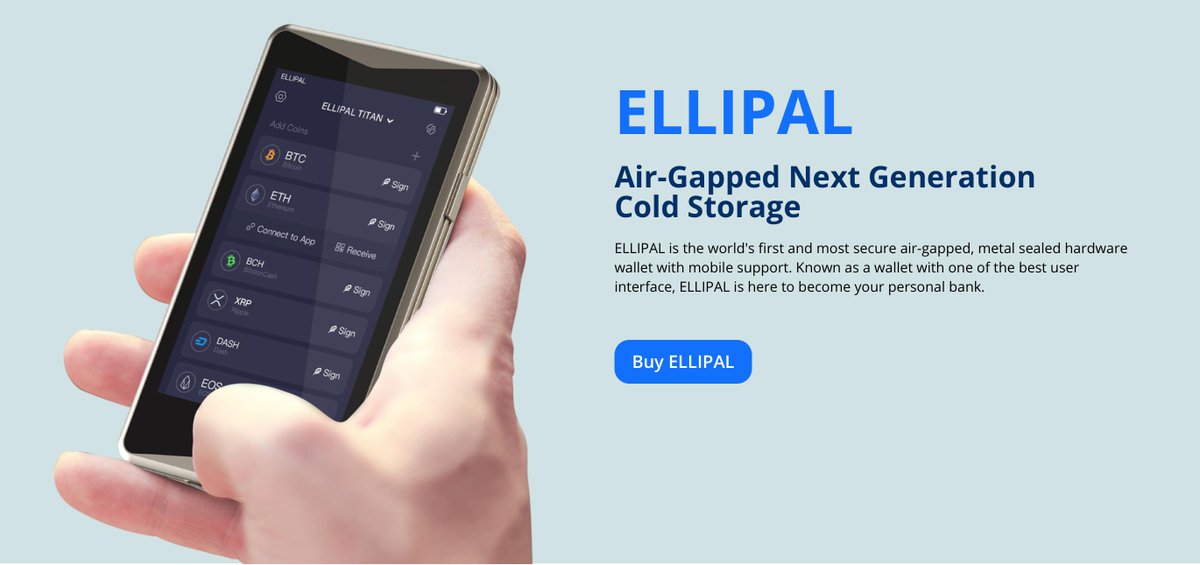
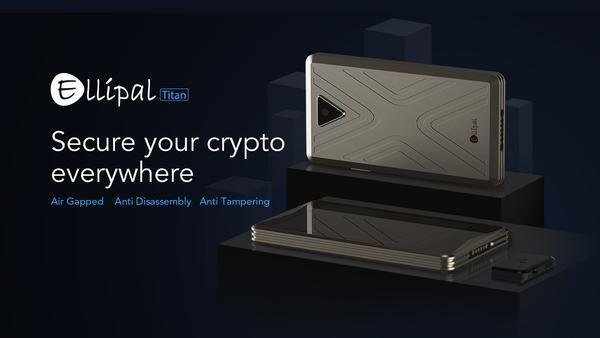
The Ellipal Titan Pre-Order has been officially extended until September 15th, 2019! This can be considered bad news by some, but for people that are still wanting to get a great deal on the wallet, it’s a fantastic opportunity. This device has a lot of upgraded features from the previous generation wallet (Elllipal 2.0) and has been built like a tank. This completely air-gapped crypto hardware wallet is very exciting and I look forward to having a detailed review on it as soon as I receive one.

I received a notification that my pre-order which was originally scheduled to be sent out by August 15th, has had a small delay, so I thought this would be a good opportunity for people to get a great deal on this device as the demand is heating up. And if you don’t pick one up until after the September launch date, you may be waiting a long while as there appears to be some significant demand, and therefore, some extra delays.

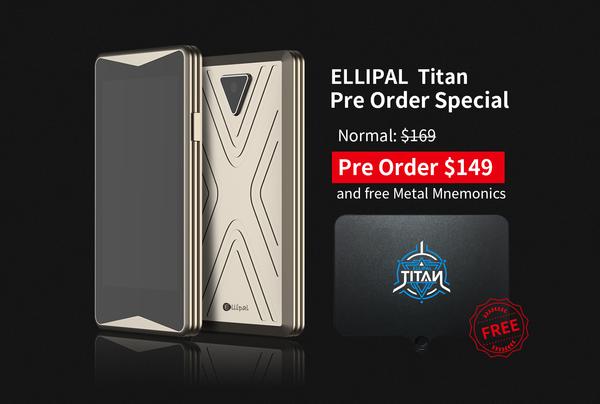
I recently wrote an in-depth first look of this device and you can find it HERE. As you can see in the image below, you can now get the Ellipal Titan Pre-Order for only $149 ($20 off) AND you’ll get a FREE metal mnemonics plate for an indestructible recovery seed solution. This device is very similar to that of CryptoSteel and CryptoTag, which can cost anywhere from $89-$215 just for the metal recovery seed device, let alone the hardware wallet itself, so it really is an AMAZING value.


Ellipal Titan Pre-Order


Ellipal Titan Pre-Order – Overview


I go into detail with this device over on this article, but I wanted to go over the primary benefits to this upcoming device that you will be hard-pressed to find with any other crypto hardware wallet currently available.

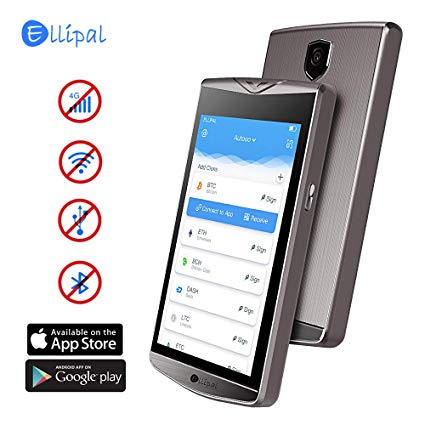
  1. This device has ZERO connections to the internet. This means no, WIFI, BLUETOOTH, CELLULAR, NFC or USB. This means that itis not subject to any network or remote attacks or any kind.
  2. This device is built like a tank. Seriously, this is the world’s first metal, fully sealed (ZERO PORTS) air-gapped security device. Most devices have at least a port for USB for charging, but this device cleverly uses a connector for charging the device that is magnetic, so it is literally air tight.
  3. The device is set to self destruct if it attempts to be tampered with. What does that mean? The device internals will self-destruct if you attempt to open it to extract any private keys or any other sensitive data.
  4. The Ellipal Titan is specifically designed to prevent evil maid attacks and supply chain attacks, which have been prevalent in other types of wallets.

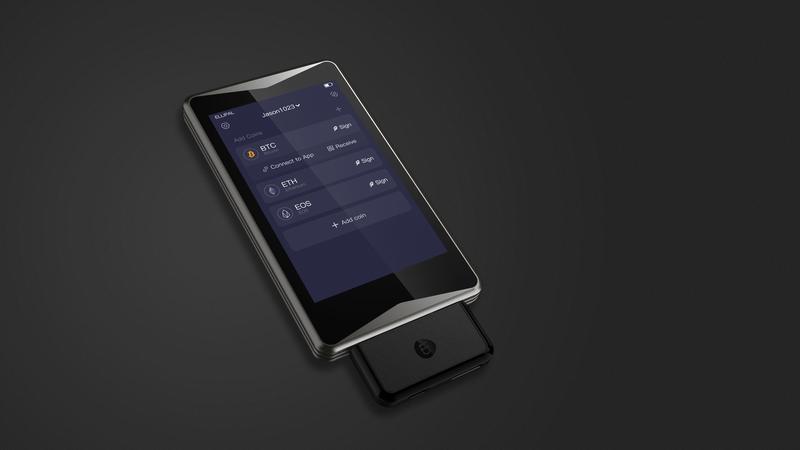
Additionally, this device has received an upgraded user experience from the previous generation Ellipal 2.0 cold wallet. Some new features include: New dark mode, finance function and exchanges have been updated and is now connected to the Binance DEX (Decentralized Exchange), and easier backup and recovery.


Existing Users get 50% Off – See Below


During this pre-order period up to September 15th, 2019, you can purchase the Ellipal Titan Pre-Order for 50% off  if you currently have a the Ellipal 2.0 device. This is a special incentive for people that have already purchased the original Ellipal 2.0 device at any period of time. This is an excellent deal if you’re looking for a massive upgrade or if you just want to add a secondary wallet to your arsenal.


Conclusion


All in all, this is one of the hardware wallets I’m very excited for in 2019. This is very similar to the Cobo Vault wallet, (which I will leave a review for HERE), but this is a much cheaper option for a lot of the same functionality, security, and durability. I would say this is the closest device to that one in terms of comparison. These are very robust devices and are built for the above average crypto user. This is also for someone that takes their security VERY seriously and wants to “HODL” long term in the safest way possible.

I will say, that if you plan on using these devices on a regular basis (i.e. trading, daily transactions, etc…), this probably isn’t the best wallet for you. Why? This has many steps to authorize and sign transactions, which is great from a security standpoint, but is really not ideal for the heavy daily user. For me? I use the KeepKey device as my daily user wallet, as they just launched a very user friendly new platform that makes it super easy to trade and manage your portfolio.

With KeepKey, you don’t even have to KYC in order to use the hardware wallet and make transactions, but if you want to trade and still keep your private keys in your possession, I would highly recommend it as your “daily use” crypto hardware wallet, as that’s what I currently use on a day-to-day basis.


What do you think? Are you excited for the Ellipal Titan cryptocurrency hardware wallet? Let us know down below in the comments!


Cheers,


The Crypto Renegade


NOTE: This post may contain affiliate links. This adds no cost to you but it helps me focus on giving as much value as possible in every single post by being compensated for recommending products that help people succeed.
OPEN DIME Review (2020) – The ONLY Way To Physically Transfer Bitcoin Offline

In this review, I am going to deep dive into the Open Dime bitcoin credit stick! What does is it do? How does it work? When would I ever need to use one? I am going to dive pretty deep into this EXTREMELY unique bitcoin credit stick, that allows you to make a bitcoin transaction OFF the blockchain. This is a secure USB-like device that is designed to have a one-way transaction of bitcoin (physically) between two parties.

As a hardware wallet enthusiast, I was very eager to test this device out in person and it honestly is unlike anything else I’ve ever used. It seems futuristic and is really the only way to transfer bitcoin to another person COMPLETELY off the grid (not even the blockchain) and is a really cool concept that has plenty of specific use-cases, but to be honest, isn’t ideal for every day bitcoin use.

The review/walkthrough below is fairly detailed and lengthy, but if you want to know what my final verdict on this device is, scroll down to my conclusion at the bottom to get a recap.

Additionally, here is a link to a related hardware wallet that is very similar to this, in the sense that operates completely offline. You can check that out HERE!

Let’s get to the Open Dime review below!


What Is The Open Dime?


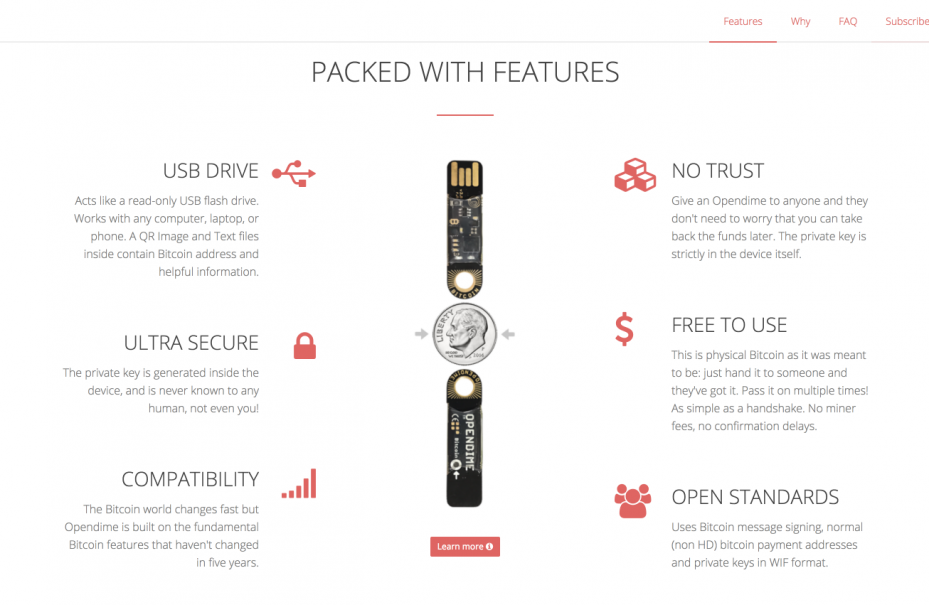
“Opendime is a small USB stick that allows you to spend Bitcoin like a dollar bill. Pass it along multiple times. Connect to any USB to check balance. Unseal anytime to spend online. Trust no one.”

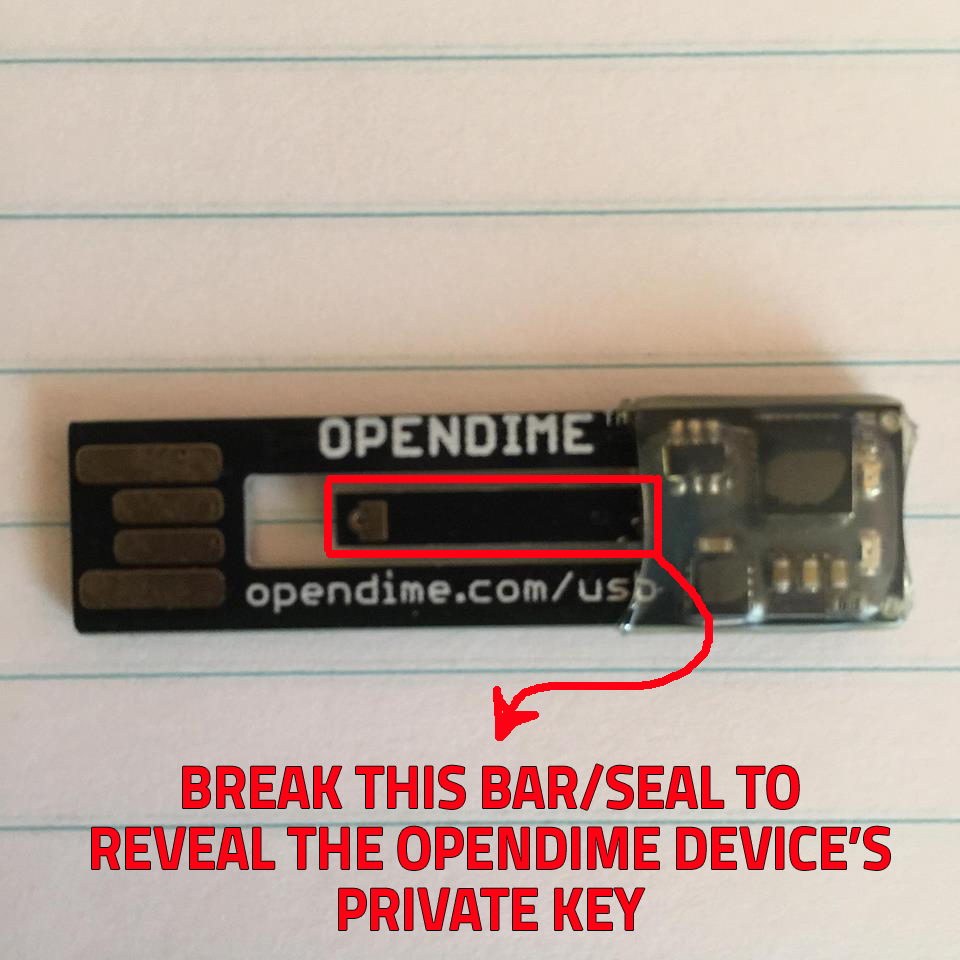
This is directly from Open Dime’s website. This device is designed to be able to pass bitcoin along from one person to another (and even down the line for multiple people) while still being secure and exposing the private key to no one. There is a secure “Bubble” that is required to be punctured in order to gain access to the private key. This means that there will be evidence if there is any tampering or foul play when holding or inspecting of the device.

This is the world’s first way to physically transfer bitcoin from one user to another (in person), while still remaining secure. In other words, it allows for a bitcoin transaction and is able to be passed along from person to person without having the need to know any passwords or wait for confirmation times on on the blockchain.

In simple terms, it’s basically a disposable hardware wallet that is used like cash. Use it accordingly.


What Comes In The Bag?


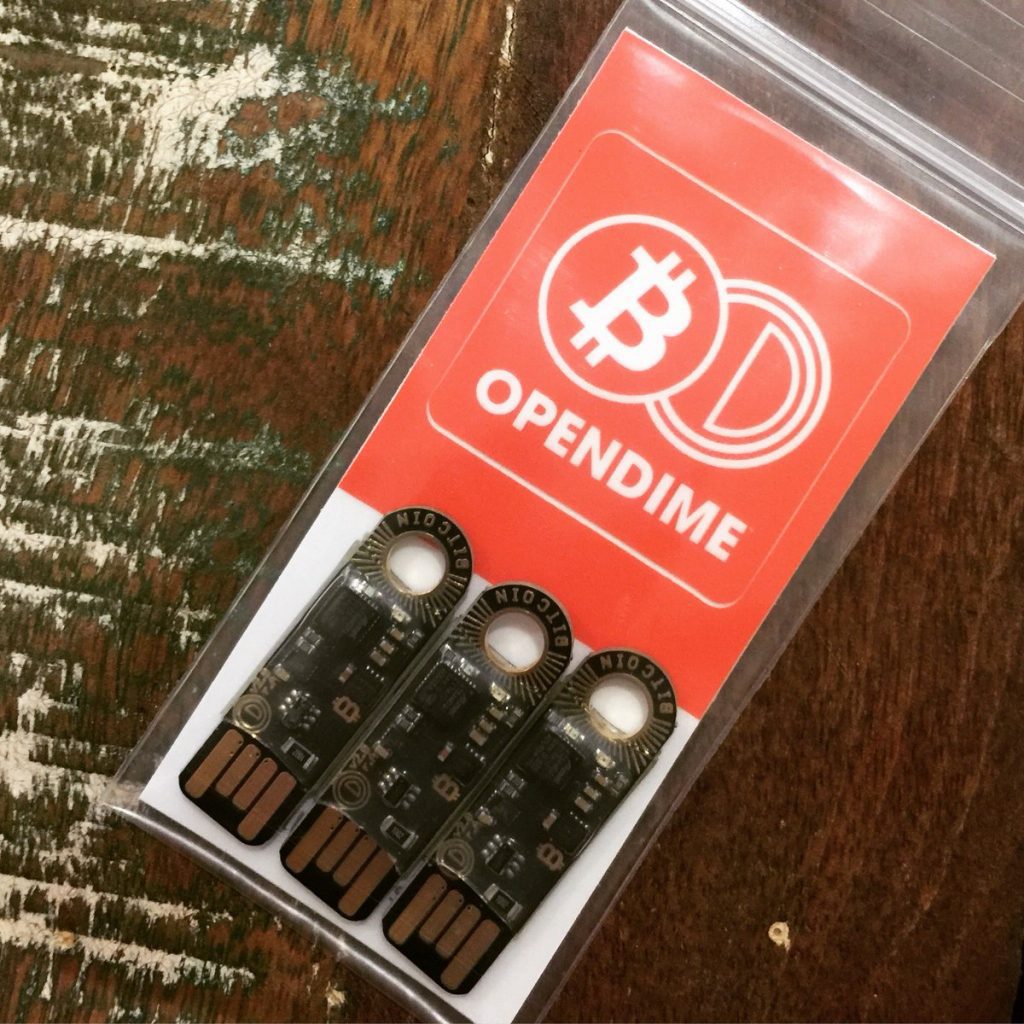
In the bag, (yes, it comes in a durable plastic bag for transparency) comes 3 Open Dime USB-sticks. This is currently going for about $37.50 for this 3-pack or roughly $12.50 per Open Dime stick.

All 3 sticks are loosely packed in a plastic bag that includes a card that includes instructions to visit opendime.com/start in order to walk through the setup process to start loading bitcoin onto the devices. 

Now, if you click that link, you’ll notice that it just redirects to their homepage. I am a bit disappointed as there is only a card that gives you 3-steps to get started.


  1. Plug Into USB

     2. Open index.htm

     3. Follow The Steps


Pretty simple, right? Well, there is no other printed form of instructions. On the device (once it’s plugged in), you will find a “readme” file on the device to learn how to setup.


Design & Setup


Design

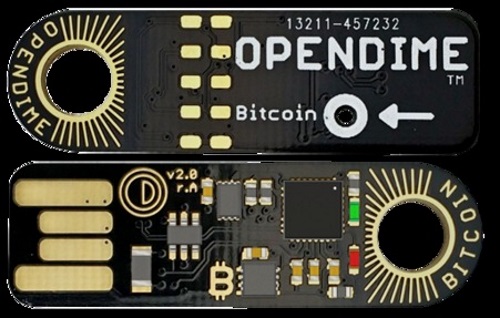
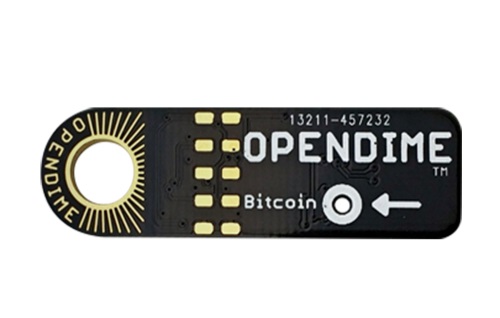
The device is pretty basic and bear-bones. There’s nothing beautiful about it, but yet it’s beautiful. It looks line an rough, unfinished product, but there’s something geeky about that kind of look. The idea of an open PCB is not only to minimize the unit cost. It also comes from being transparent and not having a closed product. I probably should have mentioned this earlier, but Opendime is an open source project. Anyone with a little programming knowledge can audit it on Github.

From the 2.0 version, the edges are now oval and not rough. The board itself is very firm and can not be broken easily and certainly not accidentally. My personal opinion is that their latest version is very well-made. I like the openness of the product. At the same time, everything is visible, but not easy to break or mess up with accidentally if you’re a newbie. The PCB and other components are protected with a glue.

Setup

The USB stick does not require drivers to work, it’s plug and play. The device was recognized instantly.

The first step is to plug the Bitcoin stick into your PC (Or Mac).

Once the device is inserted, the second step is to open the index.htm file inside the Open dime folder.

Next, when the index.htm file is opened in the browser you will be asked to agree to the terms of service. The pop-up warning is displayed in several languages.


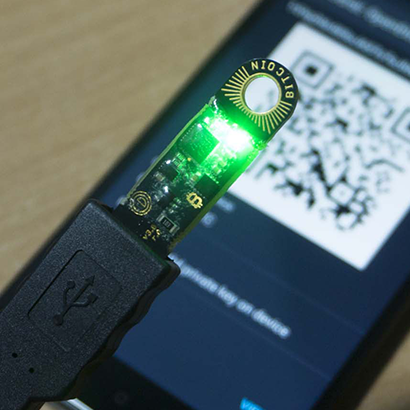
Light status Explanation
Green with brief flicker Sealed. Your funds are secure.
Red and green alternating UNSEALED. Private key has been revealed
Green solid, brief flash of red Not yet loaded with enough entropy (setup time).
Green flashing (fast) Reading/writing to drive.


The next step is to create the private key.


Generating the private key


After the device is plugged into your PC’s USB port, you will have to generate a private key in order to load the funds into your Opendime. This process is very user-friendly and easy. Bear in mind that during this process Open dime does not have a control over the private key, nor do you. The private key will be randomly generated onto a device microchip using random entropy you add to the device memory. It does not require an internet access to do so.

Firstly, the FAQ advice that for better randomness, you use images only you have. The instructions say that you’d have to add at least of 256kb of data. However, they do not state anywhere that the total file size should not be larger than the USB device memory which is around 1.29 MB.

In my first attempt, prior to knowing the maximum size, I tried to add around 5MB of data and got an error. Seeing that, I’ve selected only two images and copied them onto > Open Dime and device generated a completely random private key. Once the public key is ready, there will be a few noticeable changes to the device.

  1. When sealed, the Open Dime will flash green when plugged in into the PC.
  2. When .htm file is opened, you will see a very clear message on the screen that you now have a private key.

This entire process is very intuitive. I like that there are so many signals that show the state of your device, both physically and inside the PC. This is very smart engineering and user experience at the same time.


Verifying the device


The device can be verified in the following ways :

  • phone charger / USB – the LED light indicates the status
  • physically inspecting it – check if the resistor has been damaged
  • factory seal to make sure it comes from genuine OD factory.
  • Samurai wallet – Android only
  • Google Chrome extension- iOS only

Once I began learning about Open Dime, I clearly understood the need that this little device can be verified and audited.  At first, I thought there is only one way to verify Opendime, but as I began tapping into it, I realized how many different ways are to verify the Bitcoin bearer bond.


Adding Bitcoin to Open Dime


The next step is the best of all – adding the funds to your crypto piggy bank. You can only add bitcoin to a device if you created the public key which automatically shows receiving public address.

You can find the public address for your Open Dime inside the folder. It can be found as a text and a QR code in jpeg image format. The way you’ll be sending the money to your USB stick depends on the wallet you’ll be using. The process is pretty much similar, you can either copy/paste the text address or scan the QR code from the folder. Make sure to double check that the address is correct and confirm the payment.

Soon after the payment has been sent, you will be able to see a transaction on the bitcoin network, it may take a time depending on the network state that it gets confirmed. And that’s all.

Your Open dime went from an empty piggy bank to an item with a verifiable value. You can now exchange it like a cash from one hand to another and add funds to it an unlimited amount of times.

Since transaction will be happening off-chain, there will be no confirmations or mining fees. The participants of the transactions are verifying it instead and passing it from one hand to another, an infinite amount of times. The private key will be sealed neither you nor anyone else will know it until the device is unsealed.


Unsealing your Open Dime


Once you’re ready to spend bitcoin from your crypto piggy bank, you have to break it. Once you break it there’s no way back. Use a pin or a needle and push through the marked hole on the PCB. You need first to pierce the glue and then by pushing, you will push out the resistor. By doing so, you’re making a permanent physical change to your device, which reveals your private key.

This is probably the most amazing feature of the device. By doing a permanent damage, you can’t cheat in a transaction, because you broke the chain of trust. The device itself will now flash red once inserted into a PC, power bank or a mobile phone very visibly signaling that the private key is no longer a secret. This is at the same time the biggest risk of the device. This means that in order to get the bitcoin out of it, you’ll have to reveal it to a PC. Which further means you have to trust that PC and its security.

Compatibility & Security


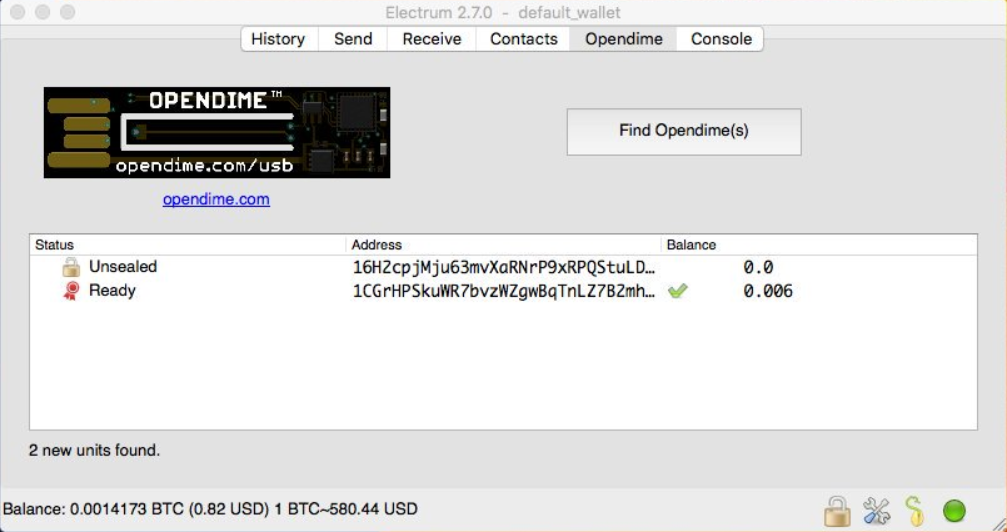
The setup can be done on any device that can read a conventional USB stick. The private key can then be imported into all common wallets after the resistance breaks out, including the following: Copay, Electrum, Samourai Wallet, Breadwallet, and Bitcoin Core.

A special feature is the app Samourai Wallet , which has implemented a complete integration for the Bitcoin Stick Opendime. This allows you to quickly check a stick on the go via OTG cable. There is also an extension for the well-known Electrum Software Wallet .

Verify the authenticity of the stick The latest generation of Open dime products includes a new chip to make fake devices impossible. Note: This test is an advanced use and is not required for normal use. For people who want to verify an Open dime before use, Open dime provides a python program. With this, all test steps of the new chip can be carried out. It’s a simple command line program, but requires some preparation.

To verify the authenticity of a stick, Open Dime offers manual and automatic possibilities in the form of the Python script trustme.py. Unfortunately, this does not happen automatically and a  is time-consuming, so most users will probably simply use the stick without checking in advance.

The transparent case and the two status LED’s already provide a basic way to detect manipulations on the hardware wallet. Details of all security measures can be found in the Open dime white paper. Opendime’s entire code is also on GitHub.


Does It Only Support Bitcoin?


Short answer is, Yes. This device was designed in the earlier bitcoin days to be used as pee-to-peer electronic cash and stays true to it’s roots. You can also see the open source code their used on github as mentioned above.


Open Dime – Conclusion


Overall, my experience was good with this device, and I would feel comfortable recommending it. But, ONLY to someone who is very technically savvy.

It’s awesome that Open dime enables me to transact off-chain, privately and securely without having to trust an online generator or a third party with my private key generation. Additionally, they are completely open-source and provide one of the best support experiences I encountered from a cryptocurrency company.

I gave away an Open Dime to my brother for his birthday and for now, I believe this is absolutely the best and safest way to give someone a bitcoin.

Some of the disadvantages of the devices are that it looks rough, though I do not mind that. Quite opposite, it really makes you feel like a nerdy cypher punk while using it.

A more serious limitation is that Open dime is disposable. There’s no way to re-use it. You can’t recover the seed or send crypto from it. Fluctuating exchange rates might be an issue in this kind of transactions. All of these things are not impossible to solve and I hope that we will see even better physical cryptocurrency solutions from the Open dime team.


What do you think? Would you ever use an Open Dime? Let us know in the comments below!


Cheers,


The Crypto Renegade


NOTE: This post may contain affiliate links. This adds no cost to you but it helps me focus on giving as much value as possible in every single post by being compensated for recommending products that help people succeed.
ELLIPAL 2.0 Cold Wallet Review (2020) – Most Secure Bitcoin Wallet?

In this review, we are going to dive deep into the Ellipal 2.0 crypto hardware wallet. Is it really as secure as they claim? Is it better than Ledger or any other mainstream competitors? Stay tuned for the whole article to find out!

This device is very unique to say the least! Until recently, this was the first 100% air-gapped device of it’s kind, which is super compelling for security enthusiasts. We all have heard of the numerous exchange hacks over the years and it’s becoming more and more apparent that you need to keep your private keys offline, and on a hardware wallet. So, is this the right one for you? Let’s take a look down below.

One thing I will say before we dive in to the details is, in regards to the the major providers in this space, the one thing that I don’t like about Ellipal is that their device isn’t open source. In my opinion that is a crucial function. Not only for transparency, but also for security. When holding a large amount of funds on the device, it is good to know that an active community is reviewing the code on a continual basis. That is really my only “gripe” with this wallet.

Having said that, it’s very impressive, and my experience with it was very good and the steps involved made me feel very secure about my choice as the security of this device is top notch! Let’s take a look below.


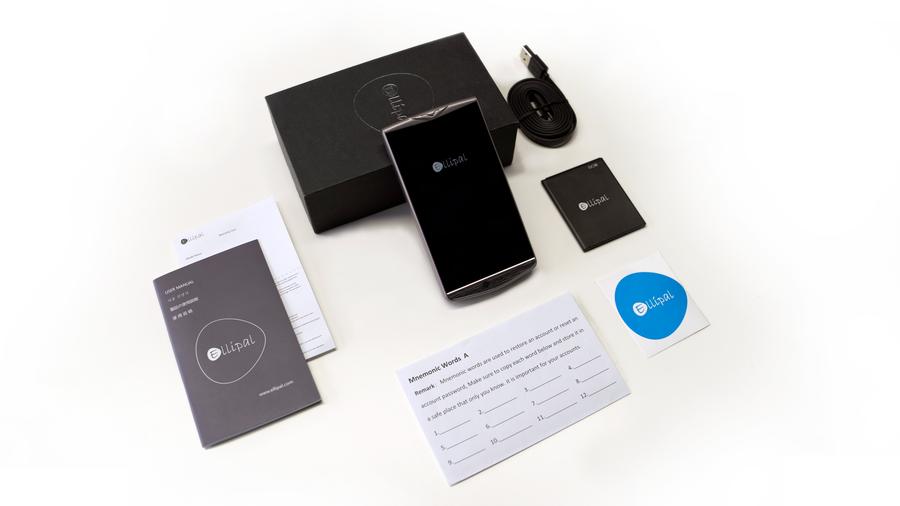
What’s In The Box?


To preface this device, It has zero: Wifi Connections, Bluetooth Connections, 4G connections, or any wired connections to any other device!

This device comes with everything you need to get started with using, minus the iOS and Android app, which you will need to download to begin using. All hardware and components are listed below.

-Ellipal Hardware Wallet

-Charging Cable

-User Manual

-Mnemonics Recovery Seed Card

-Warranty Card


How To Setup The Device


So this is where this device separates itself from the likes of KeepKey, Ledger, or Trezor. The three mainstream heavy hitters in terms of the hardware wallet market. How does a device that claims to have no internet access whatsoever work? The short answer, QR codes. This hardware wallet interfaces with the Ellipal mobile app and allows you to have both a mobile (hot) wallet and a wallet that displays on the hardware device as well.

The Ellipal has a camera on the air-gapped device so that between you smart phone and the hardware wallet, you can scan QR codes to transfer funds and still be kept completely offline. This creates an extra step for management, but for the most paranoid among us, this is actually a comforting process.

It essentially is a 3-step verification process for managing your funds and requires an SD card for managing firmware upgrades. This is a pretty arduous process, even for those that are pretty tech savvy. Again, this could be interpreted as more secure, but also makes managing funds and your device to be a bit cumbersome for the average user.


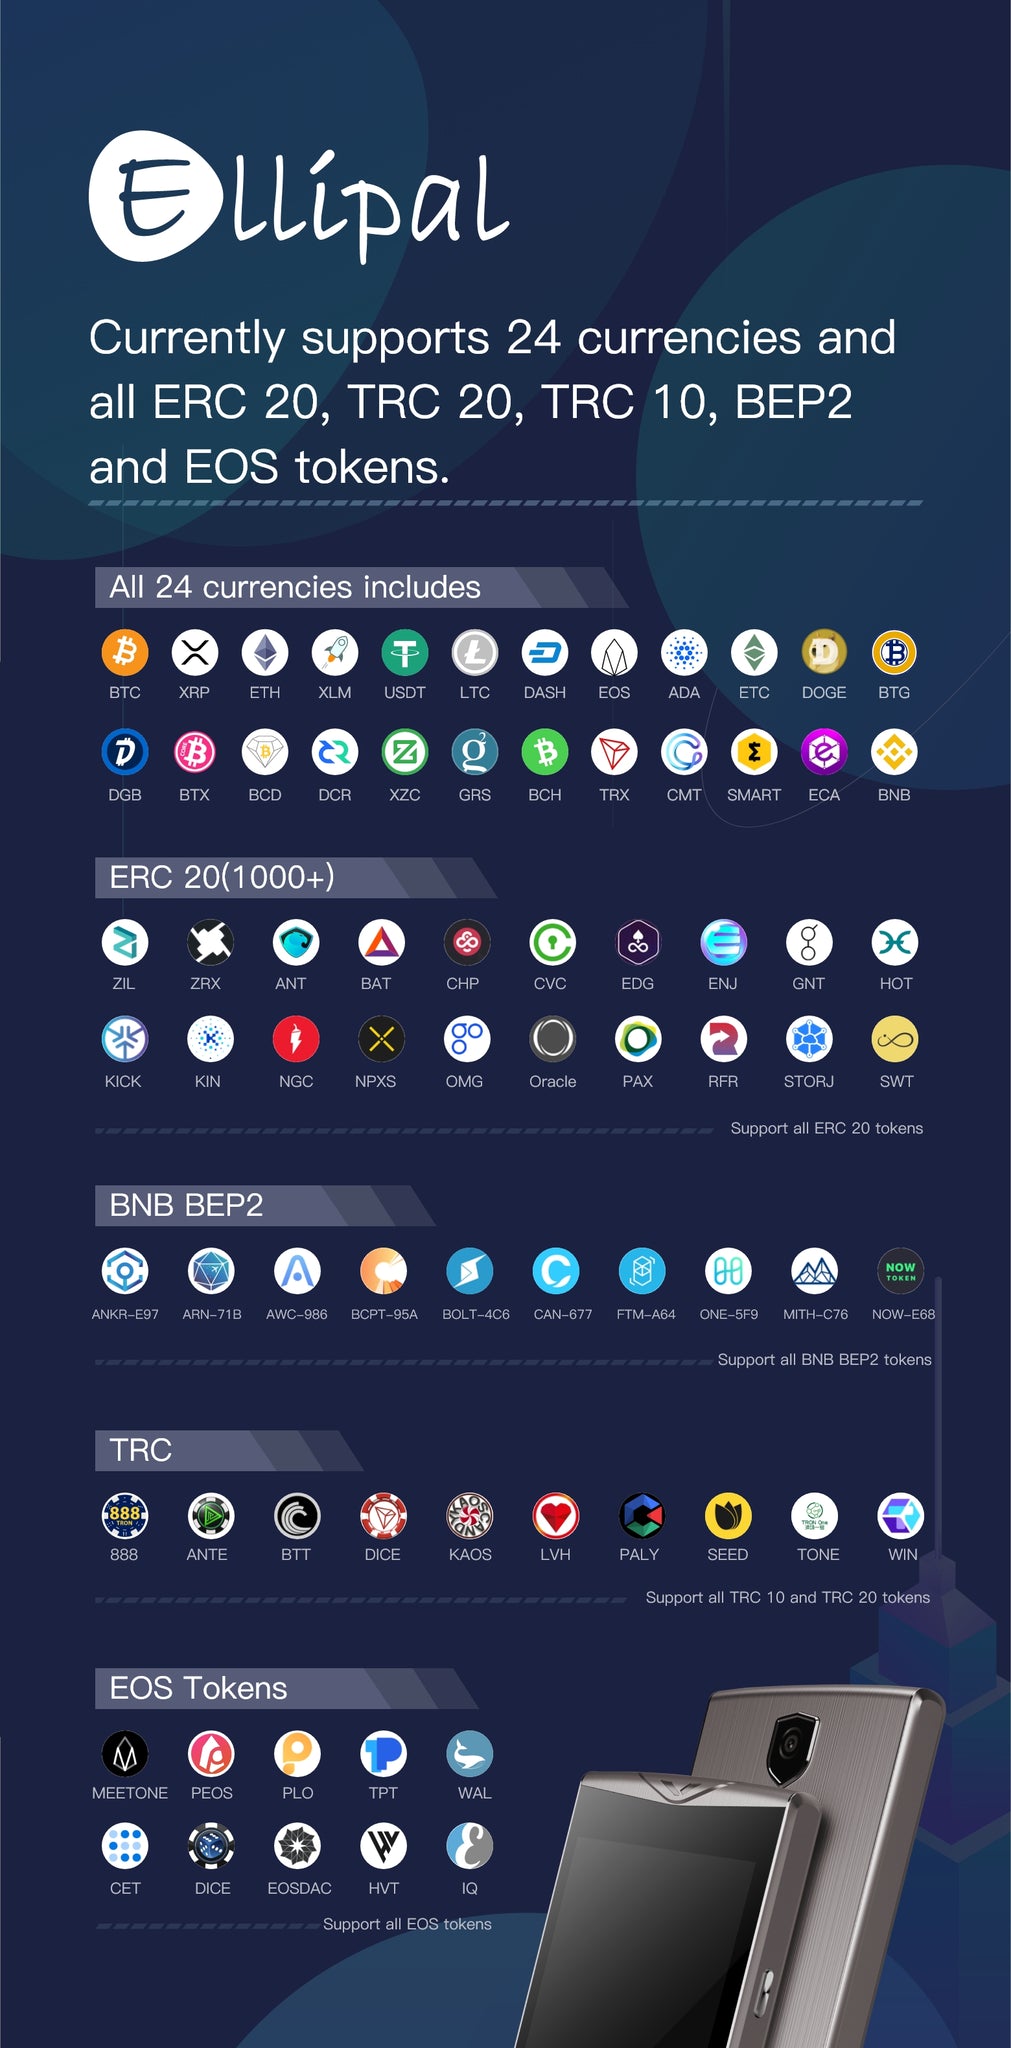
What Coins Are Supported?


Instead of manually writing this out, I will include a chart with all existing coins that are supported. They are additionally developing apps on certain coins that I will list in writing here:

BCN, NANO, XEM, XTZ, ZEC, LSK, QTUM, ONT, BTS, STEEM, WAVES, XAVES, XVG, SC, NEO, IOTA, ELA. The current coins supported are listed below.


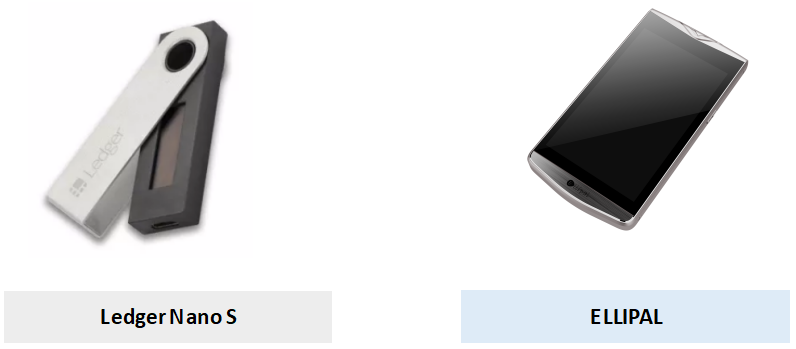
Ellipal 2.0 Vs. Ellipal Titan Vs. Ledger


Ellipal Titan has a self destruct mechanism in place, so that if the screen is tampered with or crushed or broken in an attempt to gain access to it’s internals, it will break a special circuit board that holds all your private keys. This is powerful. Additionally, it’s very sturdy, so not only is it IP65 rated for dust and water resistance, but its made out of a very strong single piece of metal that houses and encompasses the entire device.

The Ellipal Titan is specifically designed against evil maid of supply chain attacks so nothing can be imported or inserted as there are no open access ports on the device.

The Ellipal 2.0 is still a very strong and secure device, but it doesn’t have a durable exterior that is built for abuse, and it also has an SD card slot for updating it’s firmware on the device and also has a charging cable port, so there are 2 entry points. Again, still very secure, but the Ellipal Titan is really a massive upgrade.

In terms of other mainstream competitors, like Ledger, it’s like comparing apples and oranges. This device is much more expensive at $149 and is completely air-gapped. This means there is no USB connection to any online interface and does not have access to any where near as many apps or coins that are supported on Ledger.

The Ellipal is more for the paranoid users that do NOT want to risk having anything interface with online devices. The user experience is much more complicated and not as easy to use as the Ledger, not to mention Ledger is only $59, and is currently the cheapest “mainstream” hardware wallet, but can only support 3-4 coins at once.


https://youtu.be/3NYIiPdFg2w

Ellipal – Conclusion


This is a really unique and secure hardware wallet. The only other wallet that is remotely close to this one that is currently available at the time of this writing is the Cobo Vault wallet. You can read an in-depth review of that device HERE. That wallet is very durable and is more in line with the upcoming successor to this wallet, the Ellipal Titan, in terms of durability, however that device has less than 10 coins currently supported and has a much heftier price tag at $479. It’s more of a niche device in my opinion.

Having said that, if you are on the fence with this device, the upcoming Ellipal Titan is currently available of pre-order at the same price of $149, and is slated to start shipping around August 15th, 2019. I my personal opinion, I would go with that, as it’s a massive upgrade from this device. However, if you choose this device, you still can’t go wrong. Both devices will have the same coin support and will continue to expand in terms of functionality and coin support, as the firmware is going to be compatible.

If you want to purchase this device, it will be supported for years to come. Click the button below to jump to their site and make the jump to a unique form of crypto security!


What do you think? Is there a more secure hardware wallet for a comparable price you would choose over this? Let us know in the comments below!


Cheers,


The Crypto Renegade


NOTE: This post may contain affiliate links. This adds no cost to you but it helps me focus on giving as much value as possible in every single post by being compensated for recommending products that help people succeed.
 

Cool Wallet S REVIEW [2020] – Wireless Hardware/Software Wallet In One!

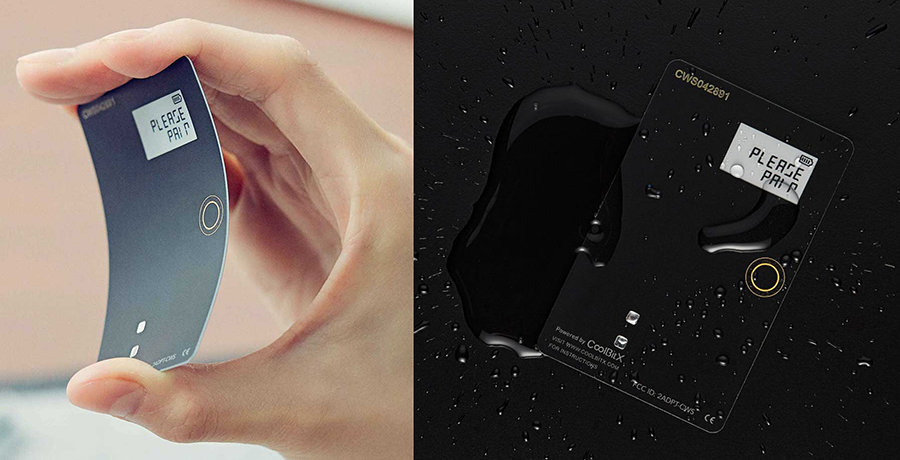
In this review, I am going to dive deep into the Cool Wallet S, which is a credit-card shaped cryptocurrency hardware wallet. Is it secure? How does it work? How many coins are supported? Stay tuned because we are going to address all of these questions and more!

When I first picked up my Cool Wallet S, it was a very professional package and one of the only bluetooth hardware wallets on the market. Until recently, there haven’t been any other wireless hardware wallets that are on the market (Now, there is the Ledger Nano X). I was enthralled because I always wanted a secure way to use a hardware wallet with my mobile device that didn’t require me to be tethered to my laptop or other USB device in order to sign transactions.

This wallet takes all the ease of use of a software wallet on your phone and merges it directly with the security of a hardware cold storage wallet, hence the name “Cool Wallet” (Hot Wallet + Cold Wallet = Cool Wallet). When I first opened it up, it was pretty straight forward, and actually resembles a basic plastic credit card, except the texture is a bit different and has an e-ink screen to verify transactions. I will go into detail below for the user experience and design of the product and what my thoughts were when comparing it to other hardware wallets I’ve reviewed.


What’s In The Box?


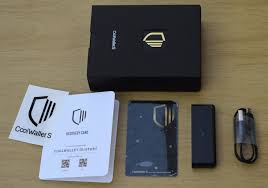
-Cool Wallet S Device

-Recovery Seed Card

-Cool Wallet Sticker

-Charging Pad With USB Cable


The above are the contents of the sleek, black, minimalist box, however this is only half of the equation. The device itself interfaces with the CoolBitX app which you can get from the iOS app store or Google Play store to setup the device. The app is where you will go through setup, initialization, and ultimately processing transactions, with the hardware wallet by it’s side.


Design And Setup


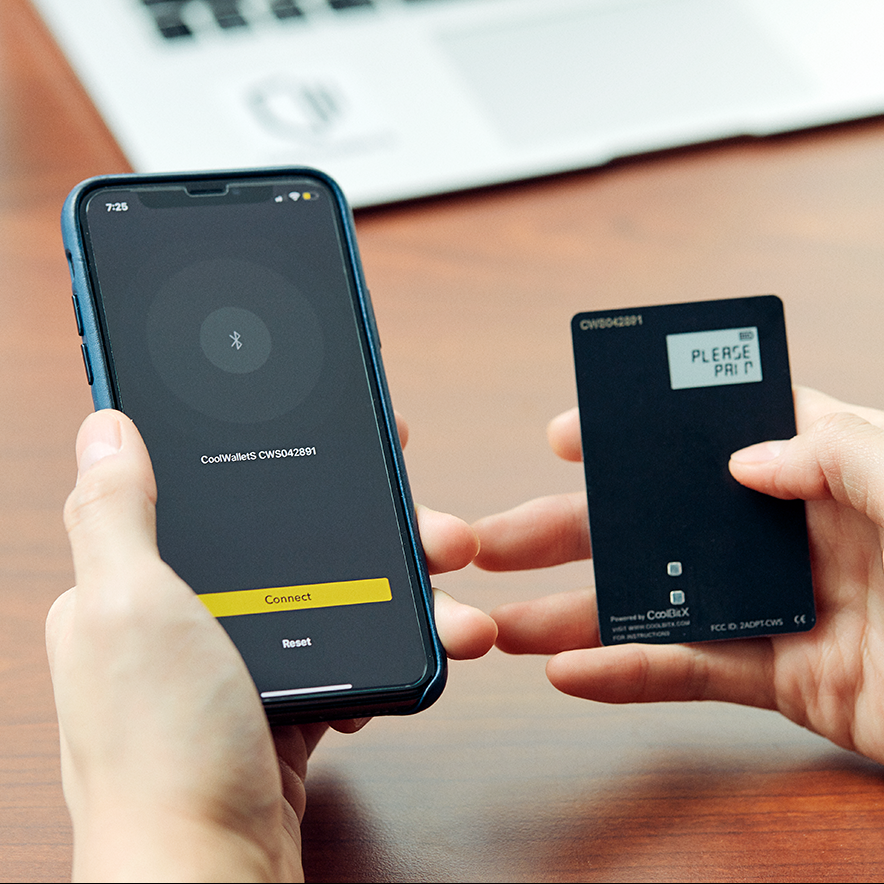
When you pull the device out of the box, it will have at least a partial charge so you can set it up right away. Powering up the device is easy and straight forward, so all you will need to do is make sure you’ve downloaded the app and activate it before you can walk through the setup process. First, after the app is setup and you allow notifications and such, it will ask you to securely pair your device to the bluetooth connection to your phone and will ask you to allow the connection.

Secondly, once the app confirms the device is connected, it will ask you if you want to recover a wallet or create a new one. You will most likely create a new one if this is your first experience with the device.

Thirdly, it will prompt you to set your recovery seed length in either 12, 18, or 24 seed words, and once you select, it will show up on the screen with the words in the correct order. It will ask you to write these words down on your recovery seed card sheet (recommended) or get a metal recovery seed backup, like CryptoTag or Bill Fodl.

NOTE: The app will ask you if you want to save your recovery seed phrase as an image file. DO NOT DO THIS. My one issue with the process is asking if you want to save your recovery seed card as an image, which defeats the entire process. I strongly recommend writing it down on paper, or better yet, use one links above to get a metal recovery seed backup. I will leave a link to a review HERE if you’re unsure why it’s important.

That’s it! Once you do this process and verify the recovery words (it will ask you to verify them, so make sure they are at least temporarily written down) and will allow you to create your wallet. You are now able to begin using the wallet and send and receive crypto!


How To Send/Receive


This is a fairly simple and straightforward interface for sending your crypto of choice. There is a tab at the top that allows you to “Send” or “Changelly” (More on this later, it allows you to swap different coins within the app). For example, if you want to start receiving bitcoin on your phone from a friends mobile wallet, you can click on the icon for the QR code for them to scan (recommended) or they can copy/paste the address and you can manually input it in the address field.

This is the first step of using the mobile app wallet interface to begin receiving your bitcoins, but the next part (which we will cover in the section below) will address the multi-factor authentication step for you to securely add your new loot onto the hardware wallet (wirelessly) from the app on your phone, so your private keys remain offline, where they belong.


Security

Image result for CoolWallet S security

Of course, Security, the most important factor when choosing a hardware wallet. You are after all, investing in a secure device that is not only easy to use, but securely keep your private keys offline and in your possession at all times. This device finds a nice, happy medium of convenience and security when using the device. I know, I know, you are probably wondering “How secure is this thing if you are connecting via bluetooth? I’ve heard this is not a secure method of transmission.”

From my personal experience, it’s rock solid. There is a 3-step authentication process for each transaction you process, including biometric authentication, ala Face ID or Touch ID to confirm transactions on top of the other 2 authentication steps. I will list below an outline from their website that outlines their security details in a much clearer way than I could. After what I read below, I am convinced. This device is VERY secure.


“Secure Element

Your private key is stored safely in a CC EAL5+ certified S.E. Chipset which is equivalent to FIPS complied security level,  similar to the US military’s requirements, and the private key never leaves the CoolWallet S.  This chip calculates all the necessary algorithms and transmits only the calculated results (non-sensitive data) out to the phone via Bluetooth.

Encrypted Bluetooth

The Bluetooth connection can only be initialized when the wallet is turned on within a proximity of 10 meters. The design of our product uses an AES256 Encryption to communicate between a CoolWallet S and your phone along with a dedicated pairing passcode. Thus, any unauthorized devices are prohibited to communicate with the card for data retrieval.

2+1 Factor Authentication

The CoolWallet S and our app uses a sequence of biometric verification steps as well as a visual check and a physical confirmation button push on the device itself to ensure that you are in control of your CoolWallet S and that the transaction is indeed correct and valid.

Tamper-proof Technology

Cool Wallet S uses a patented “Cold Compression” process which makes it impossible for hackers to install intercepting devices that can alter the transaction details. The Cool Wallet S is wafer-thin and there is not extra space on its circuit board. With an adhesive layer that cannot be removed (even with a heat gun- the Wallet.Fail team tried) without visual damage, any alteration or tampering will be immediately visible on the CoolWallet. In any case, the Secure Element will still protect your private keys.”


Advantages/Disadvantages


Advantages:


  1. Very unique design. You won’t find ANY form factor or design of a hardware wallet like this one. It’s simplicity and security in the design, makes this device a no brainer for the every day crypto spender.
  2. Ease of use. This device only took a handful of minutes to setup and start using. Between activating the app, pairing the device, and recovery seed words, I was already making secure trandsactions in less than 10 minutes.
  3. The device is always “Cold”. This means that even though it interfaces with a “Hot Wallet”, the card is completely separate and your private keys never leave the secure element unless physically authorized by you after secure authentication.
  4. Easy to Read. The E-ink display was a good choice for not only being durable and long lasting, but allows you to confirm the send/receive address on the app AND the E-ink display for extra security when performing and authorizing transactions.


Disadvantages:


  1. Not open-source. This is kind of a big one, as having a community reviewing the security, reporting bugs, and overall being “transparent” with everything going on in the firmware and security features is a powerful tool. Not only does it provide transparency, but it brings the community together, which helps with user-engagement.
  2. Coins Supported. Now, I am going to go easy on this one, because this is the most portable hardware wallet I’ve ever used, so it stands to reason it can’t hold as many coins as a wallet like Ledger or Trezor. However, this appears to be a topic CoolBitX is working on expanding, so there is light at the end of the tunnel.

Here is a list of the current coins supported, which is still fairly solid, but if you use lots of different coins and plan on HODL’ing them for a while, this might not be the best wallet for you.

Image result for Coins/Tokens Supported By CoolWallet S


https://youtu.be/WRnzFXuhQ3A

Cool Wallet S – Conclusion


Overall, this is one of the easiest and most convenient hardware wallet solutions. It can literally fit right in with your other cards in your fiat wallet (which is still relevant, for now) and is very easy to use and only needs a charge about once a month as BLE is very low energy and efficient.

Having a wireless, secure hardware wallet is VERY nice to have, especially when you’re on the go and you want to make sure your assets are securely offline. Having said that, there is only one other option you can choose that is even remotely close to this one and that is the Ledger Nano X. The Cool Wallet S is cheaper (and sleeker) for only $99, and the Ledger Nano X is a larger and bulkier device and starts at about $120.

Which one should I choose? Well, that depends on your use case. If you want something you can fit in your wallet and you don’t need to carry in your pocket at all times, I would recommend the Cool Wallet S, to be honest. The overall user experience was cleaner and easier than the Ledger Nano X. I would only recommend the Ledger Nano X, in the event you need more coins accessible on the go, which is typically not needed as much for spending and such, plus it’s going to cost more.

Bottomline: If you want a unique, sleek, and easy to use wireless hardware wallet that is under $100 you can use on the go with you in an every day situation? Get the CoolWallet S.


What do you think? Is there a better wireless hardware wallet that you’ve used for a better price? Let us know in the comments below!


Cheers,


The Crypto Renegade


NOTE: This post may contain affiliate links. This adds no cost to you but it helps me focus on giving as much value as possible in every single post by being compensated for recommending products that help people succeed.

CoinMine ONE First Look (2020) | Start Mining Bitcoin In 5 Minutes!

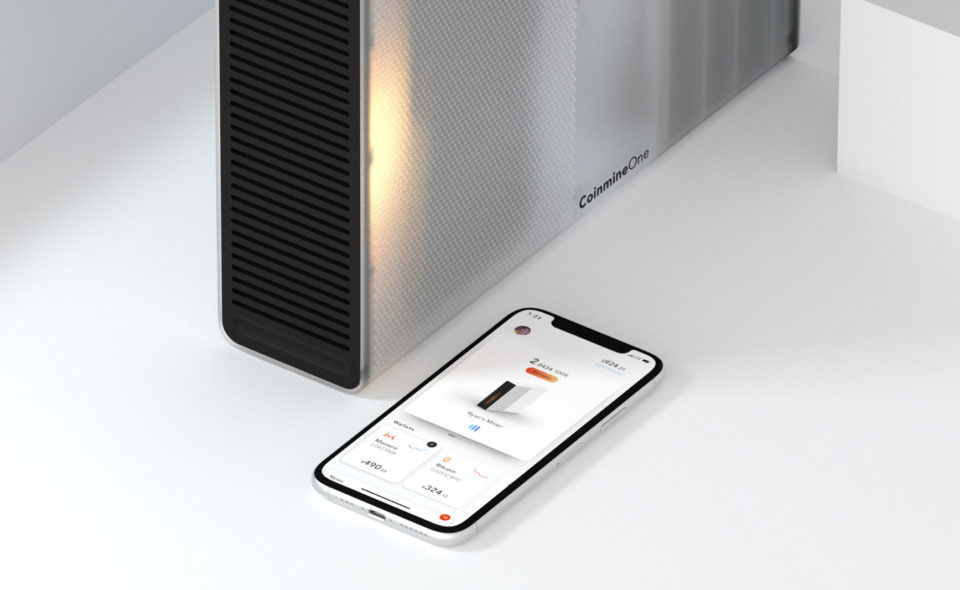
In this first look, I am going to go over whether of not it’s worth it to get the CoinMine One cryptocurrency miner. This is actually a VERY interesting product that will make bitcoin mining a simple process that even your grandmother can setup. Seriously, this device helps the un-initiated take the first step into the cryptocurrency world by setting up a non-invasive and simple mining rig that bears resemblance to a video game console.

There are several intricacies when setting up a traditional mining rig, such as an Antminer ASIC or even setting up cloud-mining with a provider. This takes the “know-how” and complete understanding of this process out of the equation. You can literally pull it out of the box and start earning bitcoin (or other cryptocurrencies we’ll cover later) within 5 minutes. This is the first machine of it’s kind and it will revolutionize what any newbies understanding of what “bitcoin mining” is.

So without further ado, let’s answer some basic questions about what this new device does and stay tuned to the end, because I’m able to offer a pretty sweet discount for my readers that are ready to dive in!


What Is The CoinMine One?


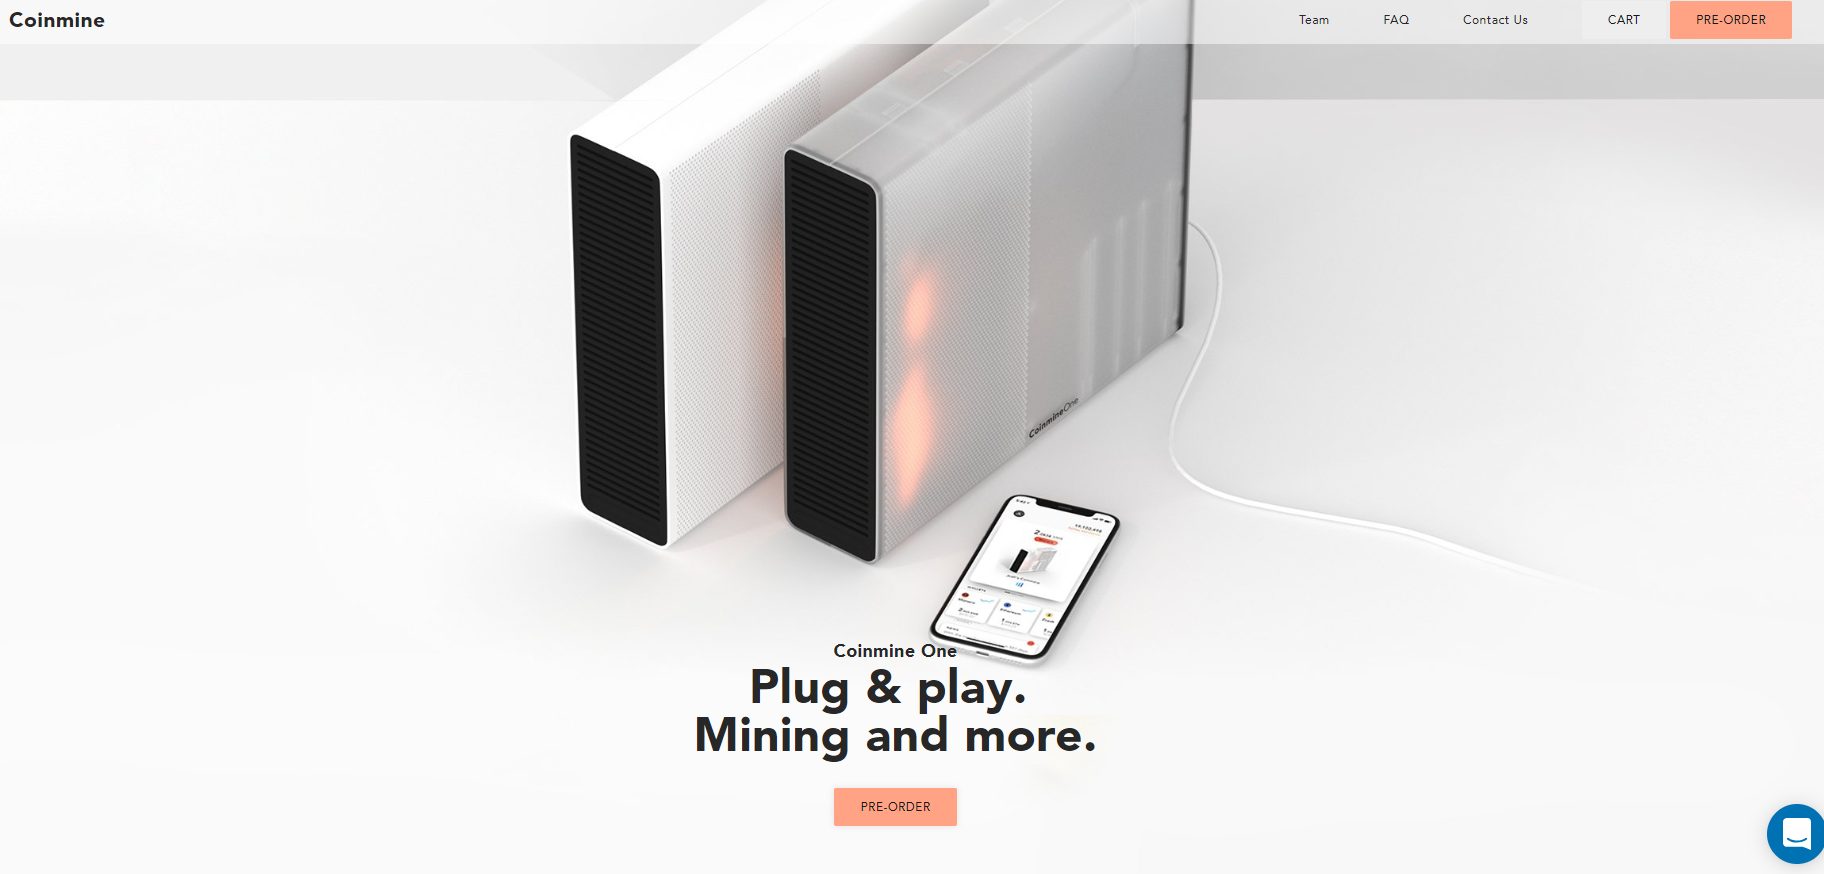
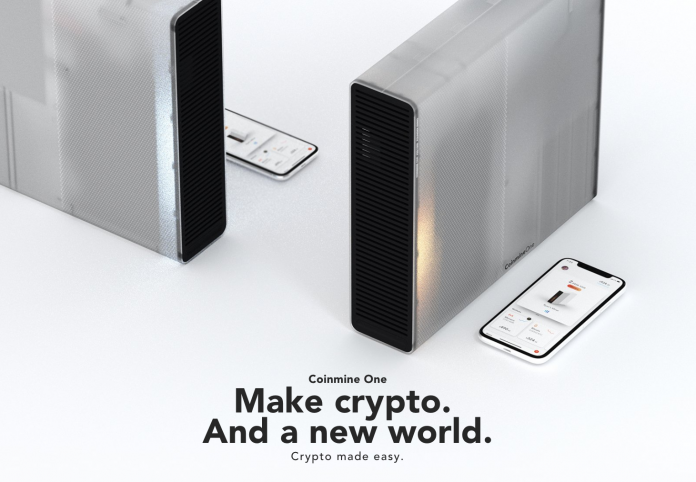
The CoinMine One is a sleek, quiet, and easy-to-use bitcoin mining device. Typically, bitcoin mining has been long known as a very elusive and complicated subject that was really only done by people that are extremely technical. Additionally, they have access to A LOT of capital to setup infrastructure for hardware, abundant electrical capacity, and a lot of cooling mechanisms to keep these super computers cold enough to operate.

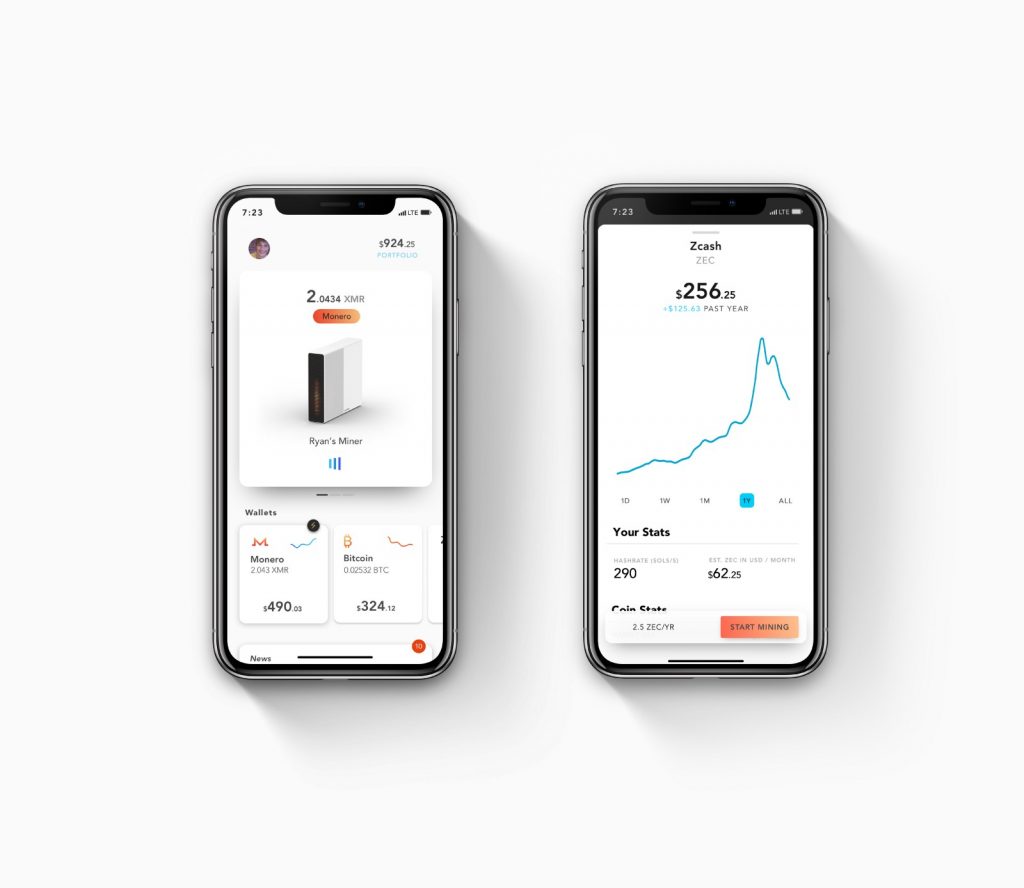
The CoinMine One solves this problem and provides a way for every day people to begin mining bitcoin and other cryptocurrencies with a simple setup from a smartphone. This is ideal for people that are aware of the advantages of cryptocurrency mining and want to secure their slot to the future of finance.

Generally speaking, not only is this a way to create passive income with a “plug-and-play” method, but it allows you to help contribute and secure the bitcoin network as this device is it’s own node. As someone who has been involved in this industry for several years now, this product was a blessing, as it helps create further decentralization by allowing non-technical users to participate in the revolution for a very fair price!


Why Do I Need It?

coinmine one review

As cryptocurrency becomes more mainstream, it’s vital to the concept of bitcoin and other cryptocurrencies to have the masses gain more understanding and participation within the ecosystem. There are only 2 ways you can currently obtain bitcoin.

  1. You can buy it. Either from an exchange or from someone who owns it directly.
  2. You can mine it. Currently 85% of the total supply (21 million coins) has already been mined.

This creates not only a level of scarcity, but also points out that as the supply decreases, the demand will surely increase, thus causing the price to rise at an increasingly high rate.

The Coinmine One allows you to do this in a very passive, easy way. I have always been an advocate of cryptocurrency mass adoption and have created this website as a resource to help educate and connect people with the right products and services. Honestly, if you do not want to pay the increasing rates to buy bitcoin, this is a simple and easy way to mint your own coins and has many features to help you compound your earnings as well.


Which Cryptocurrencies Can You Mine With It?

As of this writing, you can directly mine: Bitcoin, Ethereum, Grin, Zcash, and Monero. They have also announced Cosmos (ATOM) staking and a rumored leak of Tezos (one of my favorites) being supported for staking!

I am a huge fan of privacy coins and there are promises of future altcoins being added as well. Additionally, this runs on what they call MineOS. It’s a software built in and managed by the connecting smartphone app that allows you to manage what coins are being mined and allows you to choose which coin to mine at any given moment, and you can toggle (within the app) as much as you want to find which coin is most profitable.

What’s really compelling is, you can mine any of the above listed coins and choose to be paid soley in bitcoin (if you choose), even if you choose to mine another coin. This happens at a conversion at the end of the day (or week) so that this is ENTIRELY automated and allows for full customization. Very cool.


How Much Does It Cost?


When this first launched in 2018, the retail price of this device was $799. This isn’t a bad price, considering the costs of hardware and cloud-mining contracts that lock you into a certain price that you have to pay, regardless of profitability.

Luckily, I have a special discount for my readers that will give you a special discount that brings the total price down to $649. You can click the link below to get this special discount, if you are ready to start minting your own bitcoin!


Coinmine One – Conclusion


Bottomline, this device looks very promising and provides the world’s simplest way to start mining bitcoin and other crypto’s in a single, silent, and easy-to-use device that you can plug into any standard wall outlet. When I set up my Antminer S9i ASIC, I had to get special adapters and splitters to use in my residential home to utilize the dryer outlet and was a real hassle to run a cord from there into the basement.

Additionally, the Antimner was EXTREMELY loud and required me to provide fans and ultimately drove up the electricity cost. I will be doing an in-depth review of the Coinmine One device shortly and will have an unboxing and setup video as well. After reaching out to these guys, I am more excited than ever to really put this to the test and make crypto mining easy again! The Coinmine One is taking the complexities and hassle out of industrial mining, and making it accessible for the average person in a VERY big way. Sign me up!


What do you think? Is there an easier solution to start mining bitcoin from your home? Let me know down below!


Cheers,


The Crypto Renegade


NOTE: This post may contain affiliate links. This adds no cost to you but it helps me focus on giving as much value as possible in every single post by being compensated for recommending products that help people succeed.
Scroll to top