In this article, I am going to give you the 3 best cryptocurrency cold storage solutions. You’ve probably heard this before by your friend or colleague that introduced you to the wonderful world of cryptocurrency: “You need to store your bitcoin offline using cold storage”. So what does that mean exactly? There are many forms of cold storage, but there is considerably more forms of “Hot Wallets” or storage that is convenient and directly tied to an internet connection.
I don’t need to tell that this form of storage is convenient, but is riddled with considerable risk. With a normal bank account, if there is fraud or if someone hacks your account, you have recourse, and in most cases your will not be liable and be fully reimbursed. No harm no foul, right?
That is not the case when it comes to cryptocurrency. It’s about self-sovereignty and full ownership and responsibility of your own finances. With that in mind comes a great deal of responsibility and in this case, responsibility over your own finances and your own bank is a blessing. So what do you need to know? You absolutely, 100% need a cold storage solution for storing your cryptocurrency offline to keep your private keys and recovery seed safe.
I am going to share with you below the 3 best cryptocurrency and bitcoin cold storage solutions, starting with what I consider to be the most secure, all the way down to what is not so secure. However, everything that is offline (generally speaking) is still more secure than keeping your long term holdings on a phone or any other internet connected device.
HERE ARE THE TOP 3 COLD-STORAGE SOLUTIONS FOR STORING YOUR CRYPTOCURRENCY OFFLINE
Be advised that these are considered to be the best practices currently in the industry and most commonly used tried and true methods. There are other ways to go about this, but as they are not properly vetted and not as commonly used, we will not be listing them here.
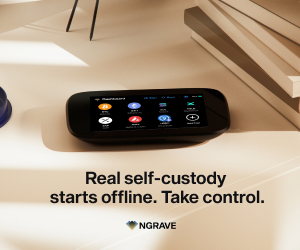
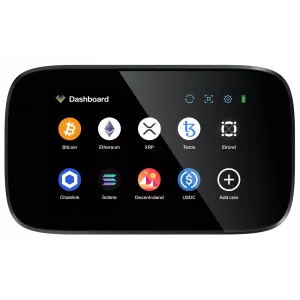
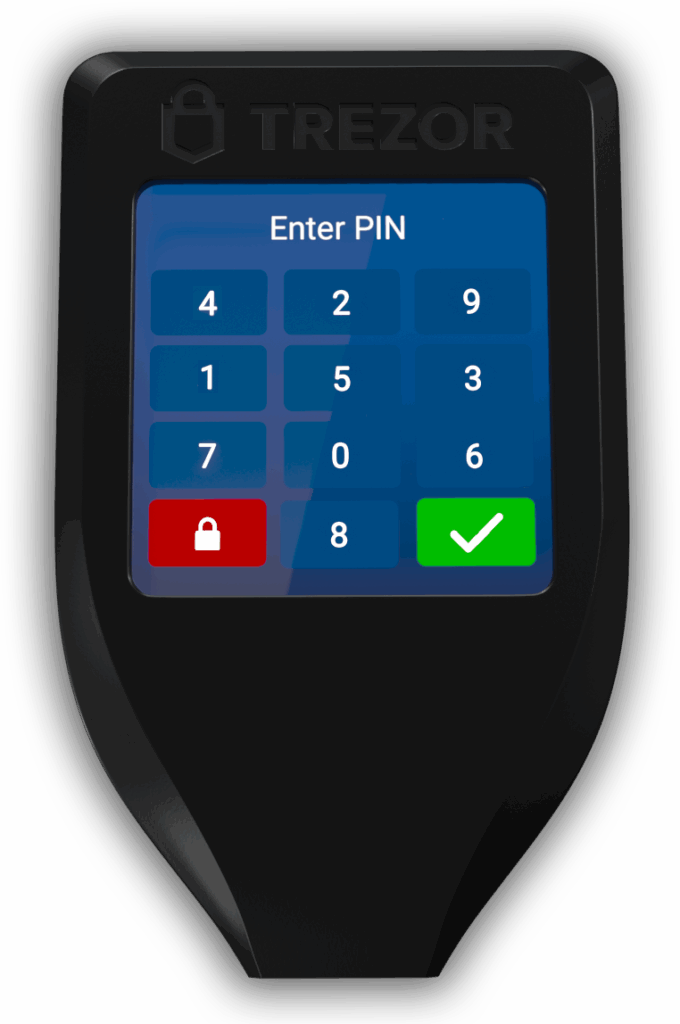
You can probably tell by now that I am a strong advocate of hardware wallets. I even developed and built one working for a very prominent cryptocurrency company and I have the latest prototype not 2 feet from where I sit now.
I have a lot of first-hand experience in understanding why it is vitally important to own one and use one for any amount of cryptocurrency you don’t plan to spend in the next 24 hours. It has some keen advantages on top of being an “offline” device, which means it cannot be hacked.
Private keys are generated on and never leave the device, even when it’s connected to the computer. This is crucial because if your private keys are stored in a secure environment and they are never removed from the device, there is no risk of them being exposed to the internet.
Custom PIN Encryption – This is an extra layer of security that requires the user to set a 4-8 digit custom pin once it’s connected to USB port that is connected to the internet, like a desktop or laptop (or even a mobile phone). Without this PIN, you cannot even gain access to the application to make changes or sign transactions.
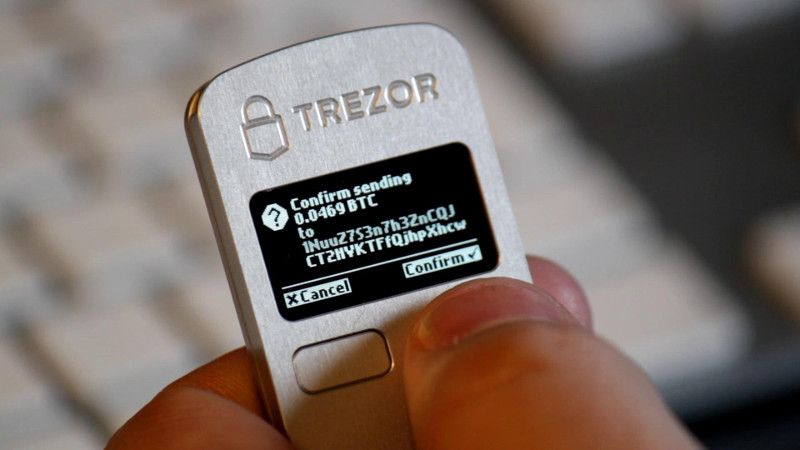
Additional Device Verification – This means that any action you take on the web or desktop application with your mouse or a keystroke, requires authentication on the device itself to ensure there is no key-logging or unauthorized changes. For example, If I want to spend 0.25 BTC on a new snowboard on Amazon (Yes, you can do this with Purse.io), and you initiate that within the web app, it will prompt your to confirm the transaction on the hardware device via physically pressing a mechanical button. This is to ensure no mistakes and no unauthorized transactions occur.
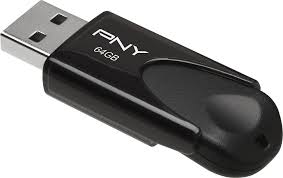
This option is better than leaving all of your holdings on a hot wallet, but is still not recommended. Why? Because unlike a trusted hardware wallet, it has no security measures. If someone gains access to the unsuspecting USB drive, they will have unfettered access to your precious private keys.
It is not encrypted, it is not protected, and anyone with access to google can crack this if they have physical possession of it. Additionally, I cannot tell you how often these little devices have hardware failures. If you do not have a backup of these keys, your coins will be gone forever if something goes wrong.
This one is a “Catch 22”. What do I mean by that? Well, I see the value of what it is and I understand why this invention was created. For instance, when I wanted to give my loved ones some bitcoin in their stocking at Christmas, it was (and still is) a great way to introduce bitcoin to the uninitiated and get them excited about this new technology.
A paper wallet is exactly what it sounds like, it’s your bitcoin in paper form. It usually includes a QR code to scan with your phone and import into a hot wallet and contains a written public and private key. This is not secure, but if you are gifting it to someone, or making a trade or transaction offline, it’s a decently good medium, especially if you don’t know or necessarily trust the recipient.
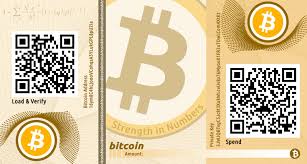
As I mentioned above, if you are unfamiliar with this amazing piece of paper, it exposes everything you need to take control of this bitcoin. It has written out the public bitcoin address and the corresponding private key. If someone dropped this in the wind and I picked it up down the road, it would be like getting a winning lottery ticket (literally). As you can see there are very few recommended uses for this, and even when using this, you need to be very, very careful.
FINAL THOUGHTS
So, 3 best cryptocurrency cold storage solutions? When choosing the best cold storage solution for you, you need to understand what your end game is. What is your purpose and intent when deciding to pull your crypto offline? Most people who learn about the many advantages about cryptocurrency, typically plan to hold it for an extend period of time, whether it be for a long term investment or even everyday spending (like me).
The Bottomline: Unless you are planning to give some bitcoin away as a gift or you are making a one time transaction with a stranger in a dark alley, I STRONGLY recommend you purchase a hardware wallet. One of the most popular ones right now and is widely supported by a wide range of different cryptocurrencies is only $59 at the time of this writing.
Believe me, it won’t be that price for long. Once the next market cycle starts to ramp up, these prices are going to be increasing, and it is a steal considering you are protecting potentially millions or billions of dollars worth of lifetime crypto-assets. The hardware wallet in question here is the Ledger Nano S, and I use this as one of my everyday wallets as well for spending. If you click the “HOME” button at the top, you can see all the different wallets we offer and endorse right now, depending on what features you need and what works best for you.
If you have any questions or comments on this post, please sound off below! I’d love to hear from you! Until next time…
Cheers,
The Crypto Renegade
NOTE: This post may contain affiliate links. This adds no cost to you but it helps me focus on giving as much value as possible in every single post by being compensated for recommending products that help people succeed.
In this article, I will tell you how to store your Tezos on the Ledger Nano S. As an investor in Tezos since the ICO, I have really studied what makes this a true market differentiator. This has a true consensus and a self-amending ledger, which is really powerful.
This means that no matter what, there will not be a “fork” of the network and will not have to worry about a network split. The downside is, you cannot split off and have people follow you and start a new version of this blockchain. What is built here will be verified by a true democracy and will always stay in tact. However, people will always have the power to leave if they do not like it.
I believe the that being able to contribute to secure a POS blockchain that will allow EVERYONE to participate is very interesting and also pretty powerful. I think they have cracked the code and this may very well become the platform that people will build new dApps on, as it is more scalable than Ethereum in this way.
No matter your use case, if you are going to participate in Tezos it is wise to store your keys securely. The absolute best solution for securely storing Tezos is to use a hardware wallet.
.When you use a hardware wallet such as the Ledger Nano S, the private keys used to access your tokens never leave the device. Ledger hardware wallet owners can manage their tezzies using the Tezos Wallet application within Ledger Live. With Tezos Wallet, you can:
Store your Tezos securely
Transfer Tezos to others via secure transaction
Delegate your Tezos for use in baking and voting
This guide provides a step-by-step guide on how to install Tezos Wallet on your Ledger Nano S and create a wallet with three different Tezos wallet providers: Galleon, Magnum Wallet, and TezBox. Although you technically have 3 options to do this, I recommend using TezBox as it’s the easiest one to use in my opinion. The user interface is very easy to use and I highly recommend it for baking.
WHAT YOU’LL NEED
To secure Tezos with a Ledger Nano S, you will need:
An initialized Ledger Nano S with the latest firmware installed — currently 1.5.5 (as of May 2019)
Ledger Live installed on your machine and ready to use
That’s it!
How To Store Your Tezos: INSTALLING TEZOS WALLET THROUGH LEDGER LIVE
Open Manager in Ledger Live using the Manager button in the left sidebar.
Connect your Ledger Nano S and unlock it using your PIN.
Your Ledger Nano S will prompt you to Allow Ledger Manager? To connect, press the right button on your Ledger device.
Find Tezos Wallet in the app catalog, either by searching for ‘Tezos Wallet’ or scrolling through the available apps.
Click Install on Tezos Wallet’s icon to install the application. Your hardware wallet will display Processing… and Ledger Live will show an installation window.This may take up to 1-2 minutes. Successful installation will be confirmed in Ledger Live when complete.
CREATING A WALLET
Now that you have Tezos Wallet installed on your Ledger Nano S, you are ready to create a wallet. There are several wallet great providers you can use! Below are the steps to get started with three of them: Galleon, Magnum Wallet, and TezBox.
GALLEON (LEAST RECOMMENDED)
Visit Galleon’s Website, where you can download a version of the wallet for Windows, MacOS, or Linux.
Open Galleon. You’ll be asked to choose a language, and agree to their Terms of Service.
Connect Galleon to your Ledger device. Plug your Ledger device into your computer, enter your PIN, and open Tezos Wallet. Then, select Connect with Ledger in Galleon.
Create Your Wallet. After clicking Connect with Ledger, Galleon will wait for you to confirm this action on your hardware wallet. This is done by clicking the top-right button on your Ledger device with the green checkmark. Your Ledger device’s screen should alternate between Provide Public Key? and the Public Key Hash you will be using to create your wallet in Galleon. Press the right button on your Ledger device to create it!
You’re Done! For more information on how to use Galleon, see their tutorials!
MAGNUM WALLET (MODERATELY RECOMMENDED)
Visit Magnum Wallet’s Website using a U2F compatible browser, such as Chrome, Firefox, or Brave. Click Create Wallet to visit their wallet website, where you should click Create a New Wallet to get started.
Create a Password. Magnum Wallet will prompt you to create a password for securing your funds. Once you have entered and confirmed your password, click Next.
Link your Ledger Nano S. After you have created a password, you’ll be brought to Magnum Wallet’s main dashboard, which gives you information of on all the tokens supported. In the top left, click to Link Your Device (outlined in green below).
A modal (pop-up) will appear over the screen with the option to import a wallet. In this case, we want to create a new wallet. Select Create at the top of the modal. Select the token you’d like to create a wallet for (Tezos), that you’d like to Link Hardware Wallet, and that the device you’re using is a Ledger Nano S. Your screen should now look like this:
Click Create to make your wallet!
Verify your address. Now, you’ll be prompted on your Ledger device to Provide Public Key?. You’ll also be shown the Public Key Hash of your wallet. Press the right button on your Ledger Nano S to verify your address and continue.
You’re done! You’ll now be at your wallet’s dashboard within Magnum Wallet, where you can send and receive Tezos or delegate them to a baker!
Visit the Tezbox Web Walletusing a U2F (Universal two-factor) compatible browser, such as Chrome, Firefox, or Opera. Here, you’ll be greeted with the option to create a wallet, restore one, or link TezBox to a hardware wallet. Click Link your TezBox.
Link your Ledger device to TezBox by clicking Link TexBox in the as seen in the user interface below.
Verify your address. On your Ledger device, you will be prompted to Provide Public Key? and the screen will also show the Public Key Hash with which you are creating the wallet. Press the right button on your hardware wallet to verify. TezBox will confirm a successful linking after this step.
Create a Password. Next, you’ll be asked to create a password to secure your wallet. Enter and re-enter a password, then choose Encrypt Wallet.
That’s It! After entering a password, you’ll be on your wallet’s page, where you can send and delegate Tezos.
CONCLUSION
As of the time of this writing, only the Ledger Nano S is the only hardware wallet that supports offline Tezos and not even the Ledger Nano X works at this time. It should be noted that there is no “native” app for Tezos via Ledger Live. What does that mean? It essentially means that you are required to use one of the above 3rd party wallets in order to properly secure your Tezos and manage your balances, send, receive, and the ability to manage baking and delegation.
So why would you go through these steps? Because you control the private keys and that is what is important. When a hardware wallet starts supporting this functionality natively, it will have a huge edge over the competition (I’m looking at you KeepKey). Additionally, there has been an influx of more exchanges getting hacked, with no signs of stopping. It is CRUCIAL, that you always maintain control of your private keys at all times. When you send them to an exchange, you technically do not own them anymore, until they decide to send them back to you.
Bottomline: If you own any Tezos, or plan on acquiring any in the near future, I would strongly recommend that you get a Ledger Nano S. At the time of this writing it is only $59, which is the cheapest hardware wallet of the primary market leaders. Tezos is sure to move it’s way into the top 10 market cap very soon and I expect the price to do something similar to what Ethereum did in 2017.
What do you think? Would you keep your Tezos keys on a Hot Wallet? Please let me know below in the comments!
Cheers,
The Crypto Renegade
NOTE: This post may contain affiliate links. This adds no cost to you but it helps me focus on giving as much value as possible in every single post by being compensated for recommending products that help people succeed.
In this review, we are going to deep-dive into the new hardware wallet by SecuX! Does the SecuX W10 a better user experience than theLedger Nano X? Does It work with Bluetooth? How secure is this relatively new wallet? Does it provide a better Ripple (XRP) hardware wallet experience? We are going to answer all of these questions and more in this in-depth review, so stay tuned!
If you are also looking for ways to obtain free bitcoin while shopping online, be sure to check out my recent review of Lolli!
Now, let’s get into the first of 3 reviews of the SecuX hardware wallets starting from this one (their entry-level device) all the way to their flagship device the SecuX V20. Let’s get right to it!
SecuX W10 – First Impression
After unboxing and looking at this entry-level device, I was pleasantly surprised that the overall quality and screen size was much larger than other entry level devices in this price range, such as the Ledger Nano S and the Trezor One. Now, those devices are classic and original devices, but they are tiny and made of somewhat flimsy, plastic form-factor.
This device is also plastic, but it feels different. Kind of like a sturdier or more robust quality of more dense plastic that feels solid, yet lightweight when you hold it. The device has only one MicroUSB port and one button for activating the device and for 2FA.
The unique and notable coins that are natively supported on these devices is Groestlcoin (GRS) and Ripple (XRP). Not many hardware wallets support these coins natively, however, almost all hardware wallets support an array of ERC-20 tokens and your main-stream coins, like BTC and ETH.
This device comes in at an entry price of $99 and is a USB connected device that does connect to a web application that allows you to fully manage the device. With a 2.8 inch color touch screen, you can use to manage and authorize transactions.
The picture below showcases the key features of this device, is the “Cross-Platform Support”, which means it can be managed via desktop, laptop, and mobile. Now, as I mentioned this device cannot conduct transactions via the mobile app, but the SecuX W20 and Secux V20 can, as they are bluetooth enabled.
However, you can still view your assets with this device in a view only state if you need to check your portfolio on the go.
The SecuX W10 is placed with a CC EAL 5+ Certified Security Element (SE) which always ensures that stored private keys, as well as the device PIN code, are perfectly protected against any form of attack. Other significant security features include:
Pre-installed tamper-resistant firmware as well as an upgrade system
Physical confirmation for every transaction
A one-time password or custom PIN code for controlling device access or the wallet apps
Anti-tamper packaging
Randomized digital keyboard for preventing consequences of keystrokes
Also, the wallet complies with the BIP32, BIP39 and BIP44 standards which allow the user to generate passwords of 12, 18 and 24 words for funds recovery.
Coins Supported
This is usually the most important factor when considering the hardware that you choose. This entry level wallet from SecuX has support for the following coins as of this writing: BTC, ETH, XRP, BCH, BNB, GRS and LTC. It also supports all ERC-20 tokens as well.
Luckily, they update the firmware frequently and they plan on adding more coins as well in the near future. If you are new to “HODLing” and you do not need any specific coins outside of these top market cap coins and ERC-20 Ethereum-based tokens to start, then this is a good option.
Overall, this is a robust, and very secure wallet. For the price point, features and capabilities, the only thing that is comparable is the Ledger Nano X, which is also a bluetooth and wireless crypto wallet using the same security chip.
With the Ledger Nano X, it comes in a little more expensive at $119, and it also allows you to hold 110 apps (or different cryptocurrencies simultaneously), but it comes in a cheap and somewhat flimsy plastic enclosure that has a very tiny screen.
The one thing I did NOT like about the SecuX W10 is the lack of coin support with only 6 coins supported natively, and a handful of more coins to be supported in the future. If you plan on only “HODLing” the top 5 market-cap coins and perhaps a few ERC-20 tokens, I would probably say this is a better option and has a much cleaner and larger display for managing and verifying transactions.
With my discount, (Code: BITCOINLOCKUP), it will take the price to around $89 and free shipping. When compared to other entry level wallets, you can’t beat the sturdiness and large screen (which is more important than you think), when managing your assets offline.
What do you think? Is this a new contender for entry level hardware wallets? Let us know what you think down below!
Cheers,
The Crypto Renegade
NOTE: This post may contain affiliate links. This adds no cost to you but it helps me focus on giving as much value as possible in every single post by being compensated for recommending products that help people succeed.
Is the Cobo Vault the best unbreakable crypto hardware wallet of 2019? Is it as tough and inpenetrable as they claim? Stay tuned for the whole Cobo Vault Review to find out! I recently wrote an article on an upcoming device that appears to be directly competing with this product called the Ellipal Titan. If you want to read that review after this one to get kind of a side-by-side comparison, you can check out the in-depth first look of that device HERE.
Overall, my first impression of this device was very good. It appears to be targeting an entirely different segment of the cold storage crypto wallet market, which is something I obviously follow quite closely. They are marketing this as a “Military Grade Durability and Security” device, which is definitely the case as it has all the proper ratings a certifications to protect against impact, water resistance, and shock resistance to ensure it is as rugged as humanly possible.
If you are new to cryptocurrency security in general, please check out my free e-book HERE. This dives in deep on the basic (and some advanced) security tips on how to best manage your cryptocurrency by learning from my mistakes. I guarantee you will learn something new and it will help you on your crypto journey! So, let’s get to why you are here and jump right into the Cobo Vault Review. Let’s do this!
What’s In The Box?
There’s a lot of bang for your buck here and certainly attempts to justify it’s current price tag of $479. This is no ordinary crypto hardware wallet, this thing is very different than Ledger, Trezor, and KeepKey as there are no active ports or USB connectors to allow you to interface with this product. I will get more into this in the next section, but needless to say this is a unique device!
Here’s what comes in the box:
-Cobo Vault Hardware Wallet (4 inch touchscreen)
-The Cobo “Vault” (Houses The Device)
-A Removable 1540 mAH Battery
-Charging Dock
-USB-C Cable (For Charging)
-Mnemonic Steel Recovery Seed Device
-Steel Tiles For Recovery Seed Phrase
-Small Screwdriver
-Instruction Booklet
The box is very large and feels heavy when you get it because of the steel grade quality of all of the components. There is an unboxing video below that will explain how this all works and gives you a visual cue of everything that is included and what each piece is used for.
The most “compelling” piece to me here is the steel mnemonic tablet that is used to secure your 24 word seed phrase. This is TYPICALLY used by other providers by writing it down on paper, which is vulnerable to the elements. These devices can cost upwards of $300 by itself, so this is a HUGE value add and absolutely necessary for anyone that takes their cryptocurrency security seriously.
If you are not familiar with what this and why it’s needed, you can read an in-depth review of the best standalone titanium recovery seed backup HERE.
This device has NONE of the following connections:
WIFI
USB
BLUETOOTH
NFC
CELLULAR
This means that it is completely off the grid. So how do you use it and set it up? QR Codes. The device has a 5-MP camera for scanning QR codes on Cobo’s website and then the companion app for managing assets from their hot wallet over to the offline device.
This is a very prolonged and arduous process. In terms of security, this is a VERY good thing. It’s like having a 7-step authentication system. However, for ease of use, it’s a killer, and most wallets try to strike a balance between ease of use and security. Cobo does not appear to care about what it’s competition is doing in this regard, since it’s breaking out into it’s own little sub-niche of cold wallet security. Here are the steps I had to follow to setup and use the device:
1.) Download the “Cobo” mobile app
2.) Power on the Cobo Vault device
3.) Go through the recovery seed phrase process. This includes writing it down and verifying it through the touch screen
4.) Set a custom passphrase that has stringent requirements including multiple special characters and at least 10 characters minimum.
5.) Scan the QR code on Cobo’s website to authenticate the firmware and authenticity of the device.
6.) Once authenticated, you scan a dynamic and ever-changing QR code on the companion mobile app to initiate transactions
7.) If you want to receive any payment directly on the device, you just generate a QR code and your sender can scan the code to initiate. If you want to send a transaction, follow the steps 2-6 above and repeat the process.
Features: What Makes It Inpenetrable?
So, in addition to having a water resistant, shock resistant, and using “Military Grade” materials and configuration, it also has a “Self-Destruct” mechanism if it expects foul play. Let me explain. The device cannot be hacked through any ports or any wireless type connections. However, if someone tries to extract the private keys manually, the chip will have a timer initiate a countdown. If the screen is broken or if the device is opened up internally in any way, it will completely wipe the device.
If this happens, the only way to restore this is through your recovery seed phrase that you now have in stainless steel thanks to having it included in the box. This can be imported to any BIP-32, 39, 44 wallet to restore your funds with this seed phrase.
Additionally, if someone tries to steal the device and initiate a transfer of the funds through their own Cobo Vault, they will not be able to, as during your initial setup it is coded to the QR code you scanned on your app that is unique on your mobile phone. This device is really the Fort-Knox of crypto wallets. It took me about 30-40 minutes from start to finish when I unboxed, setup, and made my first transaction on the device. As I mentioned above, this DOES make it very secure, but for ease of use, it’s kind of nightmare. There are no trade-offs here.
This device claims to have a lot more coins that will be supported on their road map, but this is definitely one of the “cons” of this device as it is of the utmost quality, but also is VERY lacking in the coins that are supported. Below is a picture of all the coins that are currently supported as of this writing.
For those that are not familiar with all of these coins or brands, I will list them here: Bitcoin (BTC), Bitcoin Cash (BCH), Ethereum (ETH), Ethereum Classic (ETC), Tron (TRX), Eos (EOS), Litecoin (LTC), and Dash (DASH).
Price
This is a premium device and the price reflects that. It’s $479 USD to get this device and may have some shipping costs associated with it if you are outside of the U.S. As this is a higher-end device, you get what you pay for. I have not come across a more durable and secure device yet, but the Ellipal Titan appears to be a cheaper option that is going to be competing with this directly when it is released to the public in late August 2019. You can check out my review/first look HERE.
Overall, the Cobo Vault device is probably the strongest and highest quality device physically, that I’ve ever used in a hardware wallet. It feels solid, and I know that if I drop it, get it wet, or otherwise try to damage this, it will stand the test of time. In terms of security, I have yet to personally test a device that compares to this one.
I had several steps and verifications in order to just set it up, let alone make a transaction. I believe this device is designed to be used VERY sparingly and is not used in a daily setting. This is a long-term “HODL”er device, which is good, but if you frequently transact, it is a hassle.
Also, it only supports 8 coins currently. It claims to be supporting more coins soon, but it has mentioned that since it’s launched and have not seen any announcements of movement on that front for several months.
Finally, we have to consider the price. $479 is no cheap price for a hardware wallet and this is a premium and high end device, so I personally use it as a backup and long term device. I do not use this for frequent trading and transacting for obvious reasons described above, but I like having it for my long term stash.
So what’s the bottomline?
If you are new and are looking for your very first hardware wallet, I would personally recommend getting a KeepKey device. It is very nice quality and just launched a brand new platform that integrates trading and is the only one that allows you to keep your private keys offline and in your personal possession the entire time. It’s my go-to wallet for daily use. You can get that HERE.
If you are looking for a secondary or longer term wallet to diversify, then I would ABSOLUTELY recommend this wallet, as it is probably the most secure wallet you can get and the quality is unmatched. I have only used mine twice, but that also means it’s safe and sound and I have no second thoughts about someone being able to crack it, even if they get it in their hands. I feel very comforted knowing that this is literally unbreakable. You can get the COBO Vault hardware wallet below and check out some reviews on their site below
NOTE: This post may contain affiliate links. This adds no cost to you but it helps me focus on giving as much value as possible in every single post by being compensated for recommending products that help people succeed.