You Might also like
-
How To Store Your Tezos (XTZ) On The Ledger Nano S (2020)
In this article, I will tell you how to store your Tezos on the Ledger Nano S. As an investor in Tezos since the ICO, I have really studied what makes this a true market differentiator. This has a true consensus and a self-amending ledger, which is really powerful.
This means that no matter what, there will not be a “fork” of the network and will not have to worry about a network split. The downside is, you cannot split off and have people follow you and start a new version of this blockchain. What is built here will be verified by a true democracy and will always stay in tact. However, people will always have the power to leave if they do not like it.
I believe the that being able to contribute to secure a POS blockchain that will allow EVERYONE to participate is very interesting and also pretty powerful. I think they have cracked the code and this may very well become the platform that people will build new dApps on, as it is more scalable than Ethereum in this way.
No matter your use case, if you are going to participate in Tezos it is wise to store your keys securely. The absolute best solution for securely storing Tezos is to use a hardware wallet.
.When you use a hardware wallet such as the Ledger Nano S, the private keys used to access your tokens never leave the device. Ledger hardware wallet owners can manage their tezzies using the Tezos Wallet application within Ledger Live. With Tezos Wallet, you can:
- Store your Tezos securely
- Transfer Tezos to others via secure transaction
- Delegate your Tezos for use in baking and voting
This guide provides a step-by-step guide on how to install Tezos Wallet on your Ledger Nano S and create a wallet with three different Tezos wallet providers: Galleon, Magnum Wallet, and TezBox. Although you technically have 3 options to do this, I recommend using TezBox as it’s the easiest one to use in my opinion. The user interface is very easy to use and I highly recommend it for baking.
WHAT YOU’LL NEED
To secure Tezos with a Ledger Nano S, you will need:
- An initialized Ledger Nano S with the latest firmware installed — currently 1.5.5 (as of May 2019)
- Ledger Live installed on your machine and ready to use
That’s it!
How To Store Your Tezos: INSTALLING TEZOS WALLET THROUGH LEDGER LIVE
To install Tezos Wallet on your Ledger Nano S:
- Open Manager in Ledger Live using the Manager button in the left sidebar.
- Connect your Ledger Nano S and unlock it using your PIN.
- Your Ledger Nano S will prompt you to Allow Ledger Manager? To connect, press the right button on your Ledger device.
- Find Tezos Wallet in the app catalog, either by searching for ‘Tezos Wallet’ or scrolling through the available apps.
- Click Install on Tezos Wallet’s icon to install the application. Your hardware wallet will display Processing… and Ledger Live will show an installation window.This may take up to 1-2 minutes. Successful installation will be confirmed in Ledger Live when complete.
CREATING A WALLET
Now that you have Tezos Wallet installed on your Ledger Nano S, you are ready to create a wallet. There are several wallet great providers you can use! Below are the steps to get started with three of them: Galleon, Magnum Wallet, and TezBox.
GALLEON (LEAST RECOMMENDED)
- Visit Galleon’s Website, where you can download a version of the wallet for Windows, MacOS, or Linux.
- Open Galleon. You’ll be asked to choose a language, and agree to their Terms of Service.
- Connect Galleon to your Ledger device. Plug your Ledger device into your computer, enter your PIN, and open Tezos Wallet. Then, select Connect with Ledger in Galleon.
- Create Your Wallet. After clicking Connect with Ledger, Galleon will wait for you to confirm this action on your hardware wallet. This is done by clicking the top-right button on your Ledger device with the green checkmark. Your Ledger device’s screen should alternate between Provide Public Key? and the Public Key Hash you will be using to create your wallet in Galleon. Press the right button on your Ledger device to create it!
You’re Done! For more information on how to use Galleon, see their tutorials!
MAGNUM WALLET (MODERATELY RECOMMENDED)
- Visit Magnum Wallet’s Website using a U2F compatible browser, such as Chrome, Firefox, or Brave. Click Create Wallet to visit their wallet website, where you should click Create a New Wallet to get started.
- Create a Password. Magnum Wallet will prompt you to create a password for securing your funds. Once you have entered and confirmed your password, click Next.
- Link your Ledger Nano S. After you have created a password, you’ll be brought to Magnum Wallet’s main dashboard, which gives you information of on all the tokens supported. In the top left, click to Link Your Device (outlined in green below).
A modal (pop-up) will appear over the screen with the option to import a wallet. In this case, we want to create a new wallet. Select Create at the top of the modal. Select the token you’d like to create a wallet for (Tezos), that you’d like to Link Hardware Wallet, and that the device you’re using is a Ledger Nano S. Your screen should now look like this:
Click Create to make your wallet!
- Verify your address. Now, you’ll be prompted on your Ledger device to Provide Public Key?. You’ll also be shown the Public Key Hash of your wallet. Press the right button on your Ledger Nano S to verify your address and continue.
You’re done! You’ll now be at your wallet’s dashboard within Magnum Wallet, where you can send and receive Tezos or delegate them to a baker!
TEZBOX (MOST RECOMMENDED)
You can download TezBox for Mac or Windows, use their Chrome Plugin, or use their wallet in the browser! We’ll demonstrate the in-browser application in this guide.
- Visit the Tezbox Web Wallet using a U2F (Universal two-factor) compatible browser, such as Chrome, Firefox, or Opera. Here, you’ll be greeted with the option to create a wallet, restore one, or link TezBox to a hardware wallet. Click Link your TezBox.
- Link your Ledger device to TezBox by clicking Link TexBox in the as seen in the user interface below.
- Verify your address. On your Ledger device, you will be prompted to Provide Public Key? and the screen will also show the Public Key Hash with which you are creating the wallet. Press the right button on your hardware wallet to verify. TezBox will confirm a successful linking after this step.
- Create a Password. Next, you’ll be asked to create a password to secure your wallet. Enter and re-enter a password, then choose Encrypt Wallet.
That’s It! After entering a password, you’ll be on your wallet’s page, where you can send and delegate Tezos.
CONCLUSION
As of the time of this writing, only the Ledger Nano S is the only hardware wallet that supports offline Tezos and not even the Ledger Nano X works at this time. It should be noted that there is no “native” app for Tezos via Ledger Live. What does that mean? It essentially means that you are required to use one of the above 3rd party wallets in order to properly secure your Tezos and manage your balances, send, receive, and the ability to manage baking and delegation.
So why would you go through these steps? Because you control the private keys and that is what is important. When a hardware wallet starts supporting this functionality natively, it will have a huge edge over the competition (I’m looking at you KeepKey). Additionally, there has been an influx of more exchanges getting hacked, with no signs of stopping. It is CRUCIAL, that you always maintain control of your private keys at all times. When you send them to an exchange, you technically do not own them anymore, until they decide to send them back to you.
Bottomline: If you own any Tezos, or plan on acquiring any in the near future, I would strongly recommend that you get a Ledger Nano S. At the time of this writing it is only $59, which is the cheapest hardware wallet of the primary market leaders. Tezos is sure to move it’s way into the top 10 market cap very soon and I expect the price to do something similar to what Ethereum did in 2017.
CLICK HERE TO BUY A LEDGER NANO S FROM THEIR OFFICIAL SITE
What do you think? Would you keep your Tezos keys on a Hot Wallet? Please let me know below in the comments!
Cheers,
The Crypto Renegade
NOTE: This post may contain affiliate links. This adds no cost to you but it helps me focus on giving as much value as possible in every single post by being compensated for recommending products that help people succeed.
Post Views: 0 -
Bitcoin Fees: How To Check When You’re Sending A Transaction (2020)
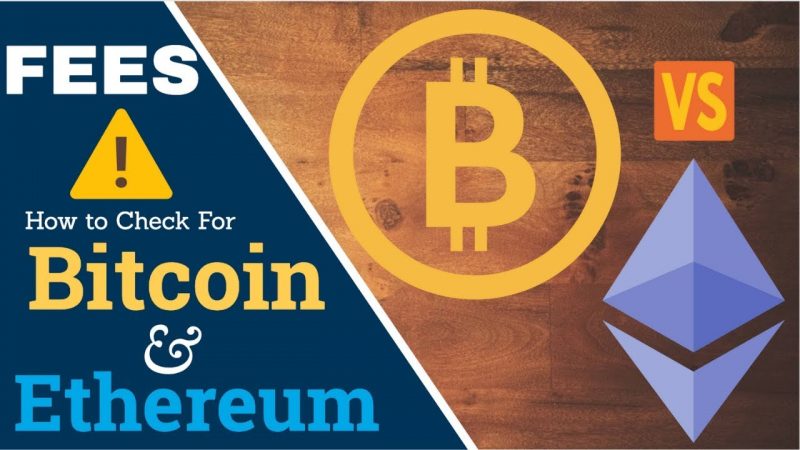
In this article, I’m going to address how to check what the bitcoin fees are for bitcoin and other cryptocurrencies. Not many people think about the “fees” when sending their first bitcoin transaction, as it’s just so exhilarating that you can transact value without permission from a bank or other institution.
This is really a minute detail, however the fees for sending a bitcoin transaction back in 2017 was upwards of 75$ when it was at it’s peak. This means you need to be able to determine if the fees are a “fair” price at a moments notice and if it will significantly cost you to move your bitcoin.
Luckily, there are a few different resources you can use to check not only what the current bitcoin fees are, but also check out the fees for other cryptocurrencies and Ethereum as well. Additionally, you need to be able to determine what the cost structure is and if you can pay more for a priority transaction. Well, I’m here to break it all down for you. Let’s get started with the #1 resource I use on a regular basis to check the current fees for sending bitcoin in a transaction!
Before I jump down there, I wanted to provide you with a free resource for protecting your cryptocurrency and it’s a free e-book I recently wrote and you can obtain it for free on my website here at the top right corner in an orange button. “5 Best Ways To Secure Your Cryptocurrency” is available to download now! Go grab it!
HOW TO CHECK BITCOIN FEES ON BITCOINFEES.INFO
Bitcoinfees.info is one of the best resources to check real-time bitcoin fees and what amount of time you would need to wait for your transaction to be confirmed for that fee. For example, it will let you know what the estimated fee is if you want it confirmed in the next block (10 mins), within the next 3 blocks (30 mins), or next 6 blocks (60 mins).
As you wait longer the fees will go down, but not drastically. To provide a frame of reference, the current fees at the time of this writing is $2.17 USD fee for having my transaction in the next block and $0.78 cents in the next 6 blocks.
This varies and fluctuates and is determined by the demand in volume and what specific mining pools are charging and maintaining a competitive marketplace. Why are there fees if they receive a block reward already? Well, to put it frankly, because they can.
Bitcoin miners are the groups of people that use their hash power to ensure the transaction is not only confirmed, but that it’s also safe and secure. It is a necessary component for the network and ecosystem to flourish and maintain economic incentive.
This site also shows your daily, monthly, and yearly averages in the form of charts and graphs to show you how this progresses overtime. They also consider that the average bitcoin transaction is 250 satoshis per byte large for measuring these averages. This also includes the basis of the 1 MB blocks that the current block size represents and would not relate to the fees for the lightning network.
HOW TO CHECK BITCOIN FEES ON COINBASE
The fees charged by Coinbase are pretty low. But they can add up, especially if you use the service often. You will see the buying and selling fees we described above.
There may also be fixed and variable fees depending on the amount of the transaction. And when your purchases are smaller, there is a flat fee charged.
Here are the flat fees for the smaller transactions:
- If you are buying or selling in the amount of $10.99 or less, the fee is $0.99
- If you are buying or selling between $11 and 26.49, the fee is $1.49
- If you are buying or selling from $26.50 to $51.99, the fee is $1.99
- If you are buying or selling from $52 to $78.05, the fee is $2.99
This is a fairly low and tiered system, but as you can see, this fee is for Coinbase and does not include any miner fees or network fees. So please keep in mind that that you will need to add the two totals together in order to find out what you will actually be paying.
HOW TO CHECK ETHEREUM FEES
For ETH, I typically go to ETH Gas Station for this information as it’s the most real-time and accurate in my experience. When sending Ether in a transaction, it uses a component of fees known as “Gas”. What is gas? It’s essentially a fraction of Ethereum that is required to pay for the transaction and is typically much cheaper than bitcoin transaction fees. This also applies to ERC-20 tokens and security tokens as well as they are built on top of the Ethereum network.
This has several other tools to estimate transactions for a specific block and also if you want it applied to s specific smart contract on the network. It includes anything else you may need to know including what mining pools are currently verifying on the network, what the estimated wait time is to have your transaction included in a specific block, and also how full or empty these blocks are.
All in all, this is the only resource I need when trying to estimate how much I will be paying in fees and the only other resource I might use is the specific block explorer I would use in order to verify the status of my transaction. For those of you who do not know what a block explorer is, it is basically a way for you to check the status of your transaction and how many confirmations it’s received before it’s delivered to the recipient.
CONCLUSION
Overall, these are the most common resources you will use to check the transaction fees for bitcoin and Ethereum as these are the largest networks by volume and therefore, the most likely to be used when sending crypto. You can also check each individual blockchain if you want to determine what the fees are for, say “Monero” for example.
In the event I want to know what the estimated fees for that example would be to attempt a transaction when sending from my hot wallet, or I would simply use google and include the “coins name + transaction fees” to get the most accurate result. These examples hopefully clarify some of the questions that surround how much you will pay in fees at an given time on these popular coins and networks. Until next time…
What are your favorite resources to check crypto transaction fees? Sound off in the comments below!
Cheers,
The Crypto Renegade
NOTE: This post may contain affiliate links. This adds no cost to you but it helps me focus on giving as much value as possible in every single post by being compensated for recommending products that help people succeed.
Post Views: 0