You Might also like
-
Ledger Wallet Ripple: How To Store Ripple (XRP) On The Ledger Nano S (2020)
In this article, I am going to explain how to store Ripple (XRP) on the Ledger Nano S in the Ledger Wallet Ripple. Most people I speak with talk about whether or not XRP is safe to leave on exchanges for storage. The simple answer is no. Under no circumstances is it safe or even a slightly good idea to leave ANY coins your have on an exchange. “Not your keys, not your crypto” is a statement you’ll hear repeated throughout the crypto ecosystem. If you are unsure about the safest ways to store and secure your cryptocurrency private keys, then grab my free e-book that gives you some in depth resources on how to manage your crypto safely. I also wrote a comparison review of the major differences of hot vs cold wallets, in case you are unsure.

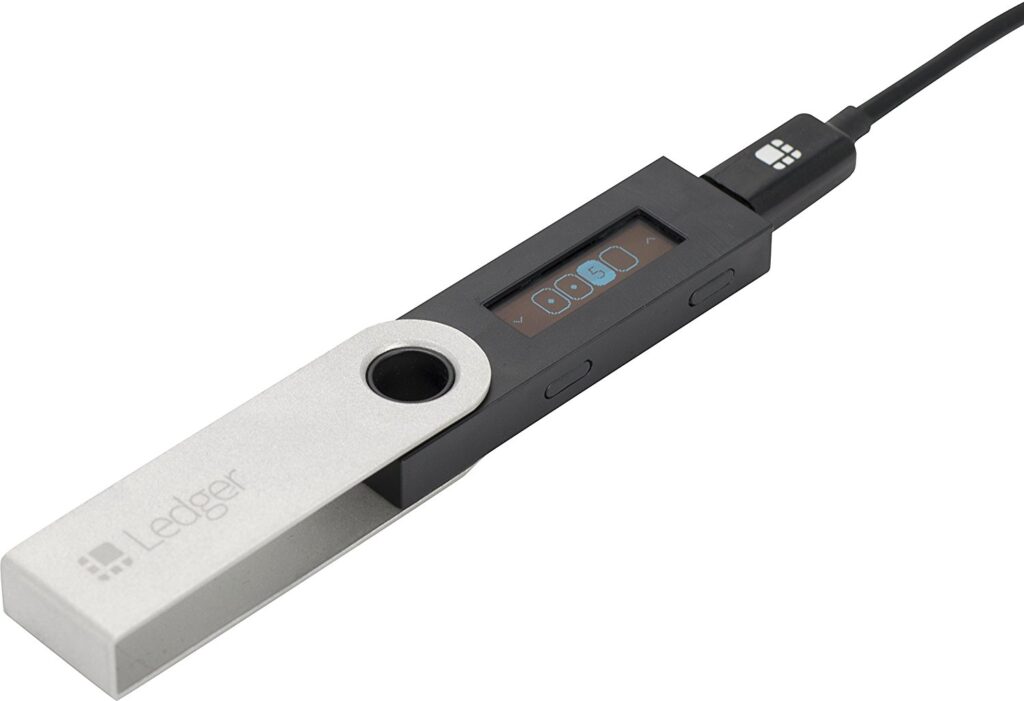
Now, as Ripple is a top 3 market cap coin, it is imperative to know how to properly store it on a hardware wallet, and the one wallet that can easily store this right now is the Ledger Nano S. You can also store it on the newly released successor to this wallet known as the Ledger Nano X, if you want a larger storage capacity and a wallet that is wirelessly capable. Let’s get to it below!
WHAT IS RIPPLE (XRP)?
Ripple is both a platform and a currency. Let me explain. Ripple itself is platform and open source protocol which is designed for quick and cheap transactions. This was “invested” as a resource for efficient, cross-border payments that is intended to be used by big banks. The Ripple platform is very very cheap and efficient and unlike bitcoin, it is designed as a payment machine and nothing more.


XRP (the token that is represented on the ripple platform) is designed to transfer value across the Ripple platform. The intention behind this is to be able to transfer value from either cryptocurrency or fiat from peer to peer in the fastest way possible. That is it’s only function.
The other noteworthy aspect of this is, there is a predetermined amount and it is not mined or staked, like it is on POW and POS networks. In fact, there is no blockchain for this token at all. This has been the source of a lot of criticism in the ecosystem that this is not really a “crypto” currency, but rather, just a digital version of fiat.
HOW DO I BUY RIPPLE (XRP)?


You can buy ripple directly at many OTC exchanges, or other trading exchanges like Coinbase or Binance. When using Coinbase, you can link up your bank account and/or major debit card to process the transaction and if you’re not verified, it can take up to 7-10 business days to process.
If you plan on buying XRP with a credit card directly, you can use either Paxful or Changelly and use this as an OTC exchange to buy it directly (although paying with credit card will incur some extra fees). You can also go through a 2-step process and buy bitcoin with a credit card on Coinmama, and then use one of the above exchanges to swap it.
LEDGER WALLET RIPPLE: HOW DO I MOVE RIPPLE TO THE LEDGER NANO S?
- Open up Ledger Live, and make sure it’s software version is up to date.
- Head over to the Manager section on the left side bar, and search on “XRP”, then click on Install.To create an XRP wallet on your Ledger device, we first need to create an “account” for you to be able to have access to your wallet’s XRP address.


- Click on the rounded + symbol on the left portion of the Ledger Live app to add an account.


- Type in “xrp” on the search bar to easily find XRP on the list, then click on “Continue“.


- Open the XRP app on your Ledger device, then click on “Continue“.


- Wait for Ledger Live to synchronize.
- Choose a name for your wallet. For this example, we’re just going to name our wallet “My XRP Wallet“.
- Tick the blue checkbox , then click on “Add account“.


- Account successfully added!Click on “Add more” if you want to create more XRP wallets, or if you want to head over to moving your funds to your XRP wallet, just click on the small x on the top right corner of this popup.


- Your XRP wallet is now ready. Simply click on the XRP wallet you made on the “Accounts” section on the left, then click on the blue “Receive” button.


- Click on “Continue“.
- Click on “Verify“.
- For security purposes, check if the same wallet address is being shown on the Ledger Live app, and the address shown on your physical Ledger device.If everything’s fine, you can now copy the wallet address shown on Ledger Live, and you can now use that address to move your funds from other XRP wallets, or from the exchange you’re using.


- Click on the rounded + symbol on the left portion of the Ledger Live app to add an account.
WHAT ABOUT THE NEW LEDGER NANO X?
The Ledger Nano X has the same process as above for adding it to your hardware wallet using Ledger Live, the only difference is it is primarily done via the mobile app. You can still plug this device in and manage this the same way as the Ledger Nano S, however, it is able to connect to the app and manage this wirelessly, which is the major advantage.
CONCLUSION
Bottom line, if you’re in the market to acquire this coin, you will absolutely need to store it on a Ledger device. Keeping all your private keys (of any coin) on a trusted hardware wallet is imperative. Period. I will say that with the Ledger Nano S specifically, is the cheapest and is the best entry level hardware wallet if you want to store ripple at only $59. The one caveat is that you can only store 3 or 4 different coins on the app at once, that’s it. If you plan to grow your portfolio, you may want to spring for the extra money and go for the Ledger Nano X, which can hold up to 100 coins or “apps” at once. I will leave the full review of the Ledger Nano S here.
What do you think? Is there a better offline wallet to store your XRP? Let me know in the comments below!
Cheers,
The Crypto Renegade
NOTE: This post may contain affiliate links. This adds no cost to you but it helps me focus on giving as much value as possible in every single post by being compensated for recommending products that help people succeed.
Post Views: 0 -
How To Store Your Tezos (XTZ) On The Ledger Nano S (2020)
In this article, I will tell you how to store your Tezos on the Ledger Nano S. As an investor in Tezos since the ICO, I have really studied what makes this a true market differentiator. This has a true consensus and a self-amending ledger, which is really powerful.
This means that no matter what, there will not be a “fork” of the network and will not have to worry about a network split. The downside is, you cannot split off and have people follow you and start a new version of this blockchain. What is built here will be verified by a true democracy and will always stay in tact. However, people will always have the power to leave if they do not like it.
I believe the that being able to contribute to secure a POS blockchain that will allow EVERYONE to participate is very interesting and also pretty powerful. I think they have cracked the code and this may very well become the platform that people will build new dApps on, as it is more scalable than Ethereum in this way.

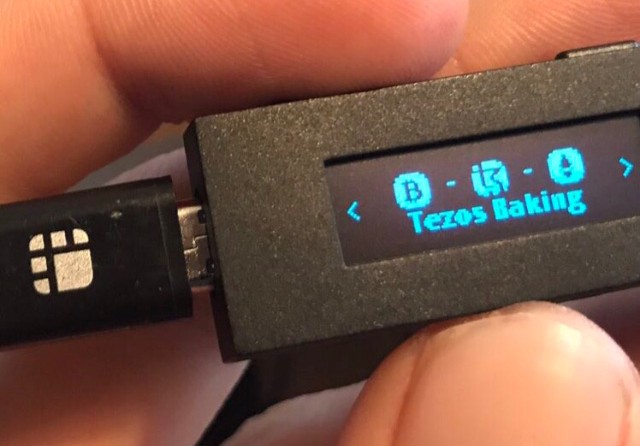
No matter your use case, if you are going to participate in Tezos it is wise to store your keys securely. The absolute best solution for securely storing Tezos is to use a hardware wallet.
.When you use a hardware wallet such as the Ledger Nano S, the private keys used to access your tokens never leave the device. Ledger hardware wallet owners can manage their tezzies using the Tezos Wallet application within Ledger Live. With Tezos Wallet, you can:
- Store your Tezos securely
- Transfer Tezos to others via secure transaction
- Delegate your Tezos for use in baking and voting
This guide provides a step-by-step guide on how to install Tezos Wallet on your Ledger Nano S and create a wallet with three different Tezos wallet providers: Galleon, Magnum Wallet, and TezBox. Although you technically have 3 options to do this, I recommend using TezBox as it’s the easiest one to use in my opinion. The user interface is very easy to use and I highly recommend it for baking.
WHAT YOU’LL NEED
To secure Tezos with a Ledger Nano S, you will need:
- An initialized Ledger Nano S with the latest firmware installed — currently 1.5.5 (as of May 2019)
- Ledger Live installed on your machine and ready to use
That’s it!
How To Store Your Tezos: INSTALLING TEZOS WALLET THROUGH LEDGER LIVE

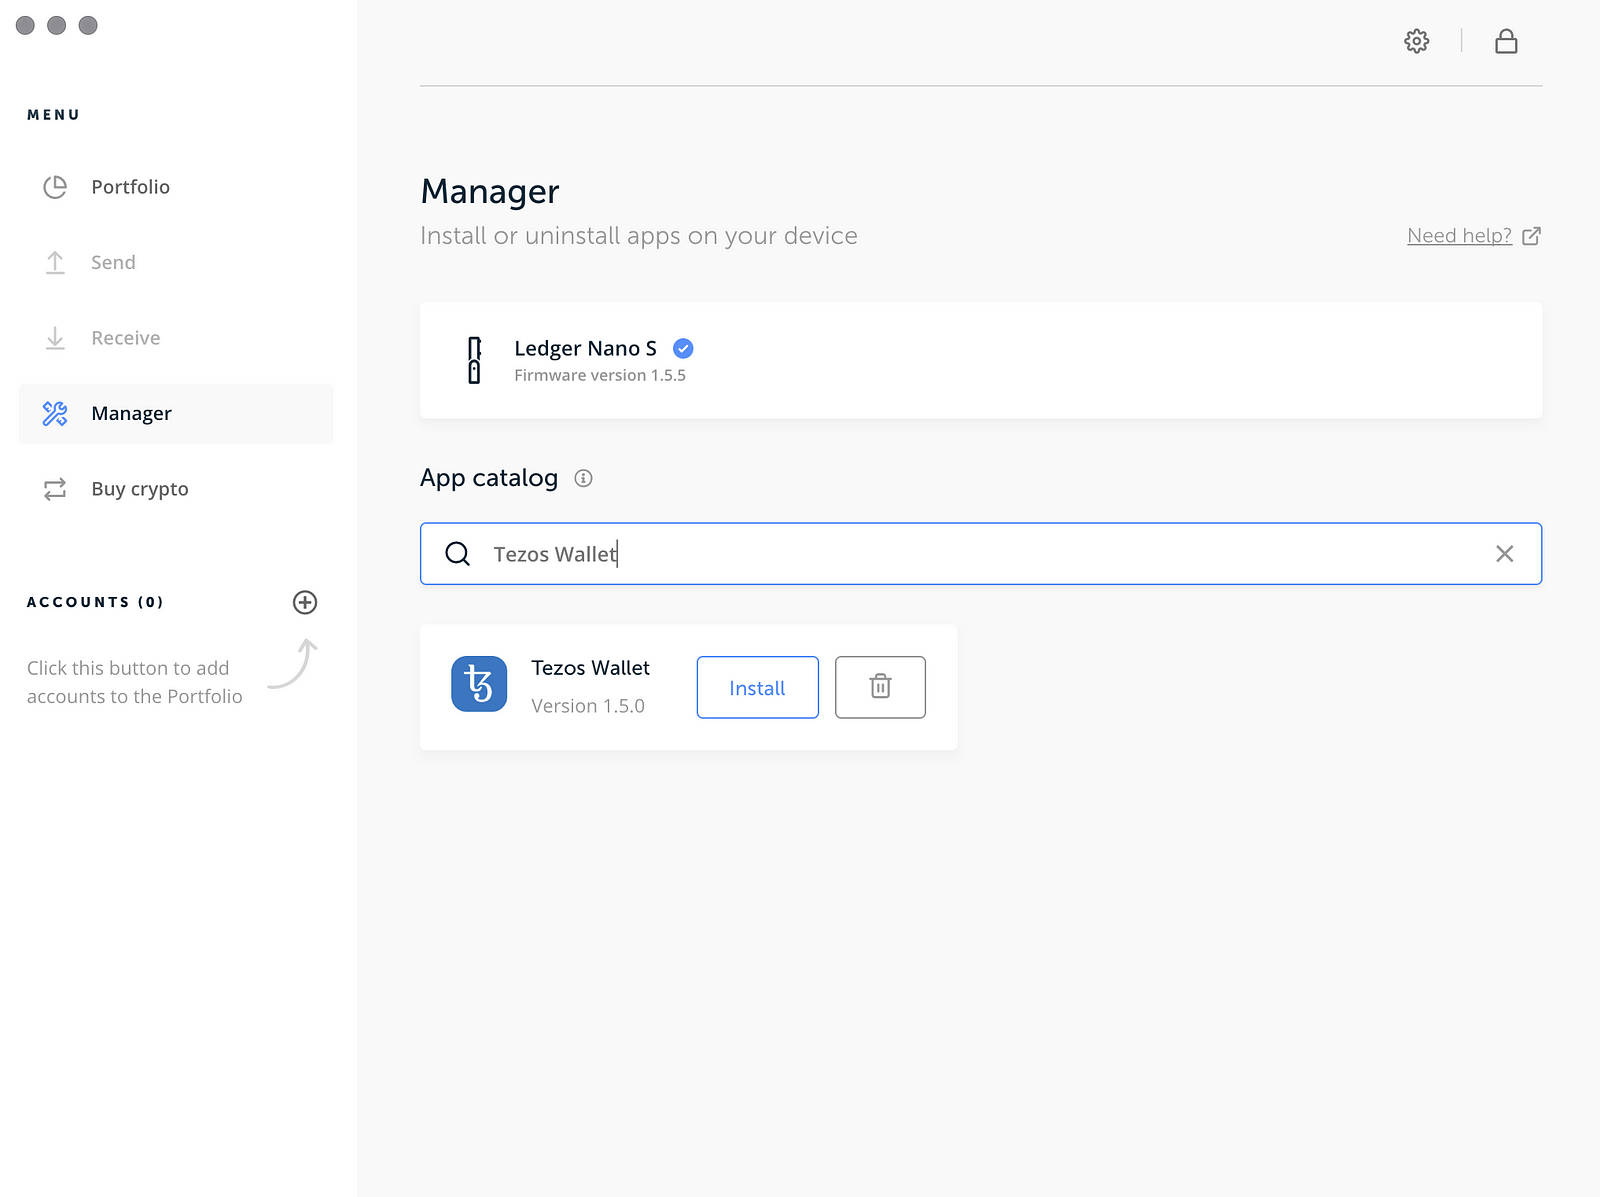
To install Tezos Wallet on your Ledger Nano S:
- Open Manager in Ledger Live using the Manager button in the left sidebar.
- Connect your Ledger Nano S and unlock it using your PIN.
- Your Ledger Nano S will prompt you to Allow Ledger Manager? To connect, press the right button on your Ledger device.
- Find Tezos Wallet in the app catalog, either by searching for ‘Tezos Wallet’ or scrolling through the available apps.
- Click Install on Tezos Wallet’s icon to install the application. Your hardware wallet will display Processing… and Ledger Live will show an installation window.This may take up to 1-2 minutes. Successful installation will be confirmed in Ledger Live when complete.
CREATING A WALLET
Now that you have Tezos Wallet installed on your Ledger Nano S, you are ready to create a wallet. There are several wallet great providers you can use! Below are the steps to get started with three of them: Galleon, Magnum Wallet, and TezBox.
GALLEON (LEAST RECOMMENDED)
- Visit Galleon’s Website, where you can download a version of the wallet for Windows, MacOS, or Linux.
- Open Galleon. You’ll be asked to choose a language, and agree to their Terms of Service.
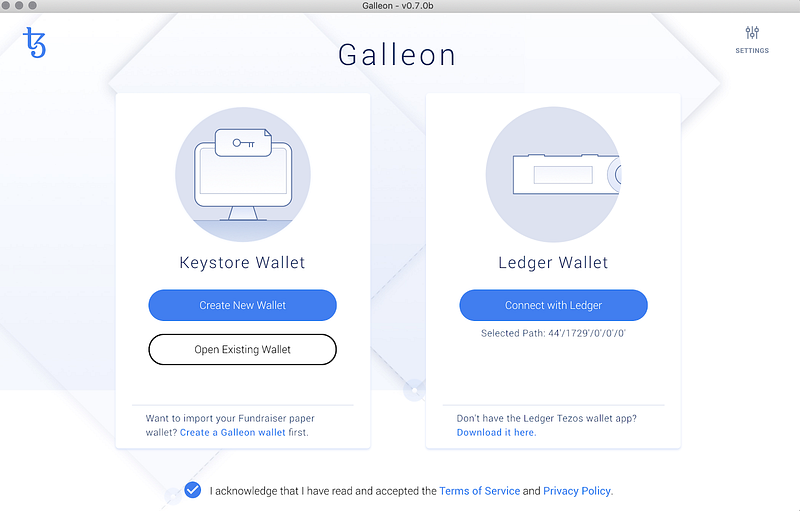
- Connect Galleon to your Ledger device. Plug your Ledger device into your computer, enter your PIN, and open Tezos Wallet. Then, select Connect with Ledger in Galleon.
- Create Your Wallet. After clicking Connect with Ledger, Galleon will wait for you to confirm this action on your hardware wallet. This is done by clicking the top-right button on your Ledger device with the green checkmark. Your Ledger device’s screen should alternate between Provide Public Key? and the Public Key Hash you will be using to create your wallet in Galleon. Press the right button on your Ledger device to create it!
You’re Done! For more information on how to use Galleon, see their tutorials!
MAGNUM WALLET (MODERATELY RECOMMENDED)
- Visit Magnum Wallet’s Website using a U2F compatible browser, such as Chrome, Firefox, or Brave. Click Create Wallet to visit their wallet website, where you should click Create a New Wallet to get started.
- Create a Password. Magnum Wallet will prompt you to create a password for securing your funds. Once you have entered and confirmed your password, click Next.
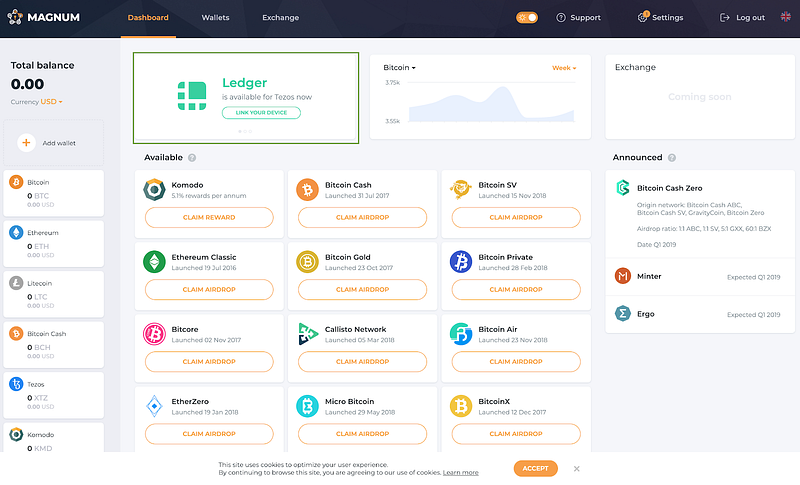
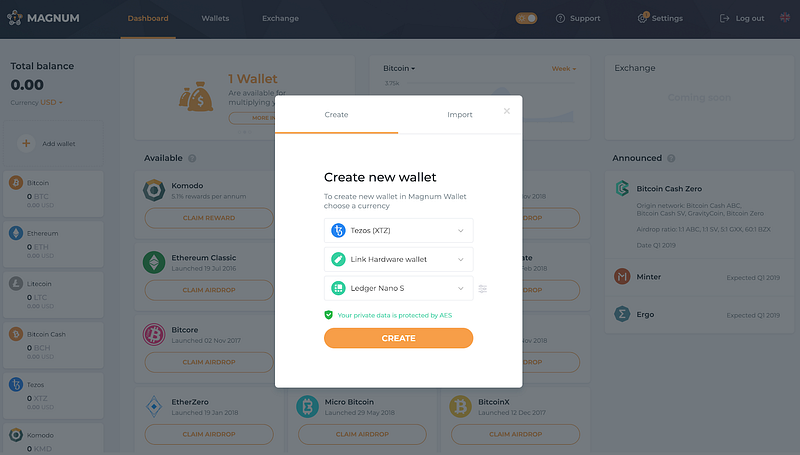
- Link your Ledger Nano S. After you have created a password, you’ll be brought to Magnum Wallet’s main dashboard, which gives you information of on all the tokens supported. In the top left, click to Link Your Device (outlined in green below).
A modal (pop-up) will appear over the screen with the option to import a wallet. In this case, we want to create a new wallet. Select Create at the top of the modal. Select the token you’d like to create a wallet for (Tezos), that you’d like to Link Hardware Wallet, and that the device you’re using is a Ledger Nano S. Your screen should now look like this:
Click Create to make your wallet!
- Verify your address. Now, you’ll be prompted on your Ledger device to Provide Public Key?. You’ll also be shown the Public Key Hash of your wallet. Press the right button on your Ledger Nano S to verify your address and continue.
You’re done! You’ll now be at your wallet’s dashboard within Magnum Wallet, where you can send and receive Tezos or delegate them to a baker!
TEZBOX (MOST RECOMMENDED)
You can download TezBox for Mac or Windows, use their Chrome Plugin, or use their wallet in the browser! We’ll demonstrate the in-browser application in this guide.
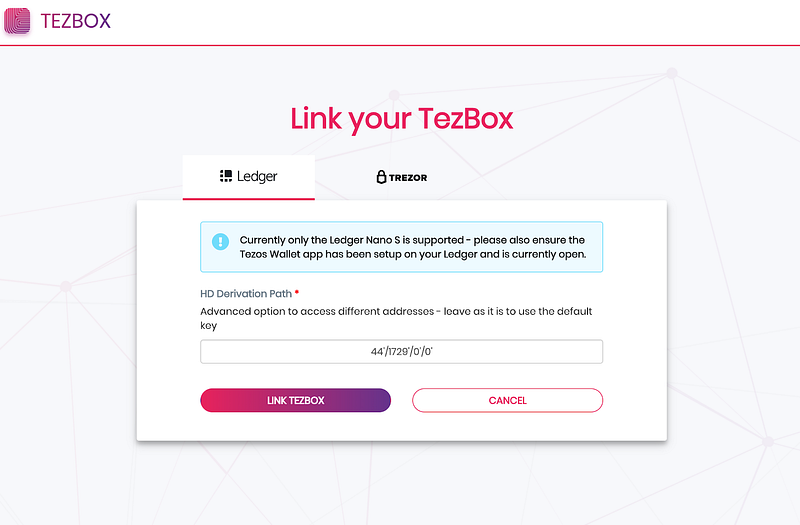
- Visit the Tezbox Web Wallet using a U2F (Universal two-factor) compatible browser, such as Chrome, Firefox, or Opera. Here, you’ll be greeted with the option to create a wallet, restore one, or link TezBox to a hardware wallet. Click Link your TezBox.
- Link your Ledger device to TezBox by clicking Link TexBox in the as seen in the user interface below.
- Verify your address. On your Ledger device, you will be prompted to Provide Public Key? and the screen will also show the Public Key Hash with which you are creating the wallet. Press the right button on your hardware wallet to verify. TezBox will confirm a successful linking after this step.
- Create a Password. Next, you’ll be asked to create a password to secure your wallet. Enter and re-enter a password, then choose Encrypt Wallet.
That’s It! After entering a password, you’ll be on your wallet’s page, where you can send and delegate Tezos.
CONCLUSION
As of the time of this writing, only the Ledger Nano S is the only hardware wallet that supports offline Tezos and not even the Ledger Nano X works at this time. It should be noted that there is no “native” app for Tezos via Ledger Live. What does that mean? It essentially means that you are required to use one of the above 3rd party wallets in order to properly secure your Tezos and manage your balances, send, receive, and the ability to manage baking and delegation.
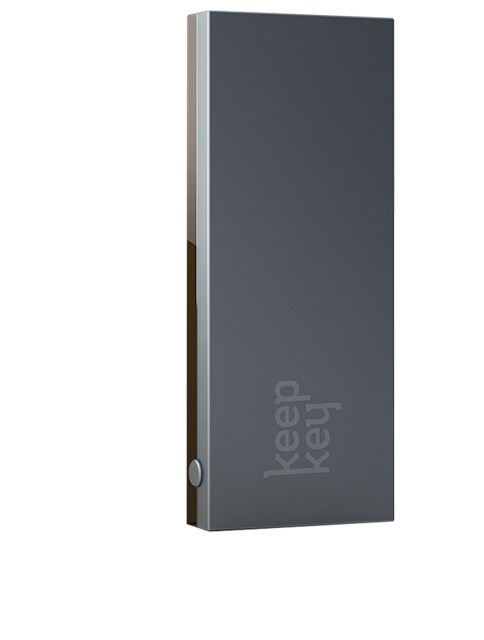
So why would you go through these steps? Because you control the private keys and that is what is important. When a hardware wallet starts supporting this functionality natively, it will have a huge edge over the competition (I’m looking at you KeepKey). Additionally, there has been an influx of more exchanges getting hacked, with no signs of stopping. It is CRUCIAL, that you always maintain control of your private keys at all times. When you send them to an exchange, you technically do not own them anymore, until they decide to send them back to you.
Bottomline: If you own any Tezos, or plan on acquiring any in the near future, I would strongly recommend that you get a Ledger Nano S. At the time of this writing it is only $59, which is the cheapest hardware wallet of the primary market leaders. Tezos is sure to move it’s way into the top 10 market cap very soon and I expect the price to do something similar to what Ethereum did in 2017.
CLICK HERE TO BUY A LEDGER NANO S FROM THEIR OFFICIAL SITE
What do you think? Would you keep your Tezos keys on a Hot Wallet? Please let me know below in the comments!
Cheers,
The Crypto Renegade
NOTE: This post may contain affiliate links. This adds no cost to you but it helps me focus on giving as much value as possible in every single post by being compensated for recommending products that help people succeed.
Post Views: 0 -
Proof Of Work Vs. Proof Of Stake | How Does It Work? (Beginner’s Guide)
What is Proof Of Work Vs. Proof Of Stake | How Does It Work? If you spend enough time in the crypto-community and you’ll witness debates over Proof of Work (PoW) and Proof of Stake (PoS). Fans of PoW will argue that it’s the transaction system Satoshi Nakamoto had in mind for cryptocurrencies. Those in favor of PoS, on the other hand, will argue that mining is outdated, inefficient, and insecure compared to staking.
So you might be wondering, what’s the difference, is one actually better than the other, and why is it better? Well like most things here at Bitcoin Lockup, I am not here to give you my unsolicited opinions, but we are here to give you some objective information that might help you determine for yourself which proof has best proven its worth.
Proof Of Work Vs. Proof Of Stake | How Does It Work?
PROOF OF WORK

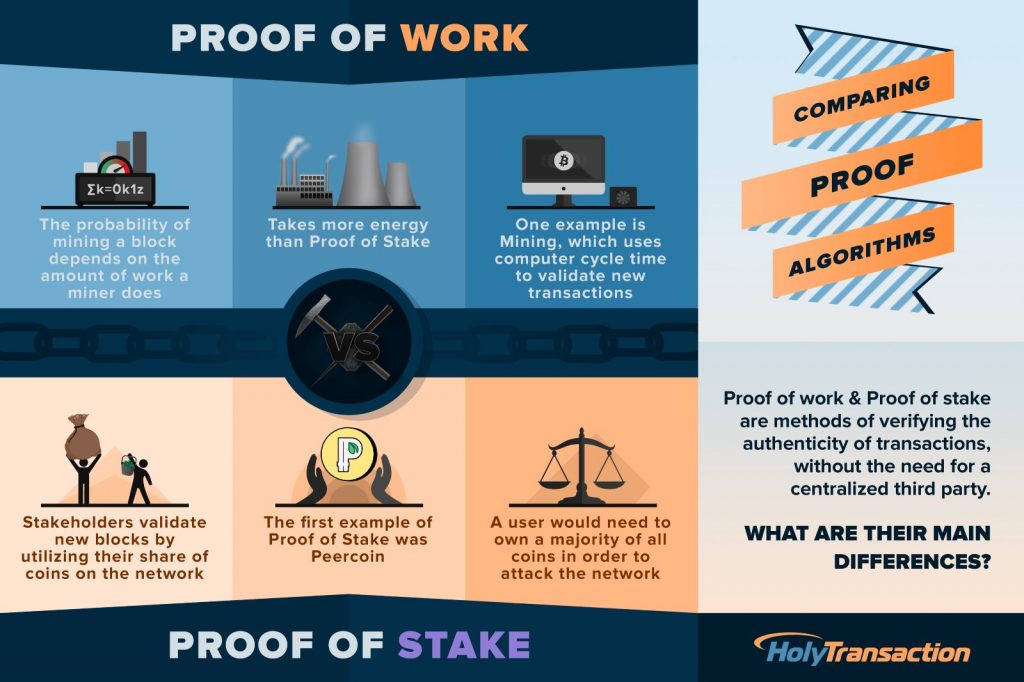
When Satoshi Nakamoto created Bitcoin in 2008, he envisioned a currency that would rely on a trustless and distributed consensus system. This would allow Bitcoin to be decentralized both in technological and financial terms. For instance, when you transact money through a trusted system, a third-party (think banks, credit/debit cards, PayPal) handles these transactions in terms of debit and credit. If Mark sends Sally $100 dollars, the institution will debit Mark’s account $100 dollars and credit Sally with $100. All of the money is handled by and within the third party, so none of the transacted funds belong to either Mark nor Sally until they are withdrawn from the system.


Bitcoin differs from traditional financial hubs by being trustless. This is not to say you can’t trust Bitcoin and blockchain with your money. In fact, it’s quite the opposite. Bitcoin’s trustless nature allows for a peer-to-peer exchange without the need for a third-party mediator.
The traditional mediators are replaced with miners, and these miners work on behalf of Bitcoin holders to see that transaction are successfully processed. In order to see that these transactions are approved, miners commit their computer’s processing power to solve the encrypted algorithms within each transaction. This is what we mean by Proof of Work.
Under a Proof of Work system, miners compete to verify that all the transactions within the candidate block (the block currently being built) are legitimate. To do this, they must solve the encrypted puzzles that verify the integrity of the transacted coins. The first miner to solve these puzzles receives an amount of the transacted currency, also known as a block reward. Once the problem is solved, the transactions create a block that is stored as a public ledger on the blockchain, and the miner announces the solution to the entire network.
As you can see, PoW is dictated by competition and computational output. Imagine an international math competition wherein a previously unsolved proof (the block) is given to the competitors (the miners). Whoever solves this proof first is awarded a prize (block reward), and the solved proof is then posted on the internet for all to see (the block being established in the blockchain).
PROOF OF STAKE
Proof of Stake differs entirely from Proof of Work. Instead of building blocks through work output, the creator of a block is determined by their share, or stake, in a currency.
Under this system, forgers (the PoS equivalent of a miner) are chosen to build blocks based on their stake in a currency and the age of that stake within the blockchain’s network. For instance, let’s say you hold 500,000 Cardano. First of all, allow me to hypothetically congratulate you on your fat stacks. Getting back to the example, under the Proof of Stake system, you’d be more likely to create the candidate block than someone with 100,000 ADA.


To go even further, if you had been holding your 500,000 ADA in the same address for a year, you’d be more likely to generate the next block than someone who also has 500,000 ADA but who has been holding it in a network address for half a year.
To give you another analogy, imagine if your odds to win the lottery increased based on a) how much money you put into it and b) how long you had been buying tickets. Now, you won’t make millions of dollars by staking your favorite PoS currency, but you can make some nice passive income on top of your investment gains.
It’s important to note that, for a stake to be chosen, it must be held on an address within the coin’s network. So if you were holding Cardano like in the above example, you would need to store it in Cardano’s core wallet. There are also no block rewards in the PoS system. Seeing as there’s no work-centric incentive to outcompete other miners, forgers are only awarded transaction fees.
There’s also a marked difference between Delegated Proof of Stake and regular Proof of Stake, but that’s for another article at another date.
PoW Coins:
PoW/PoS Hybrids:
–Dash
–Pivx
PoS Coins:
–QTUM
KEY DIFFERENCES AND TAKEAWAYS
Proponents of PoW will tell you it allows crypto to more effectively function as a currency. The PoS model, they argue, incentivizes users to stake their coins for extended periods of time, thereby making them inactive.
PoS fans, however, will defend their system’s overall superiority. For starters, it solves the problem of energy consumption that Bitcoin has created. As more transactions and users are added to Bitcoin’s network, more computing power will be needed to accommodate growth. The more computing power that is added to the network, the more the hashrate increases in difficulty. With more difficulty comes an increase in the amount of work a computer must generate to generate blocks, and this increased output leads to greater energy consumption.
Bitcoin’s growth and mining difficulty are exponentially tied to energy consumption, and critics see this as an unsolvable issue under the PoW model. It’s the reason that Bitcoin’s network alone consumes more energy than 159 countries.
Proof of Stake also defends against 51% attacks on the blockchain. As we’ve seen with the recent Bitcoin Cash and Bitcoin civil war, disproportionate mining power can lead to de facto centralization of a blockchain’s network. In order to control a majority of a PoS blockchain, a validator would have to own 51% or more of that crypto’s overall supply. So in order for someone to attack Cardano’s blockchain, for instance, they would have to $609,286,157.643 worth of Cardano to do so. I really don’t see that happening.
Both PoS and PoW have their ups and downs, and I’ll be excited to see how the market responds to coins that utilize either system or a hybrid of both. One last thing to keep in mind for PoW, however, is that once all a currency’s coins are minted and circulated, block rewards will cease to exist. This may incentivize PoW coins to update to a PoS model, but only time will tell.
Still don’t have cold storage for your private keys? click HERE for the Ledger Nano S to hold all of the PoW and PoS coins discussed above!
What do you think? Do you think PoS will overtake PoW in popularity? Sound off below!
Cheers,
The Crypto Renegade
NOTE: This post may contain affiliate links. This adds no cost to you but it helps me focus on giving as much value as possible in every single post by being compensated for recommending products that help people succeed.
Post Views: 0


